Launch!

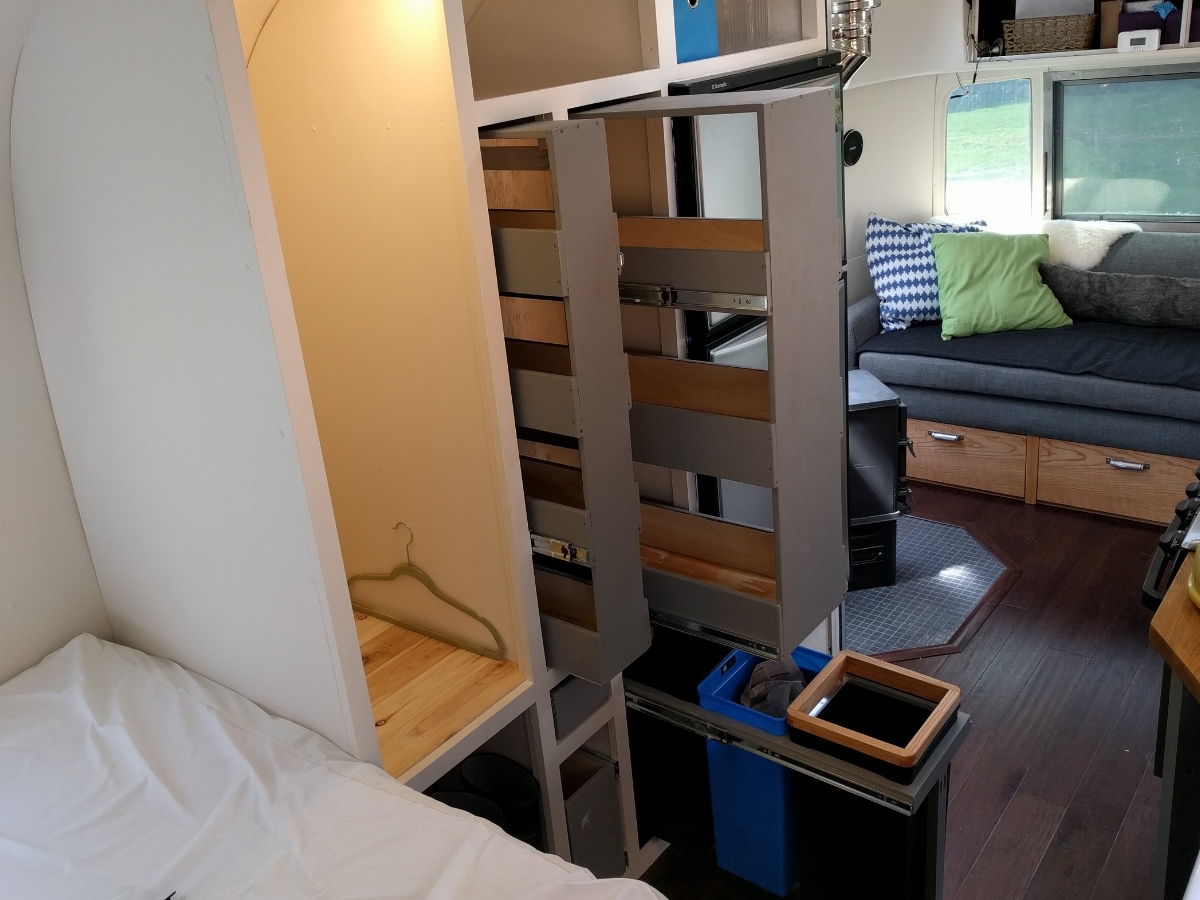
We've been itching to get on the road for some time, and that day is finally here.  We're a lot further along in the renovation than we were on our honeymoon, but we're definitely not done.

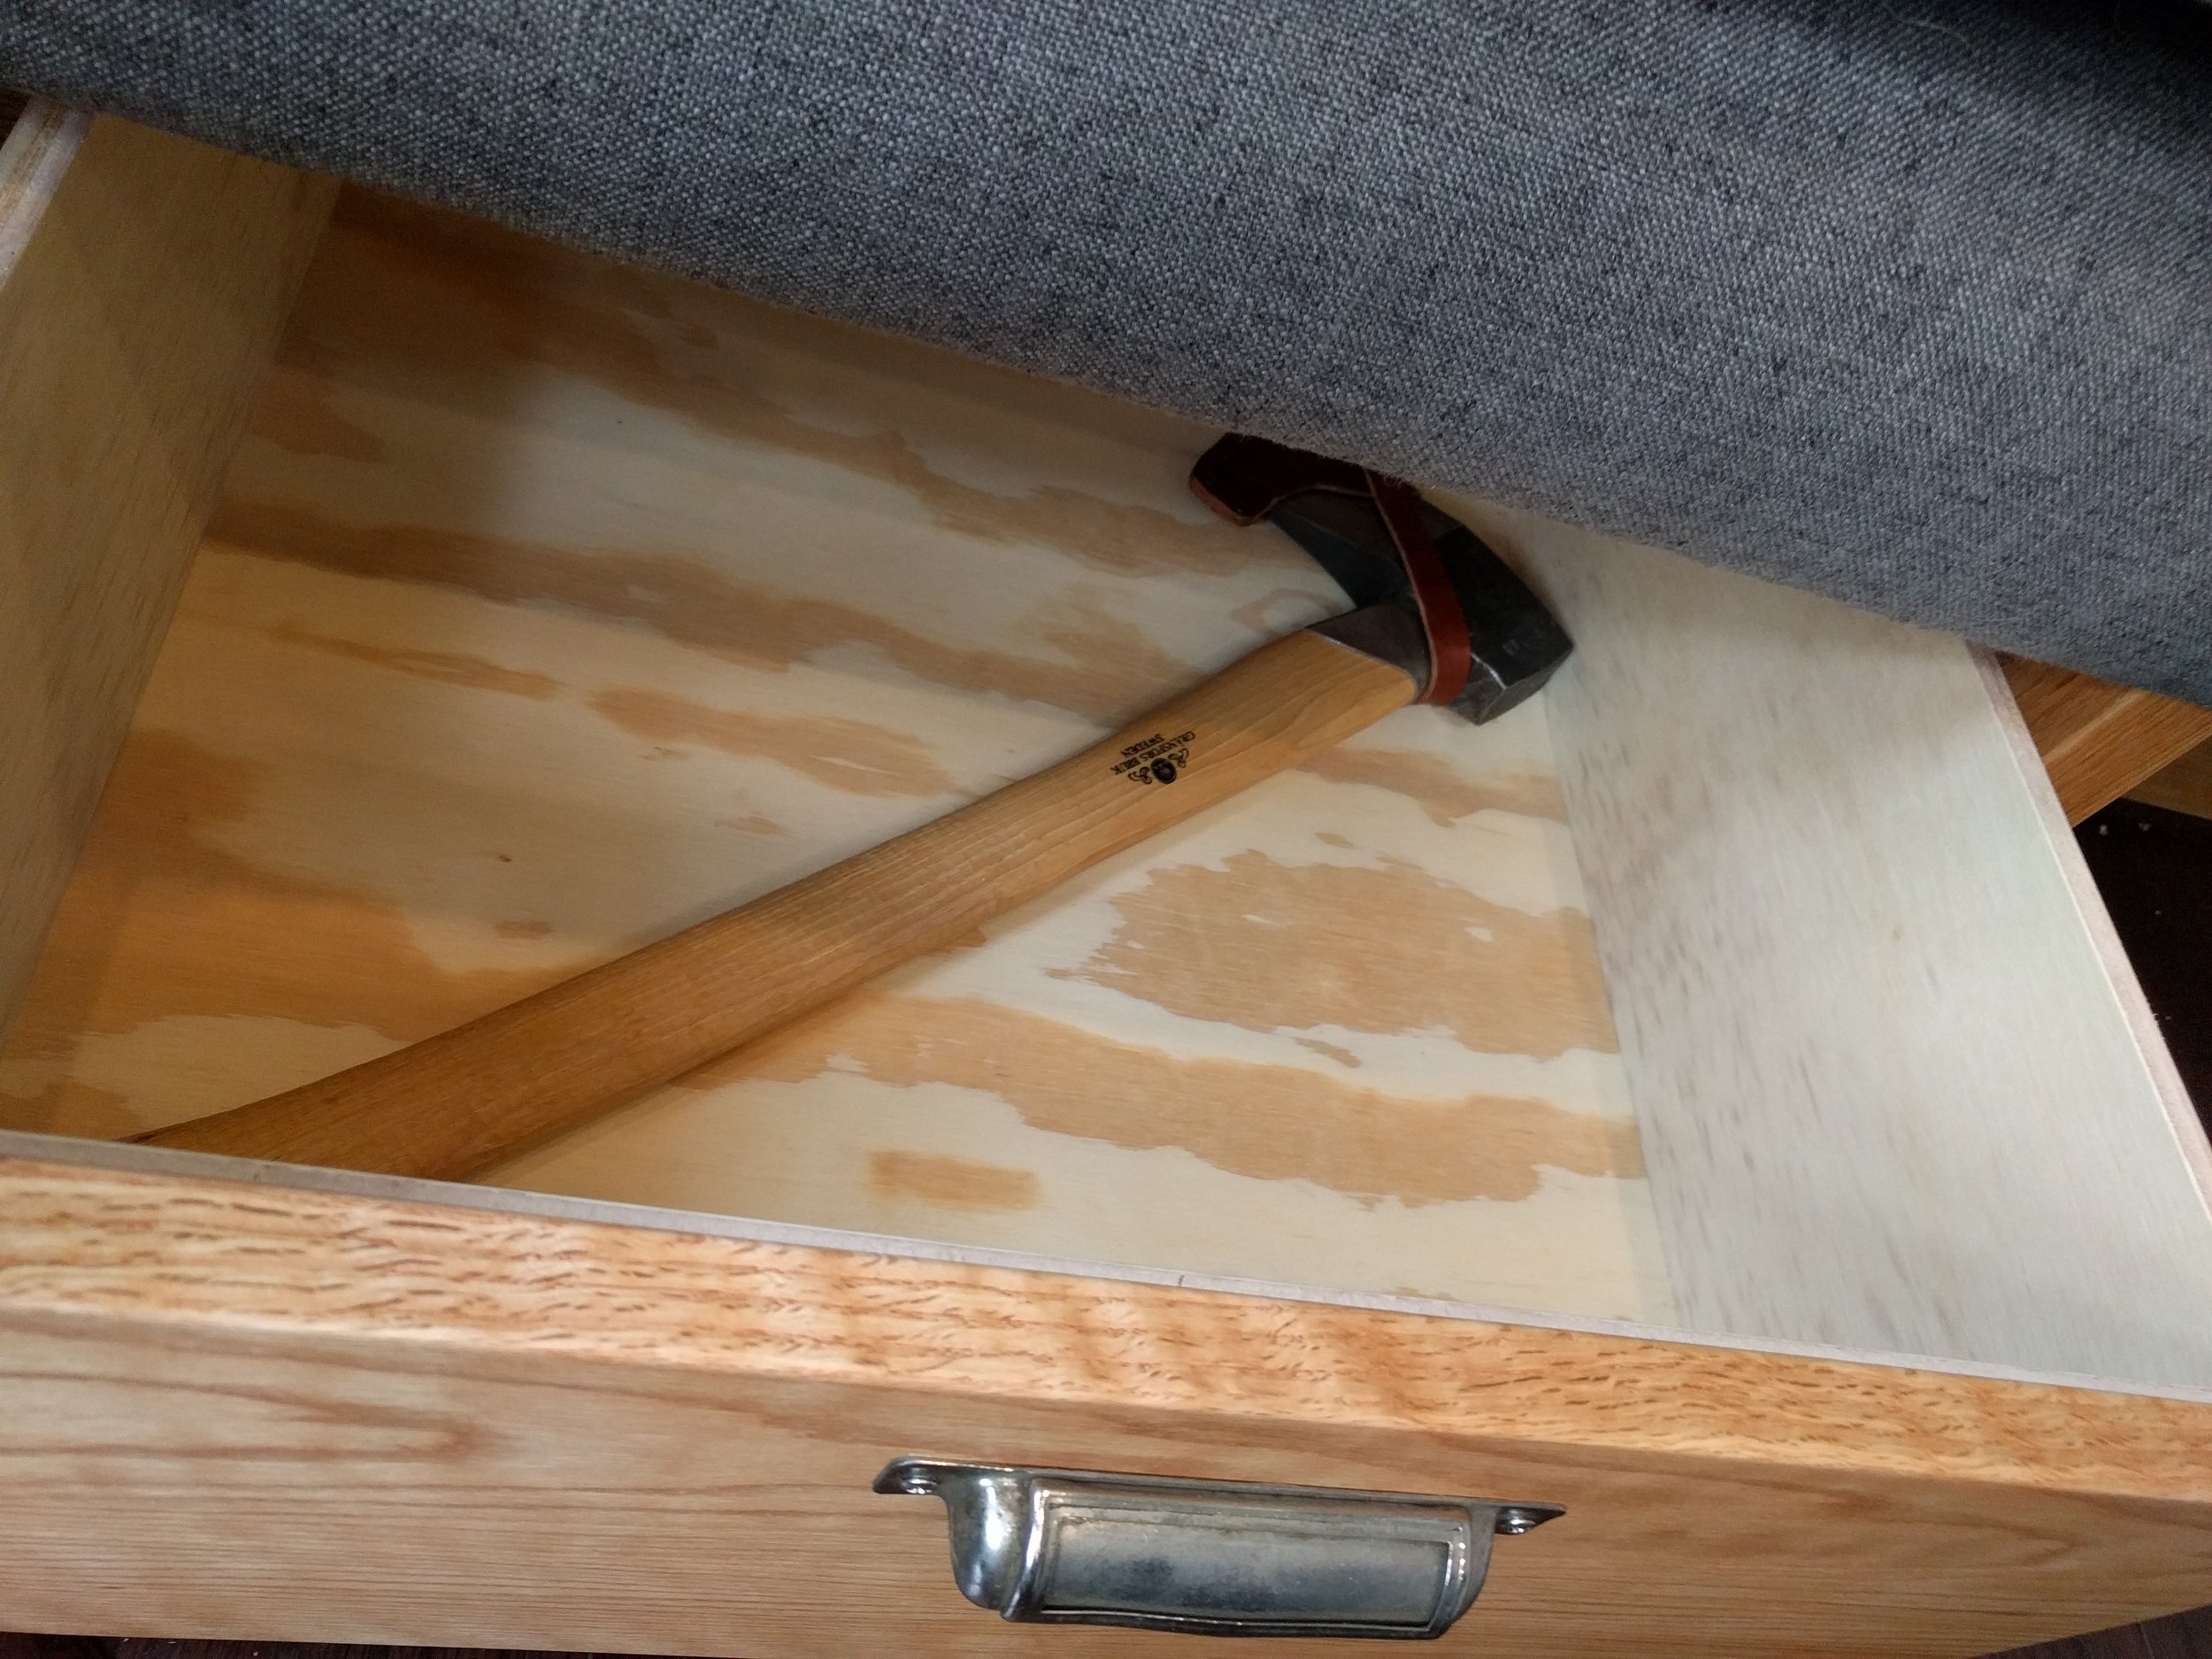
We'll get the finishing touches done at some point.  I packed a few tools and supplies.  And we'll be swinging back to Maryland at some point to do some more work.  But for now, we're off.

Our first major stopover is Robert Tremon Park in Ithaca, NY.  We learned a hard lesson about staying on truck routes on the way.  In case it wasn't obvious, back roads in mountainous regions are generally a bad idea.

IMG_20170704_173126.jpg

To access camping in Robert Tremon, you ford the river at the entrance.

IMG_20170704_193109.jpg

Our campsite is in the middle of a nice sunny field.  No hookups, but a water spigot nearby, and that suits us just fine.

IMG_20170704_192709.jpg

Time to give the solar a workout.

IMG_20170705_103755.jpg

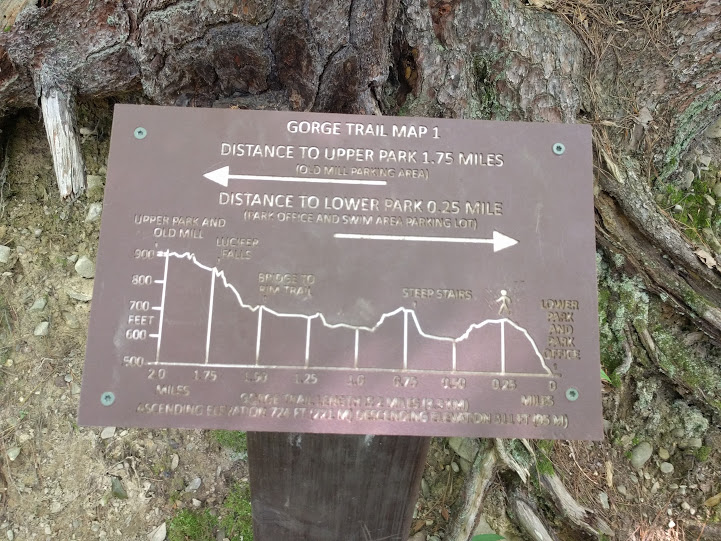
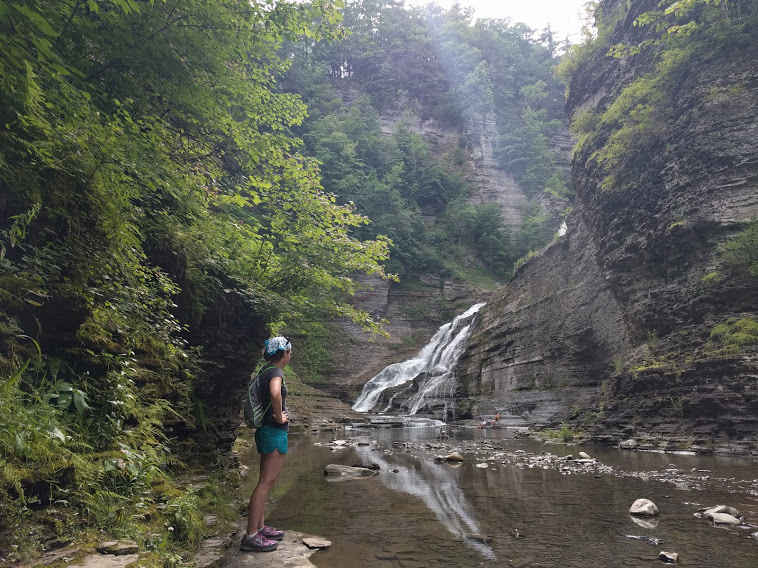
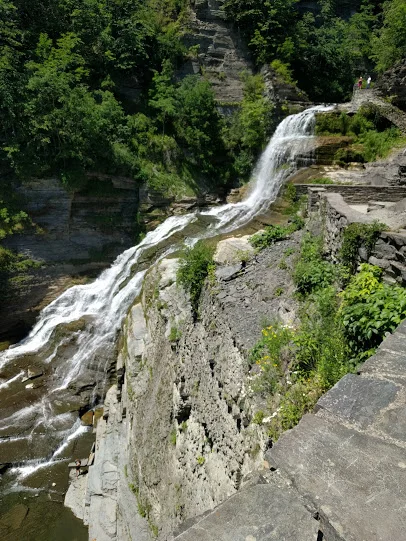
The hike up to Lucifer Falls is difficult to describe.  The gorge trail trail from the lower park takes you on a tour of progressively larger waterfalls, each more breathtaking than the last.  I'm going to post some pictures, but I almost feel like I shouldn't bother.  There's no way any of these pictures come close to showing how beautiful this park is.

IMG_20170705_111803.jpg
IMG_20170706_141614.jpg
IMG_20170705_115158.jpg
IMG_20170706_162250.jpg
IMG_20170705_115808.jpg
IMG_20170706_143936.jpg

Luna enjoyed her hikes immensely.

IMG_20170705_132147.jpg

And if all that wasn't enough to show you how magical of a place this is, can we take a moment to appreciate this violet coral mushroom we found on the rim trail?  I promise, this photo is from New York State, not from the bottom of the ocean or the surface of Venus.

IMG_20170706_171714.jpg

Next up, we're headed to Vermont.

Tiny Worm Bin

We've had worm bins before, but none of the commercial or DIY solutions were a good fit for our space.  We needed something small.  Really small.  Our house is under 200 square feet.

In addition to being tiny, our bin has to:

  1. Hold enough scraps and worms to keep up with our usage
  2. Provide lots of air circulation and good drainage to keep the worms happy
  3. Keep the worms in the bin, keep fruit flies out of the bin (or if they get in, keep them in)

Some of these links are "affiliate links."  If you decide to buy something based on our recommendation, it would be nice if you used the direct link from this page so that we can make a small commission for referring you (which doesn't cost you anything extra).

I built a trash/recycling drawer under the pantry, and I had just enough depth for an extra trash can to use as a worm bin.  We found the perfect sized bins in a SimpleHuman trash/recycling system.  I didn't actually buy the system from SimpleHuman, which retails for $80 on Amazon.  I bought replacement bins for 20 bucks a piece, free shipping.

I drilled a hole in the bottom side of the worm bin and installed a bulkhead fitting with a swivel elbow to help drain the water.  A piece of 1/2" OD vinyl tubing inserted into the elbow and secured to the side of the bin gives me a sight glass, so I can see if water is accumulating in the bin.  I built a false bottom above the drain with some 1-1/2" aluminum angle and some aluminum screen, which filters the worm castings from the water to keep the drain from clogging.

At the top of the bin, I built an aluminum frame to suspend a nylon minnow net, which holds the food scraps and bedding.  The scraps are bigger than the holes in the net, but the worms and their castings are smaller, so as the worms eat the scraps, their castings fall through the net.  The net doesn't touch the sides or the bottom of the bin, so there's plenty of air circulation throughout the scraps.  The worms are happy throughout the depth of the bin, not just on the top.

The lid needs to seal tightly, but provide good airflow through a screen.  This bin doesn't come with a lid, so I built a tight-fitting frame out of oak (varnished a bunch of times to keep it from rotting) and used no-see-um netting to keep the worms contained.  Regular window screen does not work -- the worms will crawl right through it.  I also added a rubber gasket around the rim of the trash can to keep the worms from escaping.  I had some leftover window gasket that I attached to the rim of the bin using super weatherstrip adhesive.  I sandwiched the rim of the bin between the two "fingers" of the gasket so that the flat side was up, which made a nice tight seal with the lid.

It's worth noting that another method to keep the worms from escaping would be to put a light over top of the bin that's always on.  Worms don't like light, so they'll stay in the bin.  We don't have a lot of electricity to spare, so a physical barrier seemed best.

To start composting, I put a couple handfuls of bedding (shredded black and white newspaper, cardboard, paper bags, egg cartons, etc) in the bottom of the net and put some fruit and vegetable scraps on top.  I added some crushed eggshells -- worms have gizzards, so they need some roughage to digest their food, and eggshells help maintain the pH balance of the bin.  Then, I filled the bin to the top with bedding. 

Once our 1,000 red wigglers from Uncle Jim's Worm Farm arrived, I plopped the worms in and let them settle in.

We keep a Ziplock bag in the freezer where we put all of our suitable scraps.  Freezing helps soften up the scraps so that the worms can eat it faster.  Every few days, I'll open up the bin, lift out any bedding that's still dry, drop in the scraps, replace the bedding on top, and top off with enough bedding to fill the bin.

About once a month, I need to empty the bin.  The worms will crowd at the top of the bin when it's time.  First, I'll take the bin outside and drain the water, using it to water some plants.  Then, I'll remove the net with the scraps and put it in a bucket for safekeeping.  As long as you do this in direct sunlight, the worms won't go anywhere -- they'll just burrow deeper in to the scraps.  I'll dig the castings out of the bin and put them in a shallow tray.  

The castings still contain quite a few worms, which I want to keep, so I need to separate them.  The easiest way to separate worms from soil is to make a pile at one end of a shallow bin and set it in direct sunlight.  The worms don't like the sun, so as you skim the top layer off, they'll dig deeper.  Keep pulling bits off the top and returning the worms to the pile, and pretty soon you'll end up with a wriggling mass of worms.  No big deal if a few worms end up in the finished compost, there are plenty and they'll be happy in the garden, too.

We're getting about a half gallon of vermicompost per month.  It's not a lot, but we're not really after the compost.  The real benefit here is that our kitchen trash is far less smelly, and we're putting a ton of stuff in the bin instead of the trash, so we make less garbage.  Apple core? Give it to the worms.  Lettuce going south?  Worm food.  Paper or plastic?  I can feed a paper bag to the worms.  Cardboard egg carton?  Comfy worm bedding.

Want to try vermicomposting but don't think you have room?  It doesn't take much space to keep compost worms happy.  If you want to do a tiny worm bin experiment of your own, use #tinywormbin on Instagram to share your results.

The Grand Unified Couch Theory, Part 2

Next step on the Grand Unified Couch Theory is the cushions.  Fortunately, my mother is a professional interior designer with her own workroom, so I can cheat. Thanks, Mom!

And just like that, we have cushions overnight.  We made two identical cushions for the seat and one slimmer cushion for the back.  But because of how shallow the seat is already, and the fact that the back is constructed of 8-way hand-tied springs anyway, I think it's more comfortable without the back cushion.

Slumber party mode uses the duplicate seat cushion to make a flat mattress.  It's a twin mattress, plus about an inch of width.

I Scotch-Guarded all the fabric to make for easier cleaning.  Since this is our only living room seating as well as Luna's favorite sleeping and squirrel-viewing area, Scotch-Guard was a no brainer.  It took four cans to do two coats.

The shelf behind the couch is made out of a scrap of oak butcher block I had left over from the countertop.  It's both a console table and support for the back of the couch in "lounge mode," and a nightstand in "slumber party mode."

I built the drawers the same way as all the other drawers in the Airstream using this method and these soft-close drawer slides.  The drawer fronts are made of a single piece of oak 1x10 so that the grain matches across all three drawers.  The hardware are salvaged letterpress drawer handles from A Vintage Parcel on Etsy.

I'm pretty happy that my Gransfors Bruks small splitting axe fits perfectly inside the drawer next to the wood stove.

How to Build Drawer Boxes

A typical drawer consists of a simple open-top box with drawer slides attached to the sides and a decorative drawer front attached to the face.

There are lots of ways to build drawer boxes, but the method we used makes strong, lightweight boxes with inexpensive materials and minimal time investment.  You'll need 1/2" plywood for the sides, 1/4" plywood for the bottoms, 1-1/4" cabinet or trim screws, wood glue, and a table saw with a dado blade.

Measure the space your drawer needs to fit into and subtract the thickness of your drawer slides.  Our drawer slides need 1/2" on both sides, so we're subtracting 1" from the width of the opening in the face frame.  For instance, if the space our drawer will occupy is 16" wide and 18" deep, the finished dimensions of our drawer box will be 15" wide and 18" deep.  The fronts of our drawer boxes are flush with the face frame because our decorative drawer fronts will overlap the face frame.

Cut your drawer sides out of 1/2" plywood.  The sides of the drawers should be exactly as long as your drawers are deep.  In our above example, that's 18" long.  The front and back of the drawers should be 1" shorter than your drawers are wide.  In our above example, that's 14" long.

Next, we'll cut the dado for our drawer slides.  My dado set comes with two 1/8" thick blades, which together are exactly the same thickness as a 1/4" piece of plywood.

Set your fence to be 1/4" away from the blade, and set your blade height to 1/4".  I like using a scrap piece of 1/4" plywood as a guide.

If this is your first time using a dado blade, take a moment to appreciate that you have just removed all the safety guards from your saw.  You should be wearing eye protection and ear protection.  Your body should be to the side, not in front of the blade in case the saw picks up your workpiece and throws it back at you.  You should NOT BE WEARING GLOVES.  Wearing gloves with a power saw is dangerous because if the blade catches the glove, it can grab the material and pull your hand in.

Generally, don't put your hands anywhere you wouldn't put your genitals, and you should do fine.  Sorry for the coarse wording, but it's remarkably effective at generating safe behavior with power tools.

Now, use a scrap piece of 1/2" plywood to make a test dado cut to check for proper fit. 

Once you're happy with how your saw is set up, go ahead and make your cut along the bottom of each piece you've prepared.  Take a moment to check the plywood for defects before cutting.  Sometimes you'll find a void in the plywood that would compromise your dado, so don't cut that side.  You can fill the void later.

Now that we're done with the dado blade, you can put your regular blade back in and cut your drawer bottoms out of 1/4" plywood.  The length and width should be 5/8" less than the finished dimensions of the box.  In our above example, that's 14-3/8" wide and 17-3/8" deep.

Now that you have all the pieces of your drawer boxes, test fit them together.  Remember, the drawer sides extend all the way to the corners, but the front and back are overlapped by the sides.  Make sure there are no gaps at the corners -- the drawer bottom tolerances are pretty tight, so if you cut your bottom too wide or your dados to shallow, you may need to recut your drawer bottom to get everything to fit perfectly.

Once you're satisfied with the fit of your drawer box, remove one side at a time to apply glue.  Put a thin bead of glue inside the dado cut, as well as a thin bead where the sides meet at the corner.  Use a couple of 1-1/4" cabinet or trim screws to secure the corners together.  You need to aim for dead center of the plywood you're drilling into.  I like using these star-drive trim screws because the small gauge and trim head cause less splitting. If you find you're having trouble with splitting, or just want to be on the safe side, drill a small pilot hole before installing each screw.

Now, I know what you're thinking.  That raw plywood edge looks pretty rough.  Are we really going to have to look at a raw plywood edge every time we open the drawer?

Yes.  But you can vastly improve the look with a little touch-up.  First, sand the raw edges with 100 or 150 grit sandpaper.  This would be a good time to wear those gloves and save your hands from splinters.  Just a few minutes with sandpaper will drastically improve the look and feel of your drawers.

Next, if you have any voids in the plywood showing, you can make them virtually disappear with a little glue and sawdust.  Apply some glue to the void, then shove some sawdust in there, then more glue, then more sawdust.  Keep going until you have a fairly solid surface.  Then, go over it with sandpaper to smooth it out.  Finally, smear a layer of glue over the area, and gently sand around its edges, creating a fine sawdust to coat and smooth the area.  Once the glue dries, you'll forget the void was there.

That's all there is to it.  Once I make my decorative drawer front, I attach it to the drawer from the inside with cabinet screws.

This is also the same method we used to make our sliding pantry shelf system.  We're basically just making a stacked drawer, with multiple dadoes cut in the front and back face of the drawer.  If you end up cutting across the grain, it helps to put a strip of masking tape on the wood before you cut, which will help prevent tear-out. 

The Grand Unified Couch Theory

The Airstream originally had a gaucho, or sofa bed, up front.  The couch cushion had a sheet of plywood attached to its underside, and the whole thing sat on top of an aluminum frame.  This design makes for a cheap and lightweight piece of furniture with a good bit of storage underneath, but it makes for lousy sitting and sleeping.

I set out to make a durable, comfortable piece of furniture.  This is really our only inside seating area aside from a small desk and ... ahem ... the toilet.  So the couch needs to be comfortable.  We also wanted to be able to convert it to a bed that's a bit more comfortable than a bunch of couch cushions sitting on the floor.

Some of these links are "affiliate links."  If you decide to buy something based on our recommendation, it would be nice if you used the direct link from this page so that we can make a small commission for referring you (which doesn't cost you anything extra).

I researched common furniture dimensions here and here, and got pretty deep into a Youtube upholstery hole.  I found a very useful set of videos for hand-tying springs produced by DIYUpholsterySupply.com, and ended up getting a bunch of my supplies from them.

Since I want this furniture to last, I'm building the major load-bearing parts out of oak, and using dovetail joints for the higher stress areas.  None of my local hardware stores carry dovetail saws, so I picked up this Japanese dovetail saw over at Amazon that I'm very happy with.

After a few practice joints, we're off and running.  It's good to leave a little extra on either end of the joint, which you can trim flush with the dovetail saw or a block plane

After watching a bunch of YouTube videos of carpenters saying they do just fine marking their dovetails freehand, I tried it that way.  Then I picked up this dovetail marking tool for $12.  If you want to cut dovetails, just buy the marking tool.  It'll easily pay for itself in frustration and wasted material.

Frames are 6' long by 20" wide.  11 sets of 20" spring bars per frame made for fairly even spacing.  Also got the big roll of Ruby Italian Spring Twine and a box of spring nails.  About 300 knots per frame and we're in business.

I used a piano hinge to attach the two sides together and test fit the assembly.  Lounge mode on the left, slumber party mode on the right.

I built the base and attached legs to the front of the seat.  The legs will support the front of the seat when it's pulled out into a bed.  I also started work on the arm rest, which will angle slightly outward.  I considered building shelves or drawers into the space between the arm rest and the wall, but I think we're going to like the freestanding look better.

Next, I removed the piano hinge from the frames and started on covering them.  First burlap to cover the springs, then 1" edge roll around the front and sides.  I probably could have used 1-1/4" and got a little flatter seat.  I did not put edge roll at the back of the seat or the bottom of the back because I don't want you to feel a lump behind your tailbone when sitting, or in the middle of the bed when laying down.

One layer of cotton batting with the edges tucked behind the edge roll, then another layer on top, hanging over the front.  This will smooth out the back and seat a bit, and protect the fabric cover from the springs wearing through it.  The fabric we chose is this charcoal colored linen blend.

Next, we reattached the piano hinge to the covered frames and reinstalled in the Airstream.  The frames are fairly comfortable by themselves, but much better with a layer of cushions on the seat.  I have the back angled at 26 degrees.  Since the seat is horizontal (no backward angle), if the back reclines too much, you'll feel like you're sliding forward off the seat.

The seat cushion is going to be 4", but the back cushion is going to be pretty thin.  Every inch of back cushion takes away an inch of seat depth, and 20" is on the shallow side for a couch seat anyway.  If I didn't have to work around the wood stove and hearth, I might have used 21-1/2" bar springs for the seat to make it a little deeper.  But the seat back is pretty comfortable even without a cushion, so we should be fine.

Luna approves of our progress.