
Water Treatment
Our nomadic lifestyle leads us to fill up our water from lots of different sources. Prior to our full-time RV life, I spent 13 years in the water treatment industry, so I’m wary of potential contaminants.
Not all of those sources available to us would be our first choice for water for washing or drinking. The hose behind the gas station is sometimes the best available option. To make sure we're protecting everything we're putting the water in—our tanks, our appliances, and our bodies—I developed low cost, easy to use, portable water treatment strategy to mitigate the wide range of water problems we may encounter on the road.
Some of the links in this article are affiliate links.
Help us out by purchasing products you need through the links from this page. If you buy something based on our recommendation, we might earn a small commission for referring you, but it won’t cost you any extra.
Water Treatment Gear

RV Water Softener
We soften all of our water at the spigot. Soft water makes soap more effective when using less, helps prevent lime scale in our water heater and dishwasher, and removes iron that could build up in our tanks and stain our fixtures.
This model has an easy-open top to pour in a container of regular table salt for regeneration. For our usage, we typically need to regenerate our softener every other month or so, depending on how hard the local water supply is.
When filling our jerry cans, we attach our Camco water fill valve directly to the softener, which makes hands-free filling and jug switching much easier.

Chlorox Bleach
Chlorination is important for keeping bacteria from growing in stored water and on the interior surface of RV tanks and water containers. Without chlorine, bacteria can grow freely in your fresh tank as the water sits and stagnates. If your water tank stays chlorinated, it stays clean.
For every fill-up at a source that isn't already chlorinated, I follow the National Institutes of Health guidelines of 1/8 tsp of household bleach per gallon of water with a minimum contact time of 30 minutes before use. My fresh tank is 45 gallons, so a full tank needs just under 2 tbsp. Each of my jerry cans holds 5.5 gallons, so if I'm hauling or storing water, each one needs just under 3/4 tsp. Once mixed with bleach, the water needs to sit for at least 30 minutes before use.
Am I seriously putting bleach in my drinking water? Yes. But I filter out the bleach before we use the water.

0.5 Micron Carbon Block
This high-flow carbon filter removes the chlorine from our water before it reaches our faucet. The 0.5 micron rating also removes protozoan cysts, the only common pathogens that bleach doesn’t do a good job at killing.
This cartridge is installed immediately after our water pump inside of this housing. You’ll also want the mounting bracket and the wrench. To make the installation as easy as possible (no cutting pipes needed!), pick up a set of flexible Shurflo Pump Silencing Kit hoses, which you can screw into the existing fittings on the outlet side of the pump. You’ll need two 3/4” x 1/2” threaded PVC bushings and some pipe tape to attach the hoses to the filter housing.

ZeroWater Pitcher
We care a lot more about the purity of the water we put in our bodies than the water we use to shower and wash the dishes. So, drinking water warrants some special attention.
The ZeroWater Pitcher is a carbon filter and a deionizer, so it will generally remove any chemical impurities left in the water after it comes out of the faucet. It will not remove bacteria, viruses, or protozoan cysts, but we already took care of those in an earlier step.
A good reverse osmosis system would accomplish the same thing as the ZeroWater pitcher more or less, but RO wastes a lot of water when you’re hauling it in by hand.
Lots of folks swear by the Berkey, but it’s not NSF certified (the independent test water filters go through to ensure it does what it claims, and it doesn’t add anything harmful to the water). I also haven’t been able to get a Berkey to explain exactly how it works. They say it uses adsorption (i.e. it’s a carbon filter) and ion exchange, but they won’t tell me which ions it’s exchanging, or how to know when the ion exchange surface is depleted. I prefer to use a filter that I understand, and that I can measure in real time whether it’s working.
Water Fetching Gear

Jerry Cans
If you don’t want to have to move your rig every time you go to fill up your water, you’re going to want a couple of jerry cans. I recommend getting even numbers of jugs, since it’s easier to carry one in each hand when they’re full (a balanced load) than to carry one at a time.
I keep two of these (empty) in the rear compartment of the Airstream. At the start of the COVID-19 pandemic, I bought two more to cut our trips into town in half.

Four Way Key
This cheap, handy tool allows you to open hose bibbs without handles commonly found on the outside of commercial buildings. Be sure to flush the line thoroughly before taking any water, since sediment and bacteria tend to accumulate in seldom used pipes.
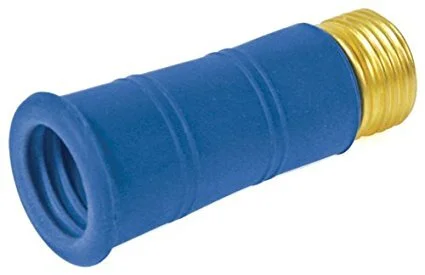
Water Bandit
This tool allows you to connect a hose to an unthreaded faucet, like the ones found in lots of National Parks. While not strictly necessary to fill a jerry can, it can be helpful if you want to soften your water while filling your jerry cans, or if you want to run a hose to your RV to fill your tank directly.
If you want to be able to walk away from your hose while it’s connected, you’ll also want a couple of worm clamps to hold the water bandit together.
Water Treatment Technique
Water Sources
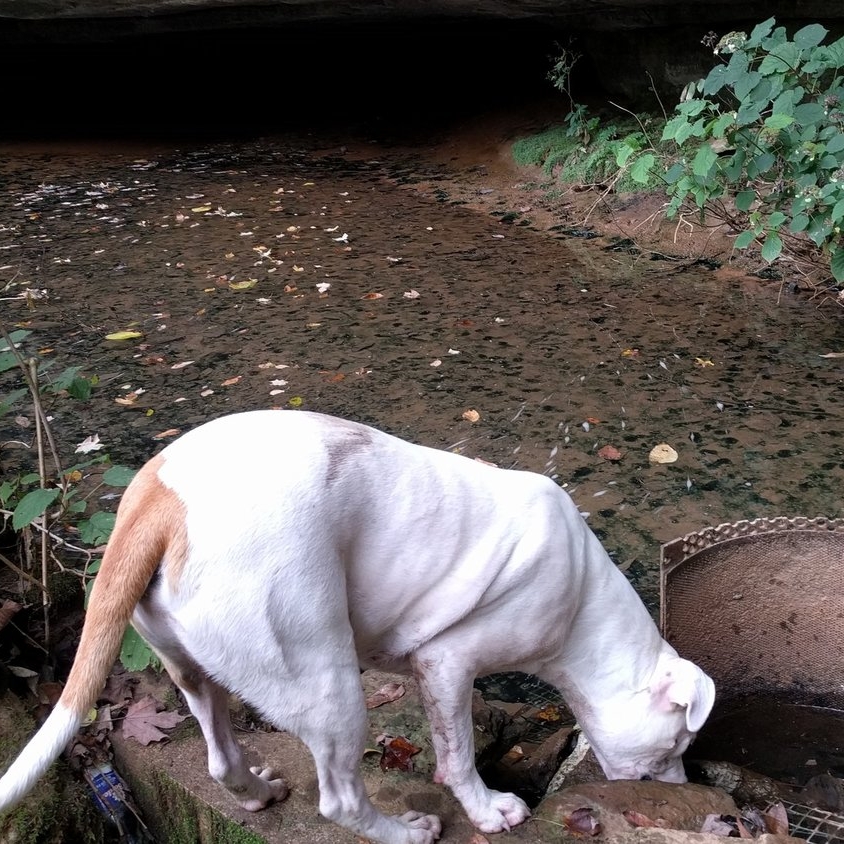
When we're filling up our tanks, we try to use the best available source. Just because the water comes out of a tap does not mean it's treated, tested, or good to drink. Just because water is treated for one purpose doesn't mean it's suitable for all purposes. And if your Air BNB host is raving about how great her spring water is, you might have reason to be suspicious about its source (photo related).
Municipal water, household well water, and campground water can be made much better with secondary treatment. The garden hose behind the gas station would not be my first choice for a water fill, but sometimes it's the best option available. Secondary treatment can make it much safer. Surface water from springs or streams needs thorough treatment -- avoid it if you can, treat it if you can't. Cloudy purple water out of the swamp next to the power plant? Find somewhere else to get your water.
Be Prepared
If you're a nomad, you'll want to be prepared to capture your water from various sources. A water bandit can help you get water into a hose from a faucet with odd or no threads. A couple of jerry cans are good for hauling or short-term storage of (chlorinated) water.
By far, the most useful tool for getting water anywhere is a four-way key. Many of the spigots you will find on the outside of commercial buildings (like strip malls, drug stores, cell phone retailers, restaurants, etc.) require a four-way key to open. The business may be happy to let you take a few gallons of water, but they’re not going to call the maintenance man to help you open the valve.
If you don't trust your water source completely, the method I recommend is practical, inexpensive, and very effective at making your water safe, both for your appliances, and for your body. If you just want to make your water quality better, or you've read the news too much to trust municipal water, this method will also address nearly every concern you might have. If you use this method on every fill, regardless of the source, you'll save some money on soaps, cleaners, and repair bills, and maybe even avoid some health problems.
Pre-Filtration
When obtaining water from a new source, the first thing to check is if your water is cloudy. Before you take any water from a spigot, run the water for a minute or so. This may seem wasteful, but the "first draw" tends to contain far more bacteria and sediment than a flushed sample.
Catch a sample of water in a clear glass and take a look. If tap water is milky at first, and then the cloudiness rises to the top and disappears within a minute or two, that's just air. No need for a pre-filter. This kind of cloudiness is very common in municipal supplies, especially in the winter.
If the cloudiness hangs around for several minutes or settles to the bottom, you have sediment that needs to be filtered first. You can install garden hose fittings on a standard filter housing and use 5 micron sediment filters, which should clear up most sediment issues at the tap.
Make sure your water is clear and colorless before you put it in your tank. Sediment that settles in your tank can be difficult to remove, and cloudy water is harder to disinfect than clear water.
Softening
Showering with hard water covers your skin and hair with a thin film of soap scum. Using soft water keeps your skin and hair softer, and can help stop the dry, itchy skin that most people using hard water assume is a fact of life. Soft water helps soap lather better and rinse cleaner, so you need to use far less soap wash your body, clothes, and dishes, and your shower will stay cleaner.
When conserving water, soft water is especially helpful for dish washing. You'll need less soap, so you'll use less wash water and less rinse water.
Consistently using soft water also prevents the formation of lime scale in the water heater, washing machine, dishwasher, valves, faucets, and shower heads. Water softeners also have the benefit of removing other impurities like ferrous iron, magnesium, and even radium from your water. If you add chlorine to your tank and the water turns orange, that's iron that a softener could have removed.
OPERATING A PORTABLE SOFTENER
A portable RV water softener can be placed in-line with your hose when you're filling your water tank or hooking up your water inlet. You'll need to periodically check your water with hardness test strips to see when it's time to regenerate your softener.
Softeners work by ion exchange. As you run water through it, your softener trades sodium ions for the ions that it's removing. After a while, your softener will run out of sodium ions to trade, and it will need to be regenerated. Portable water softeners have a lid that opens to allow you to pour in a package of regular table salt. After a few minutes of rinsing the salt through the tank and flushing it with clean water, the softener is regenerated and ready to treat your water again.
Periodically, especially if you're not using a pre-filter, you'll also need to backwash your softener to flush out any accumulated sediment. To backwash, you'll use the included fittings to hook your water supply to the softener backward, and flush water and any accumulated sediment out of the inlet side. Backwashing is usually done just prior to regeneration when it needs it. You'll want to backwash your softener every few regenerations, or more frequently if you notice a decrease in flow.
I soften all the water that goes into my fresh tank each time I fill up, regardless of the source. I simply attach the softener to the fill hose and fill my tank normally. After completing each fill, I test to see if the softener needs regenerating. If it's freezing outside, or if I'm trying to minimize the weight I'm carrying, I'll use my blowout plug and my portable 12V air compressor to push the water out of the softener.
Disinfection
Boiling is the most effective way to destroy pathogens in your drinking water. But it's not practical to boil all of your water all of the time. If your town has a boil water advisory, or if you know that the water source you're drinking from is contaminated with human waste, then you should boil all of your drinking water. Otherwise, chlorination and filtration is generally sufficient.
Chlorination is also important for keeping bacteria from growing in stored water and on the interior surface of water containers. Without chlorine, bacteria can grow freely in your fresh tank as the water sits and stagnates. If your water tank stays chlorinated, it stays clean.
For every fill-up at a source that isn't already chlorinated, I follow the National Institutes of Health guidelines of 1/8 tsp of household bleach per gallon of water with a minimum contact time of 30 minutes before use. My fresh tank is 45 gallons, so a full tank needs just under 2 tbsp. Each of my jerry cans holds 5.5 gallons, so if I'm hauling or storing water, each one needs just under 3/4 tsp.
According to the Centers for Disease Control, the NIH method is very effective at destroying bacteria and viruses. The longer the chlorine is in contact with the water, the better. It's important to wait at least 30 minutes after filling to give the chlorine time to work. Chlorination is a so-so method against protozoa, but we're going to deal with them in the next step.
Incidentally, if your well water contains hydrogen sulfide and smells like rotten eggs, this step will fix that, too. Hydrogen sulfide is a gas, so if it's in your water, the odor will probably be noticeable soon after you turn on the tap. Low levels of sulfur can smell like soil, especially when accompanied by iron. But high levels smell unmistakably strong like rotten eggs or sewage. Chlorine oxidizes hydrogen sulfide to elemental sulfur, which drops out of solution as a yellow solid.
Since hydrogen sulfide is a gas that quickly escapes from the water at atmospheric pressure, it's only likely to be present in well water, not surface water. If surface water smells like sewage, it probably is.
Carbon Filtration
In the last step, we just added a bunch of chlorine to our water. I don't want to drink a bunch of chlorine. I don't even want to inhale it in the shower. Even more so, I don't want to drink all the toxic disinfection byproducts that I might have just created by adding all that chlorine to my water. And I don't want to drink or bathe in other nasty chemicals either.
I also don't want to get a protozoan disease from Giardia or Cryptosporidium. Long-term gastro-intestinal problems don't sound like fun to me.
I can address all of these issues in one step by running all of my water through a high-flow carbon block filter with a 0.5 micron rating. Carbon filters are great for removing organics like pharmaceuticals, pesticides, or nasty disinfection byproducts like trihalomethane. They're also good at removing chlorine and lead, which I'd really prefer to take out of the water before I use it. And because the rating of the carbon block filter we're using is smaller than 1 micron, it will also filter out any protozoa that might be hanging out in my water.
A small 10" filter housing after my water pump houses my 0.5 micron carbon block filter cartridge. I use a clear housing because it's installed inside a cabinet, but if you're using a filter somewhere it'll see a lot of direct sunlight, use an opaque housing instead. Don't forget the mounting bracket and the wrench. Don't confuse granular activated carbon (GAC) filters for a carbon block, since they don't have the micron rating necessary to remove protozoans. Look for "carbon block" and "0.5 micron" in the product description, and choose a “high flow” model for the best possible flow rate.
Purification
I care a lot more about the purity of the water I put in my body than the water I use to wash the dishes. Even though I went through several steps to remove potentially nasty contaminants from my water already, I think it's worth one extra step to get rid of pretty much anything else in the water that might bother me.
The usual household water treatment setup would use reverse osmosis to treat drinking water. That might work well for a tiny house with full hookups, but it doesn't work for my off-grid use. An RO system produces a lot of waste water, and I can't afford to waste any water. The prefilters are usually reasonably priced, but the membrane can be expensive, and it'll break if it freezes. There's also a manifold with lots of tubes that can be tough or impossible to winterize.
Instead, I use a deionizer to purify my water. A deionizer uses an ion exchange process just like the softener we used earlier, but instead of trading sodium for hardness, it trades anything positively charged for H+ ions, and anything negatively charged for OH- ions. Combined, H+ and OH- make pure H2O, so we're essentially removing any remaining ions and replacing them with pure water.
THE BEST DRINKING WATER PITCHER
The ZeroWater dispenser has a five stage filter that includes a carbon step in case we missed any heavy metals or pharmaceuticals, and a deionization step that removes any remaining ions, including all the sodium that the softener added. It comes with a total dissolved solids tester to confirm that it's working, and to let you know when it's time to change the cartridge.
If my deionizer freezes, no big deal. The cartridge might break, but it's disposable.
Some folks worry that removing all the minerals from your water is bad for you. I disagree. As someone living in a first world country, I get plenty of minerals from my diet. There's salt on my fries. There's fluoride in my toothpaste. I had avocado toast for breakfast (copper, potassium), kale for lunch (manganese, copper, calcium, potassium, iron, magnesium), and brussels sprouts for dinner (selenium, copper, zinc, manganese, iron, calcium, potassium, phosphorous).
The fact is, there are often some beneficial minerals in tap water. And there are some inert ones. But those impurities ride along with all the nasty stuff I don't want to put in my body. There are better ways to get the good minerals without having to drink all the lead and Viagra that your local municipal water delivers.