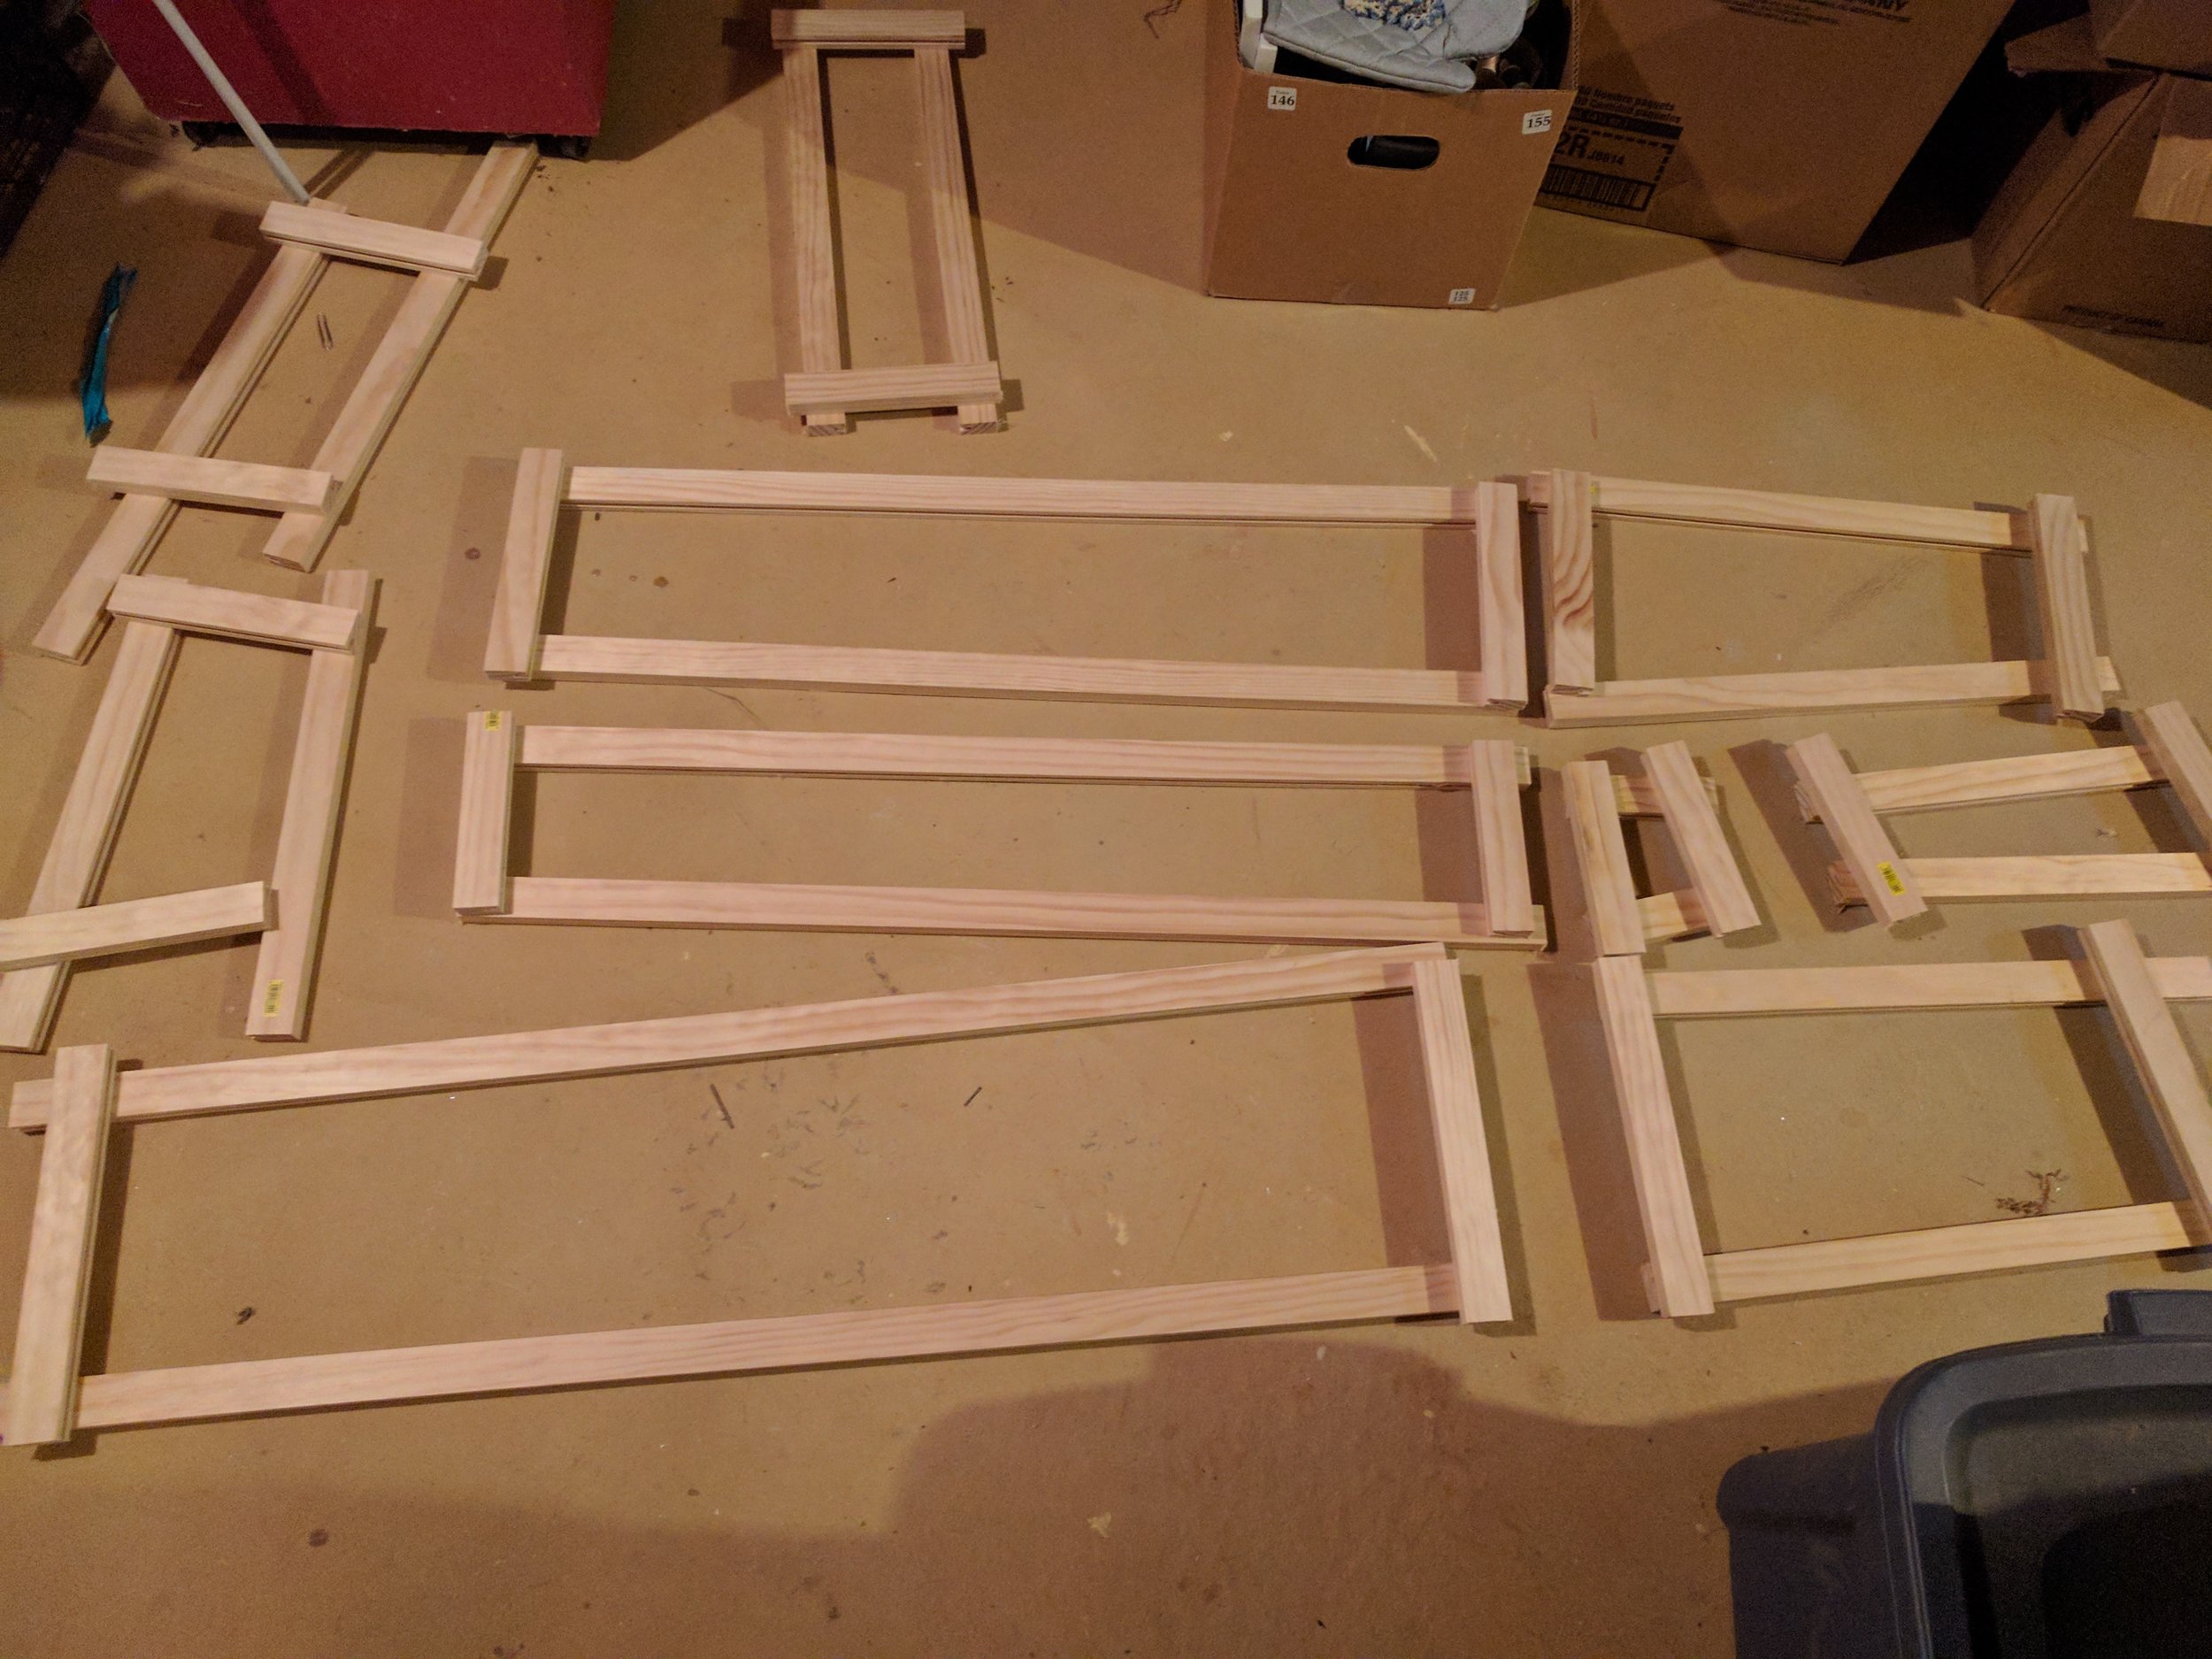
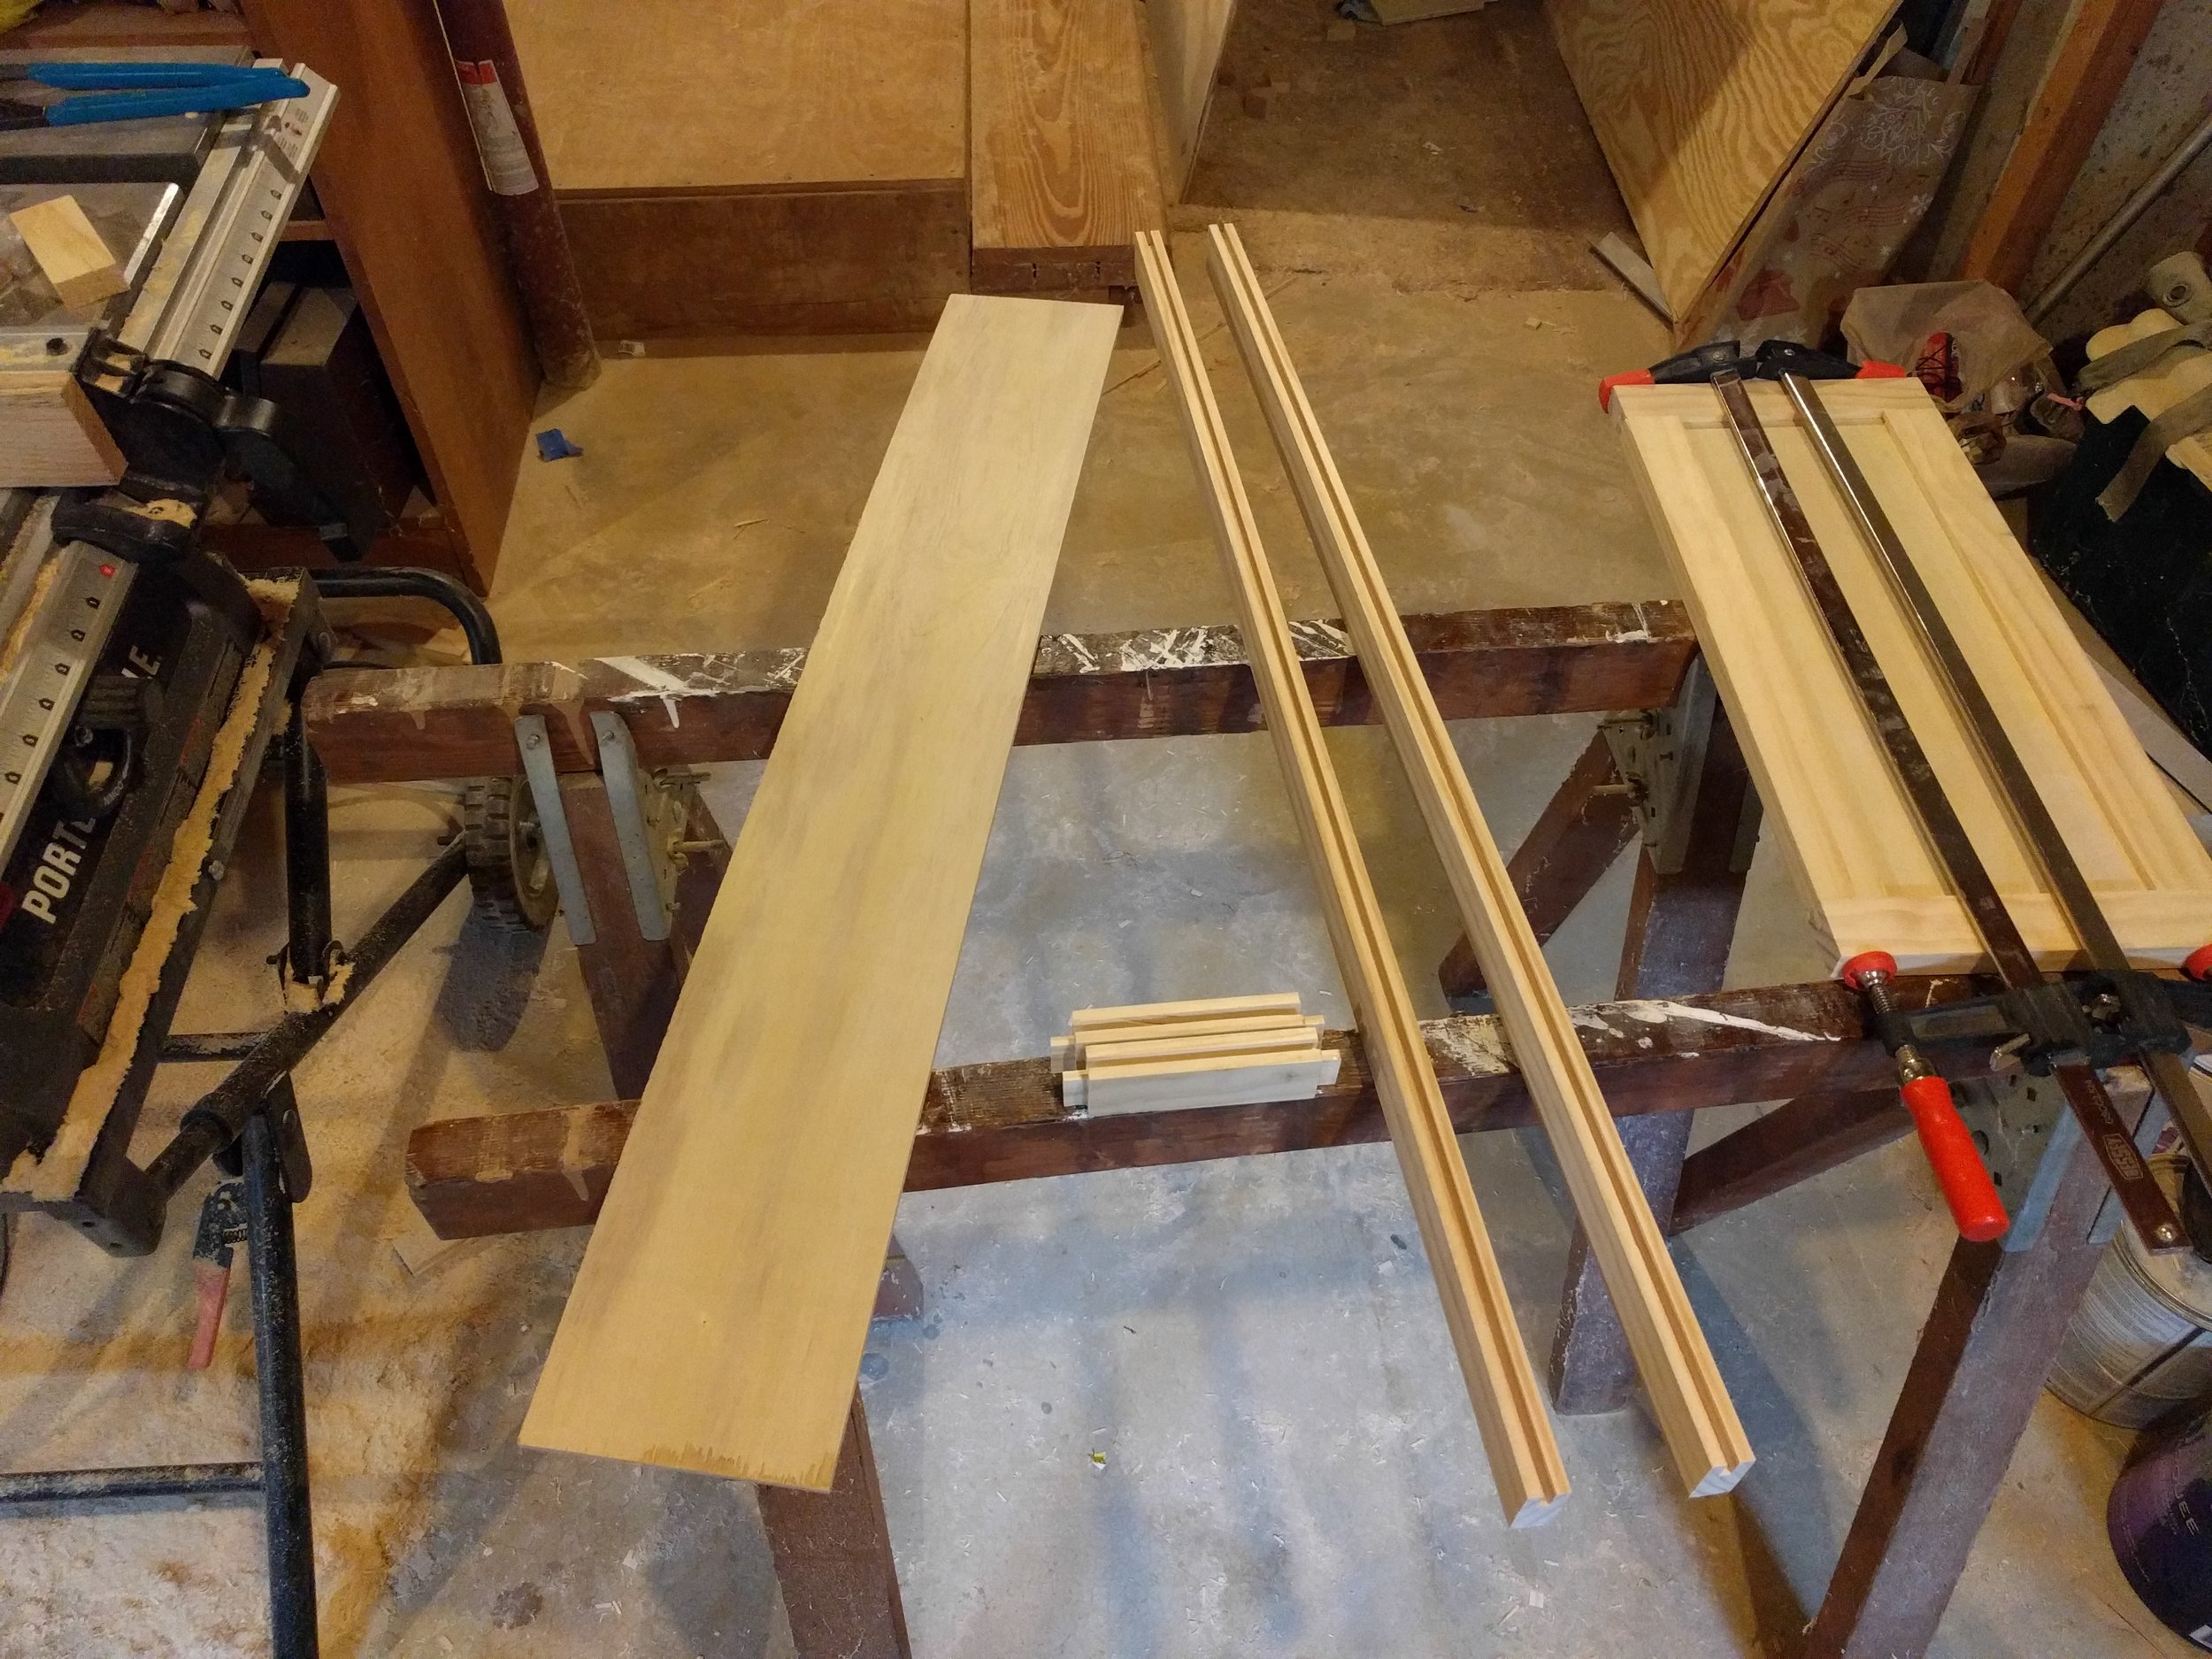
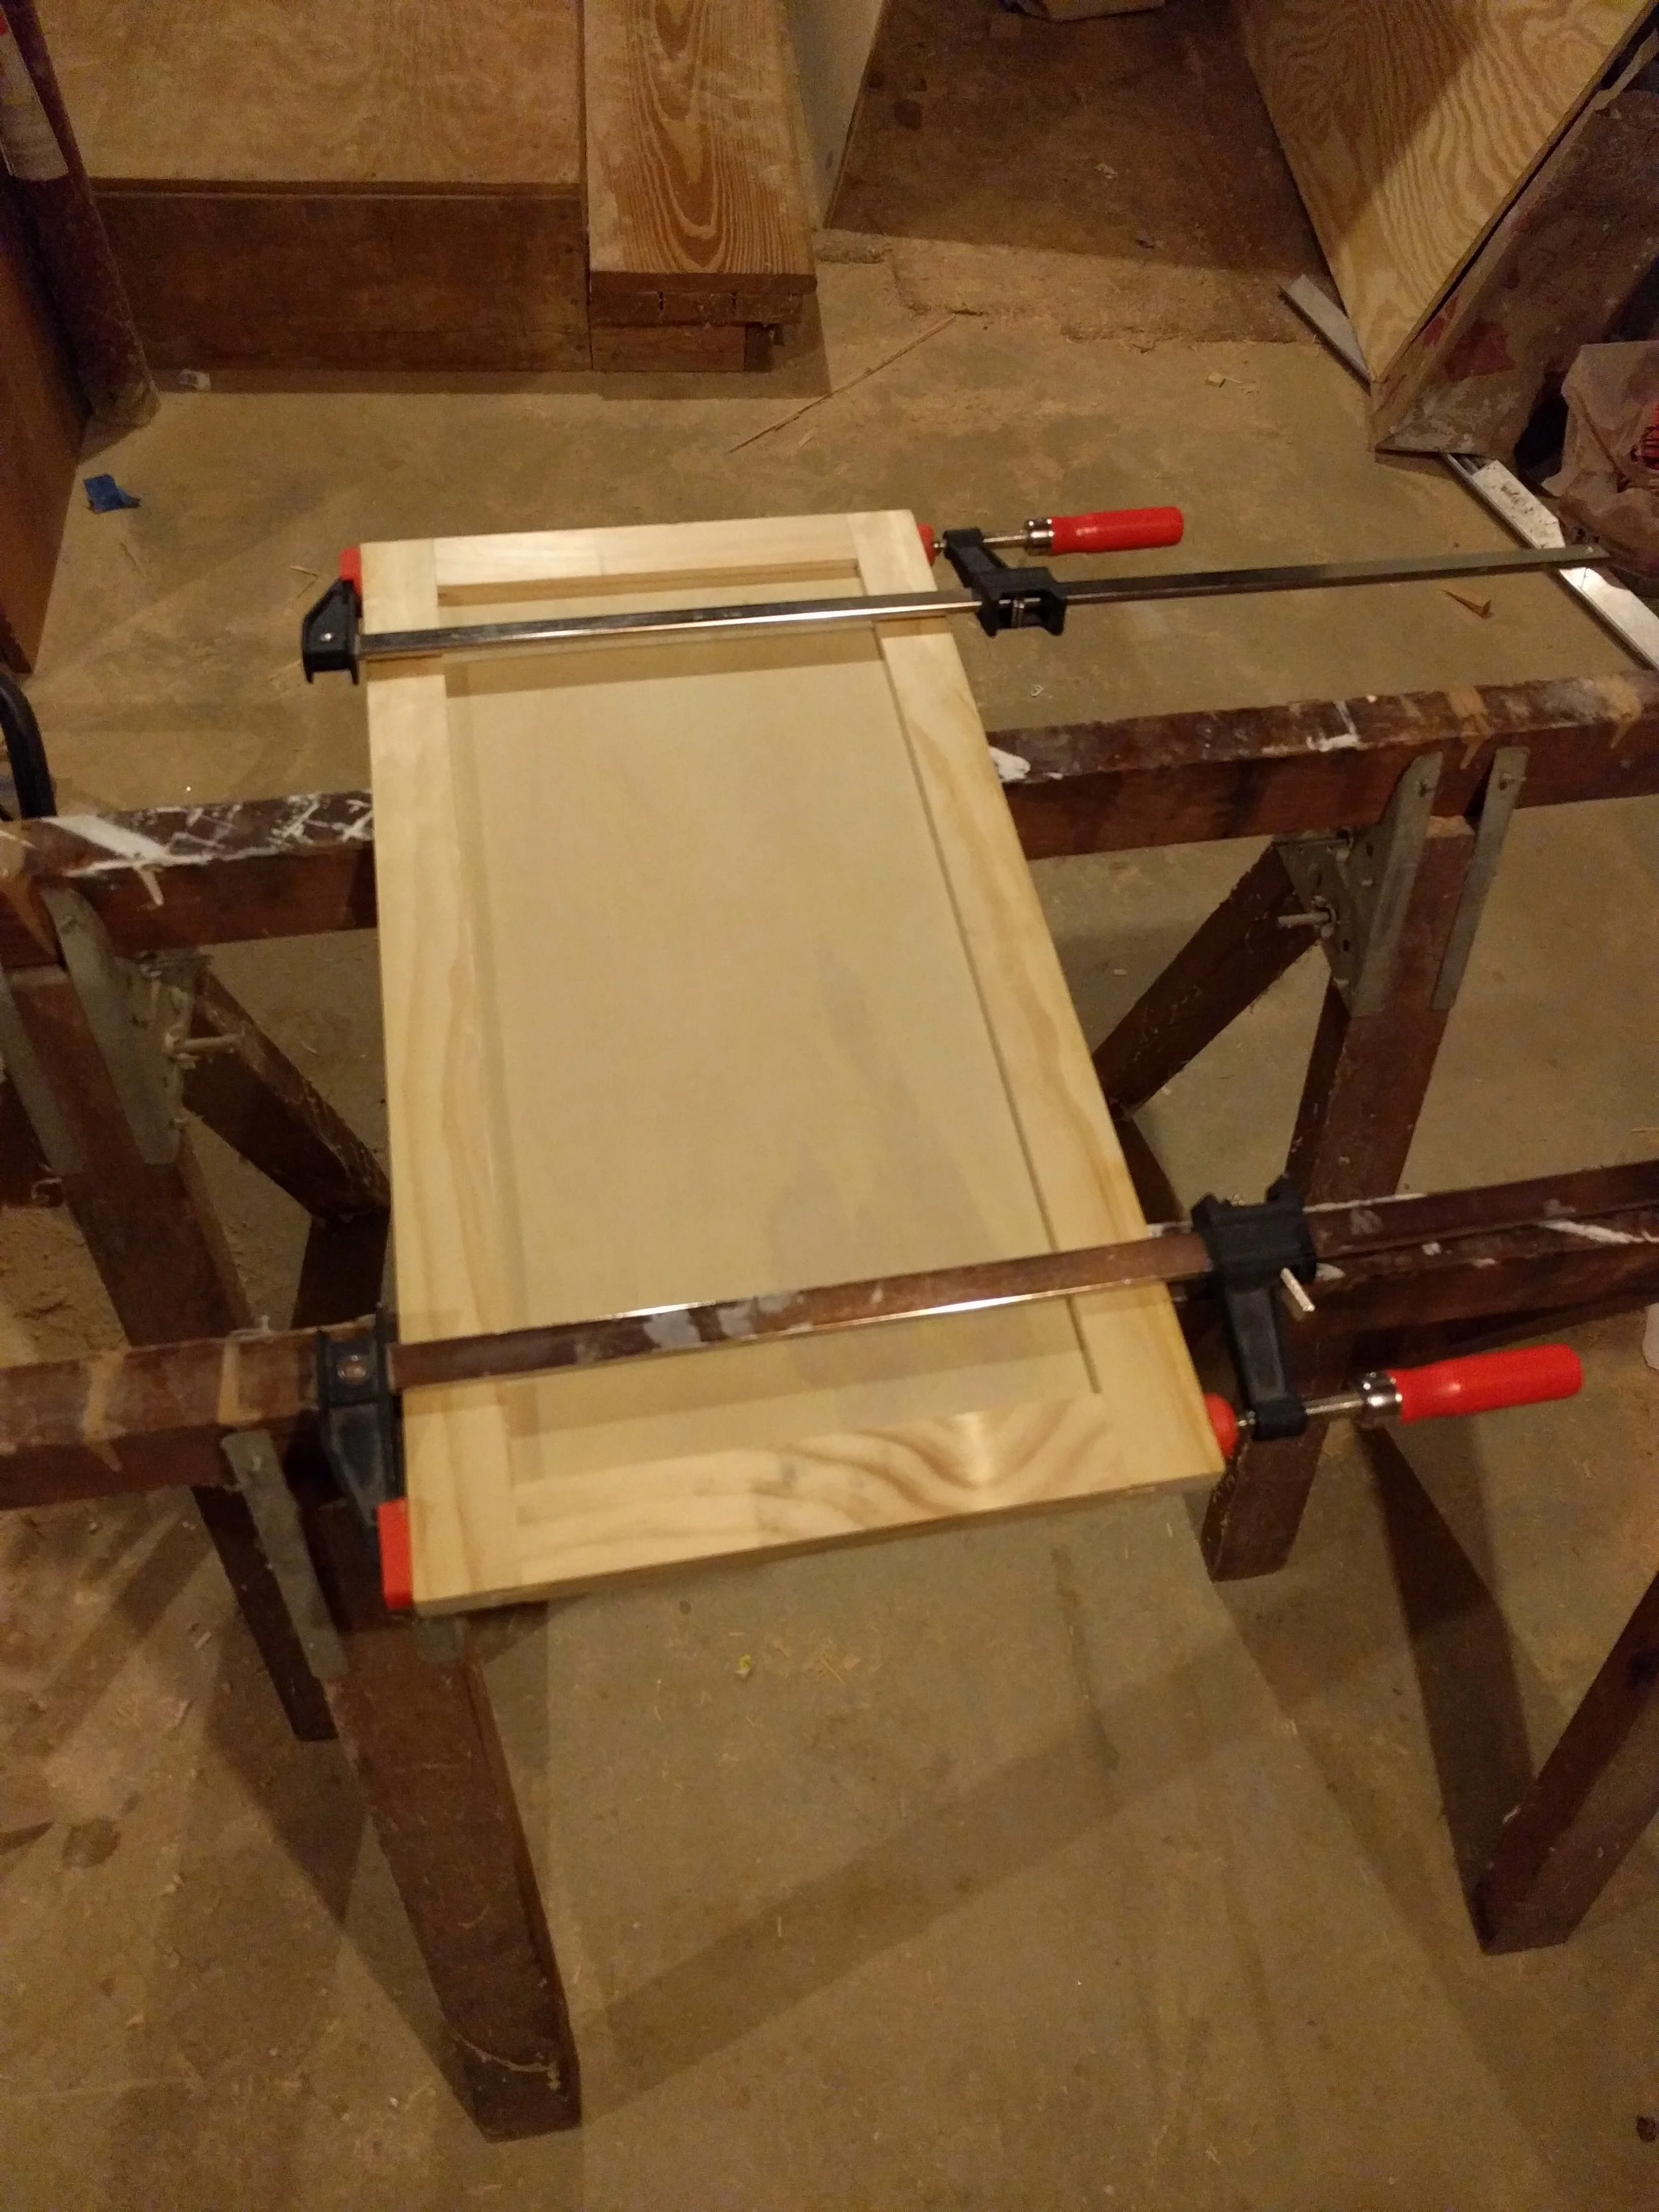
Now that I have the drawers installed, I need to manufacture some cabinet doors and drawer fronts. Like everything else, they need to be lightweight. I'm using a simple shaker style built from pine 1x2's and 1/4" plywood. Use the "premium pine" 1x2's for this, not the cheaper stuff.
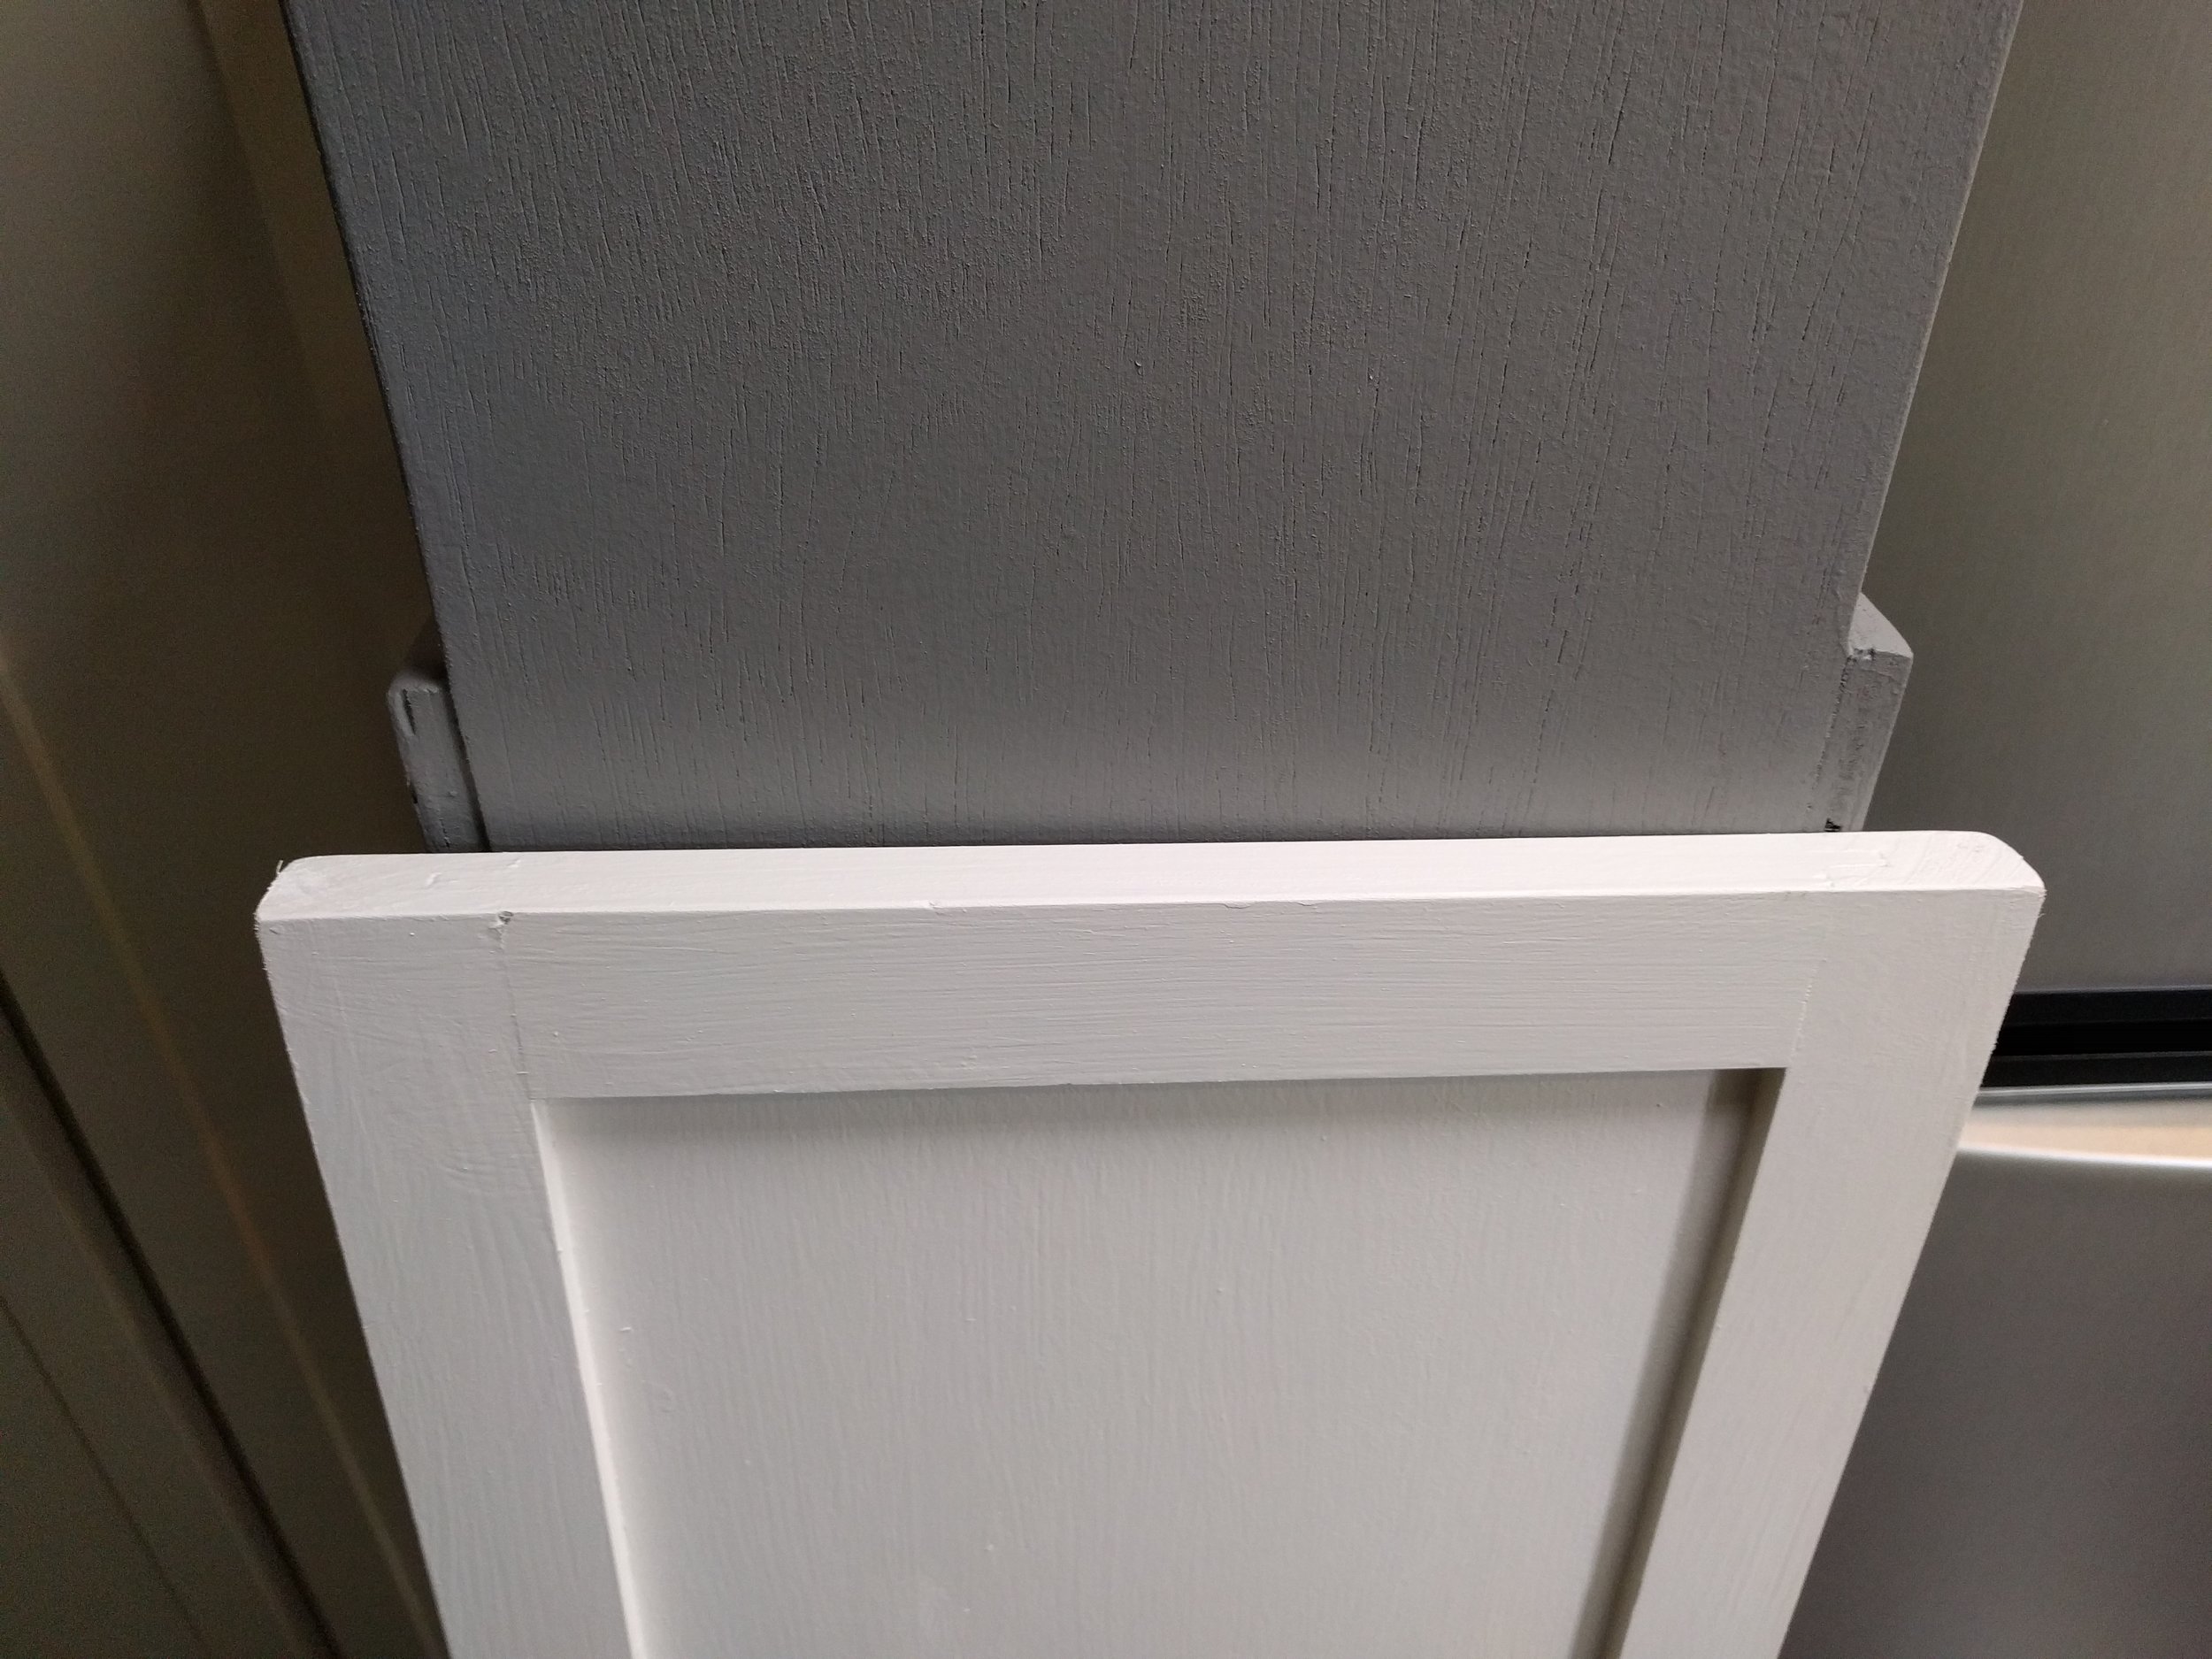
I want my doors and drawer fronts to overhang by 1/2", so I'm measuring the space I need to cover and adding 1" to each dimension to get my finished size.
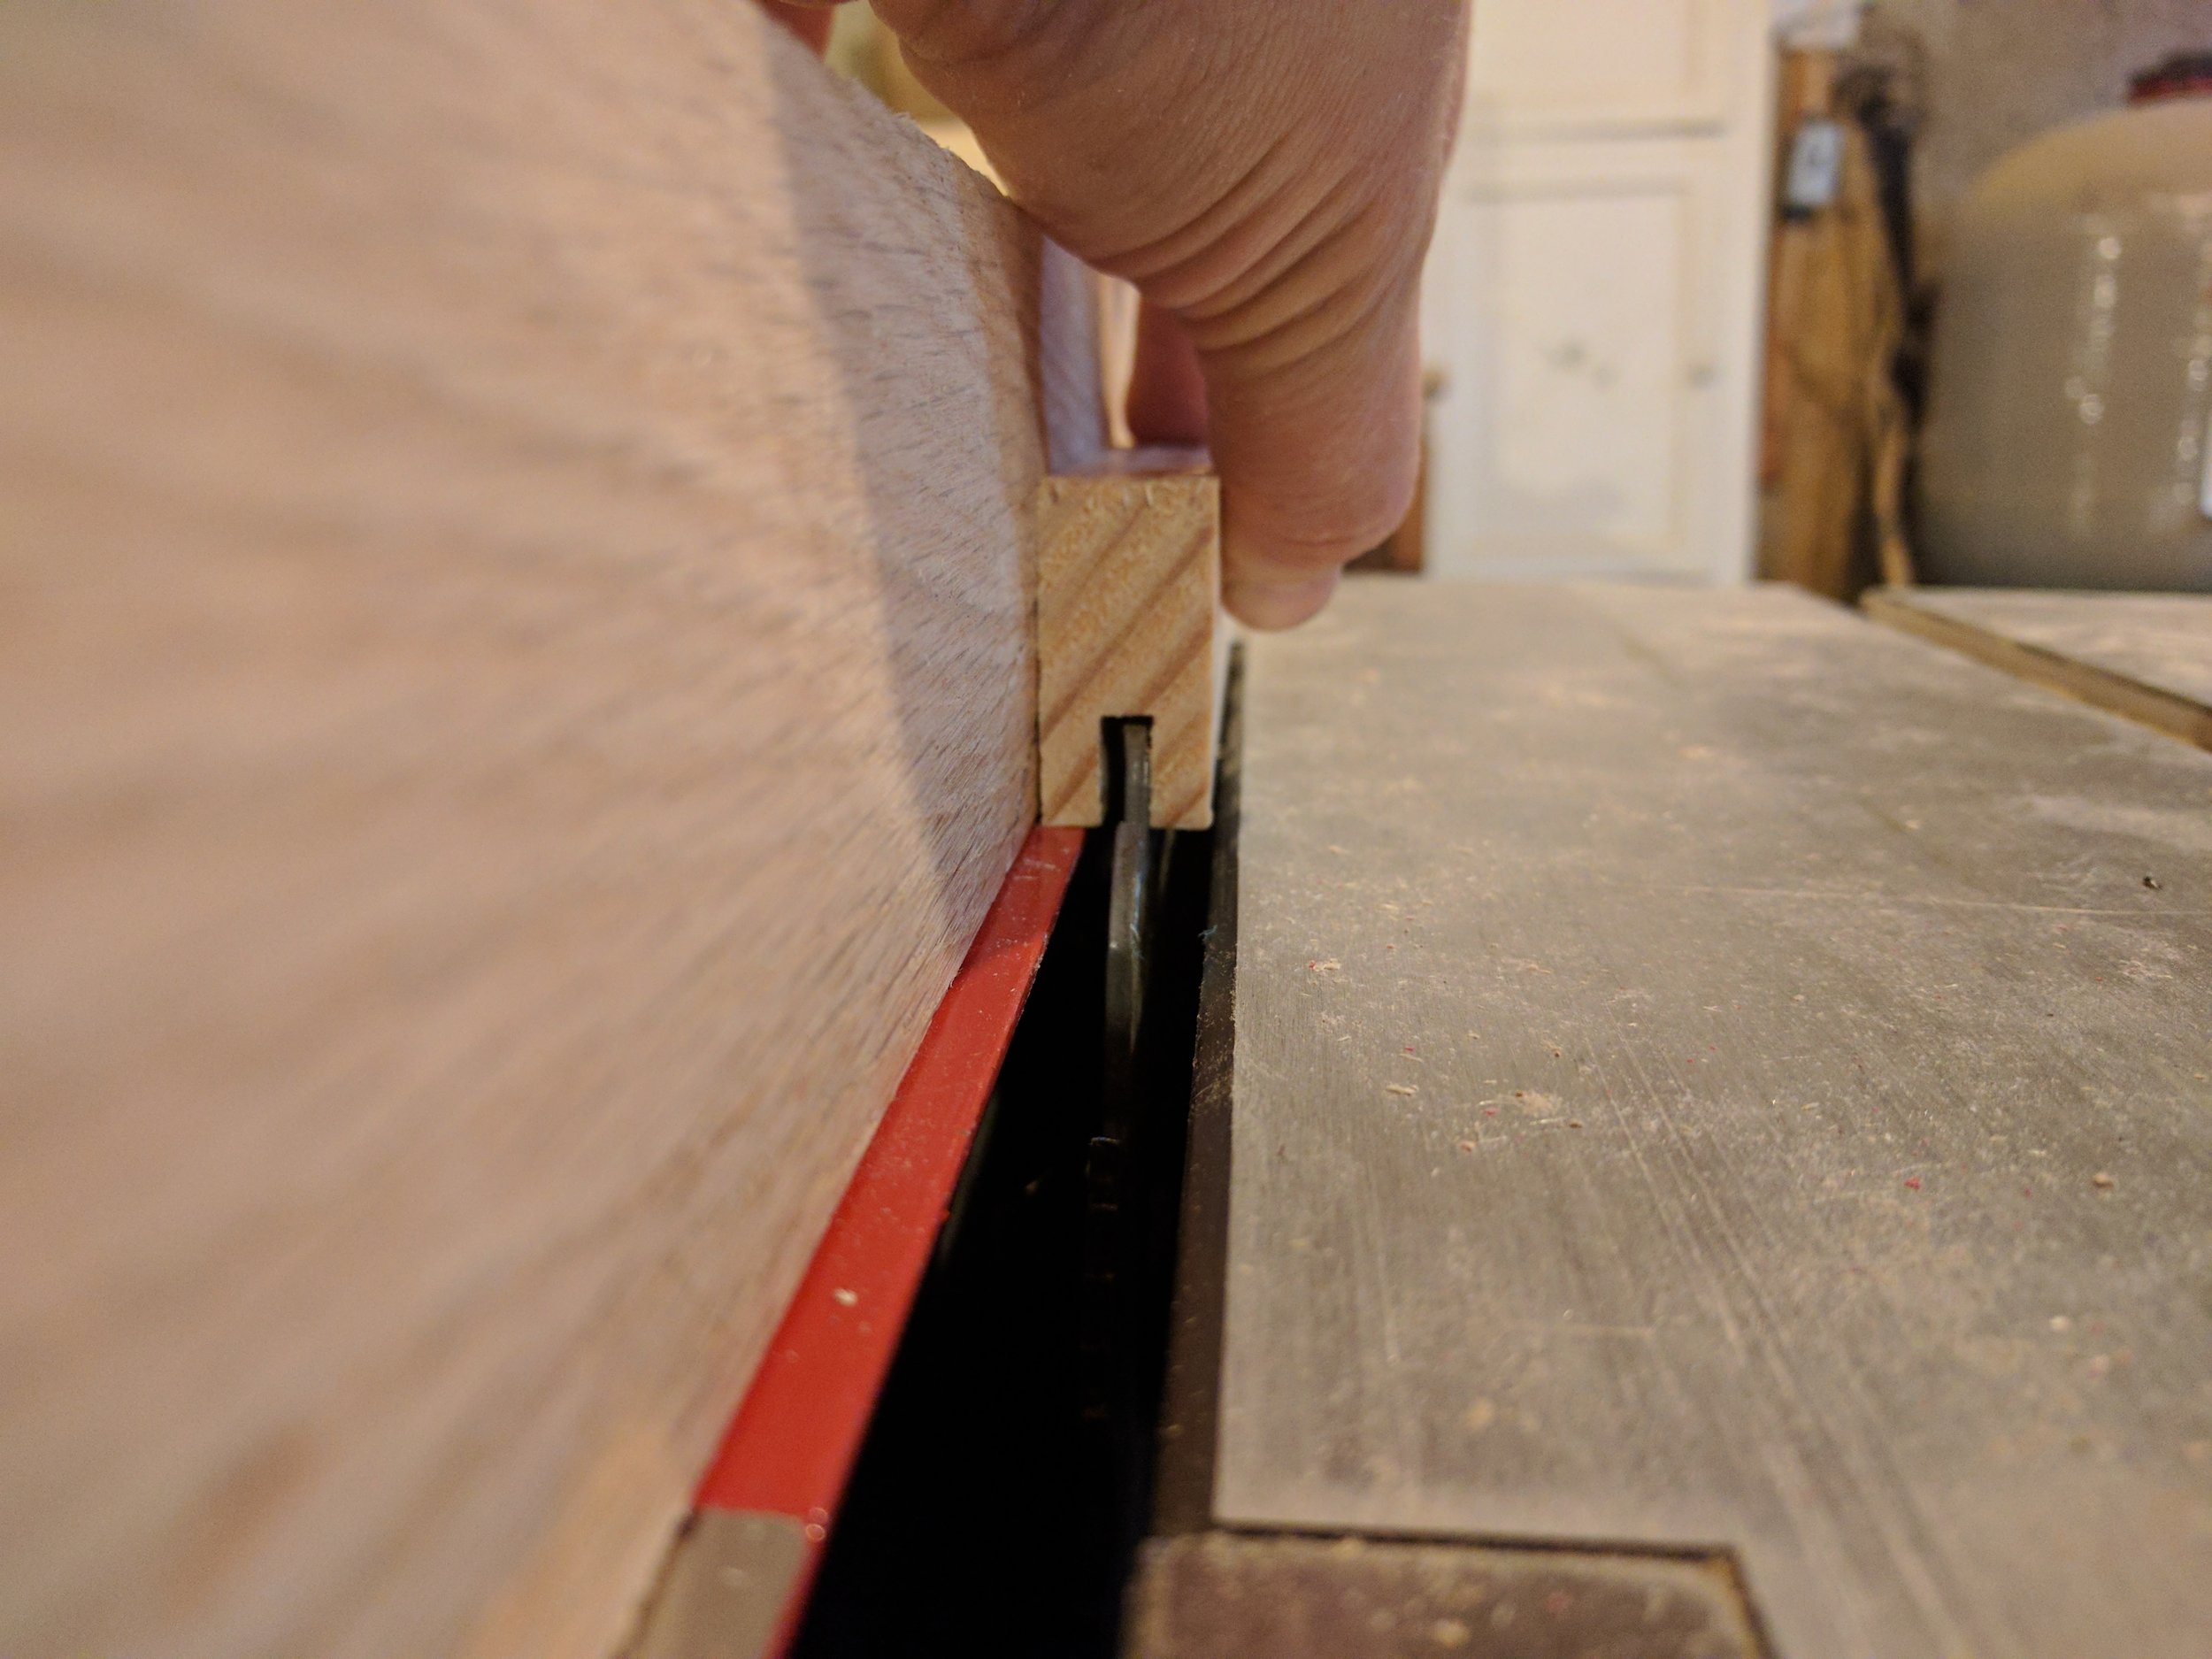
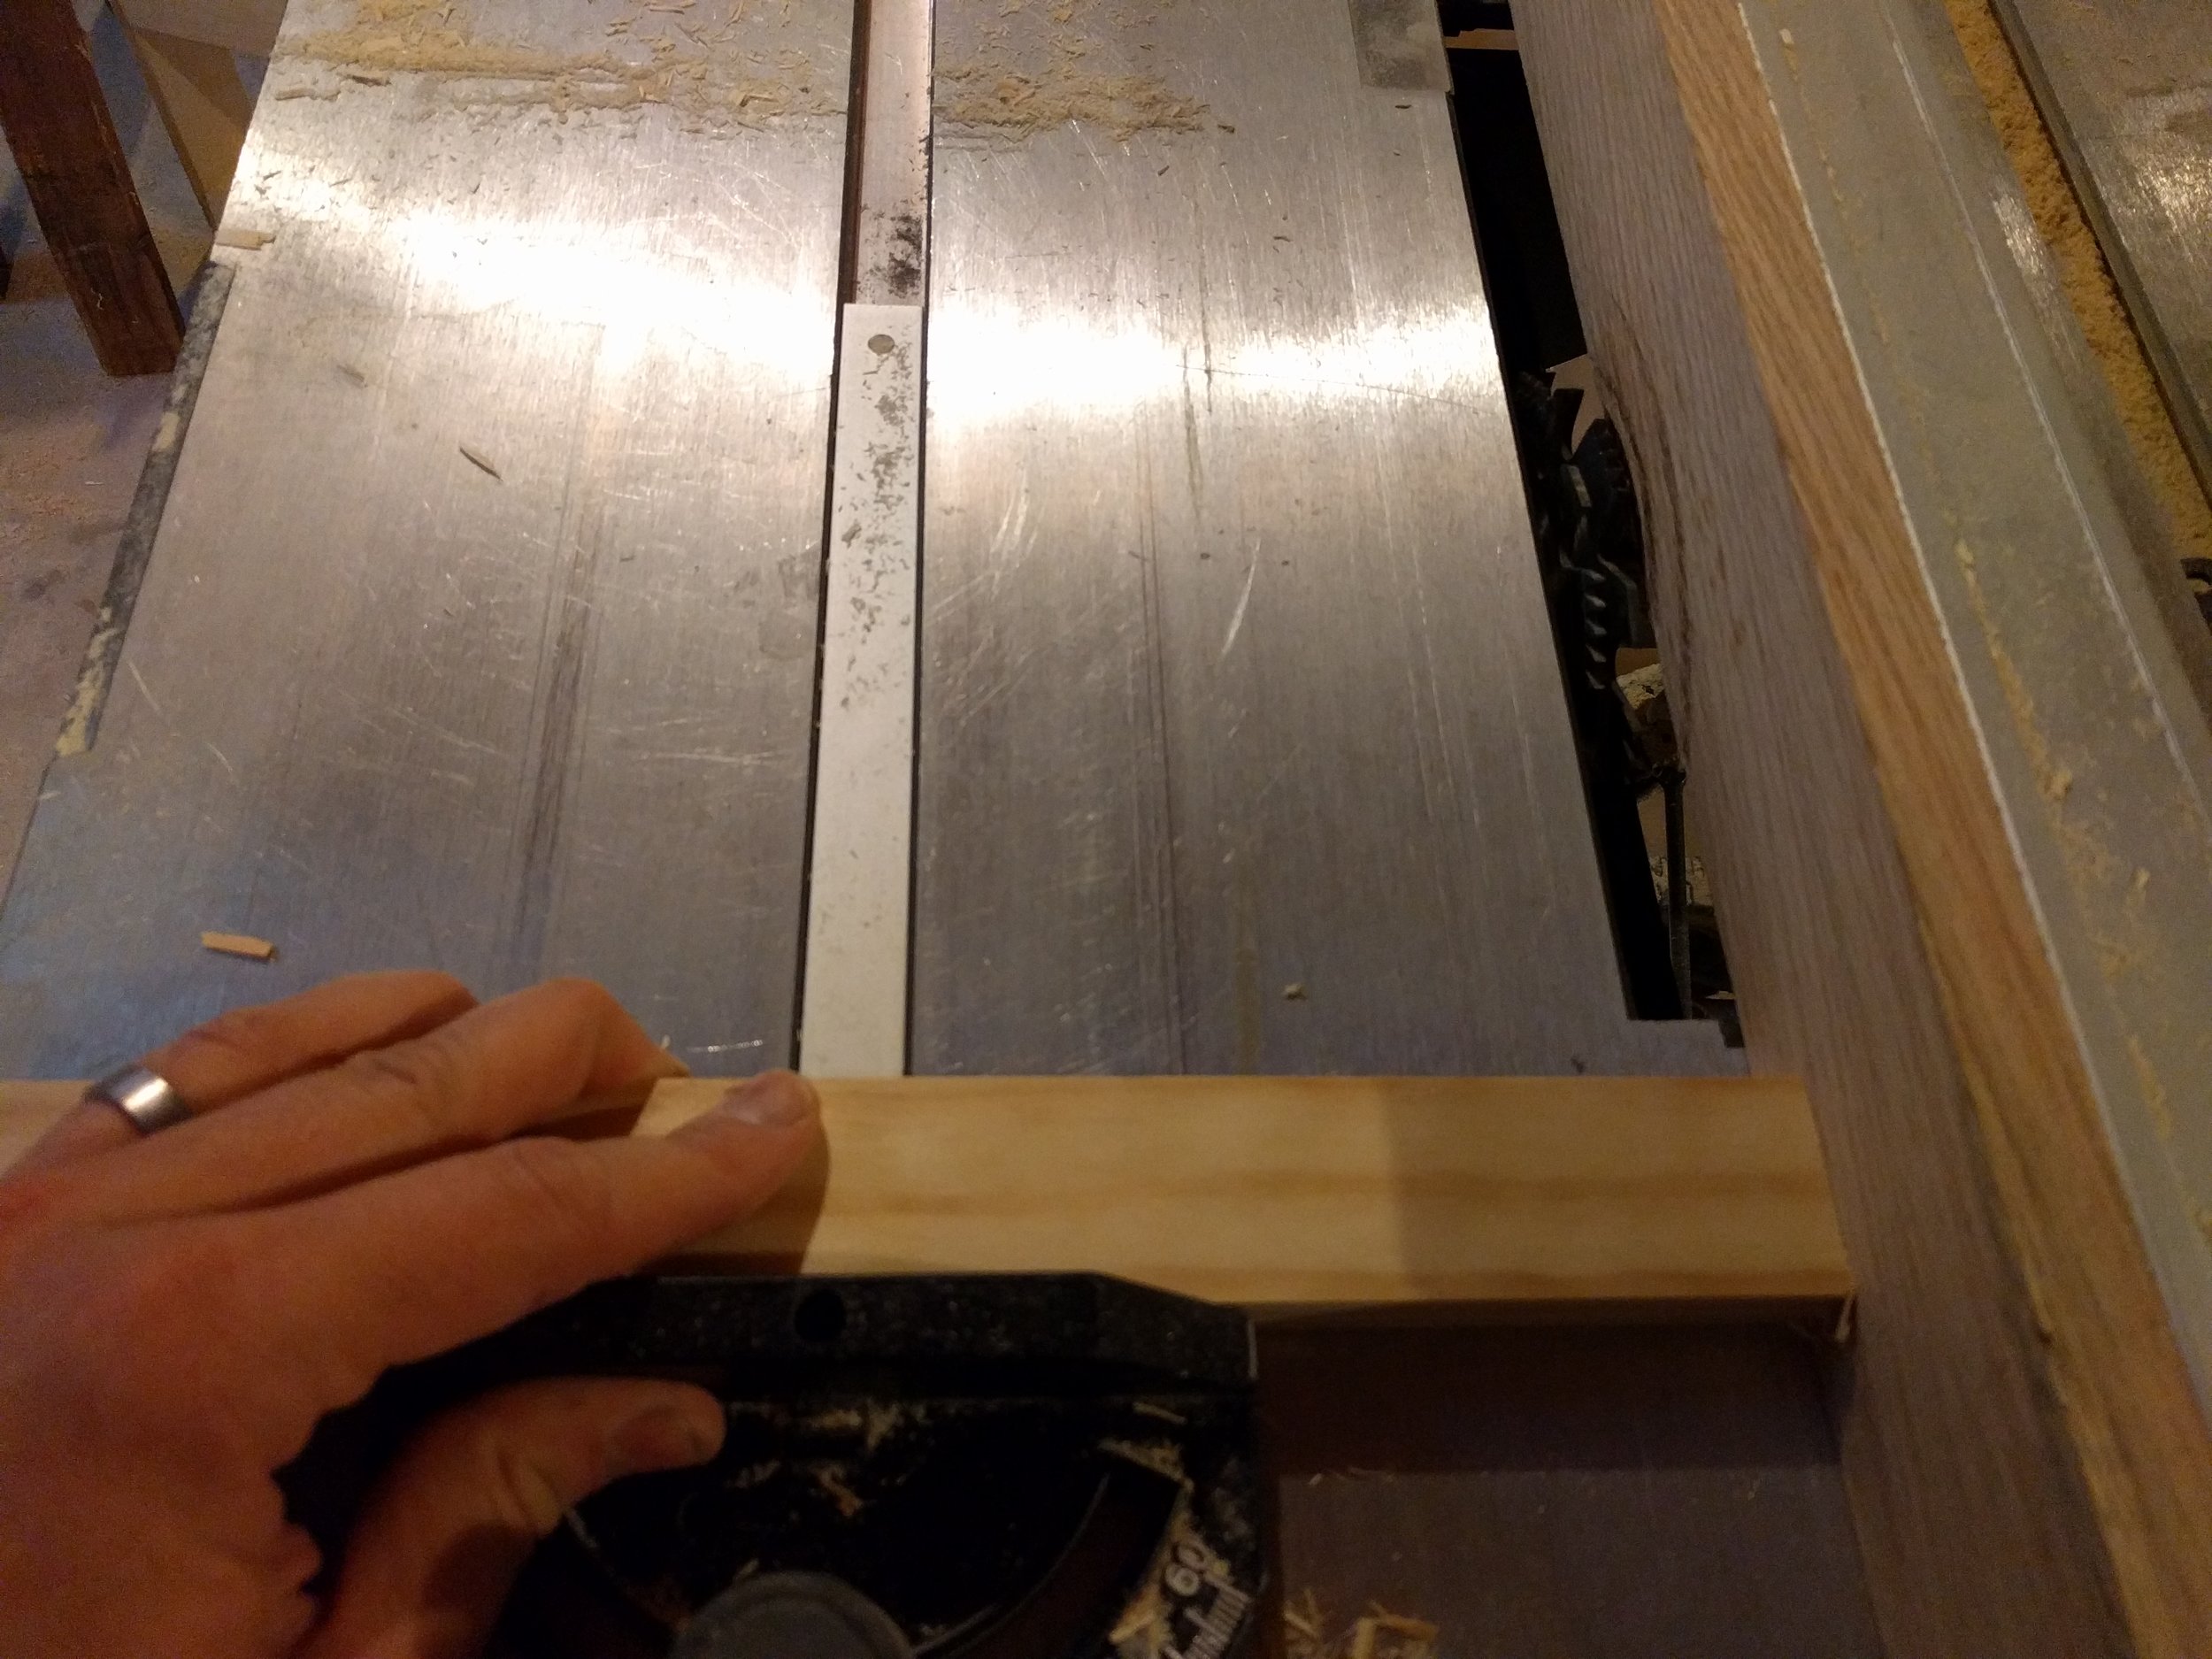
Before I begin cutting, I'll remove all the safety mechanisms from my table saw. Unfortunately, none of them are compatible with the dado blade. It's always nice to take a moment to appreciate how quickly this could become a "shaker style going to the hospital" post. Please note that my fingers are closer to the saw blade in some of these pictures than they should be -- that's because the saw is OFF. Please also note that I'm not wearing gloves. NEVER wear gloves when working with a power saw. If it catches the glove, it can suck your hand right in.
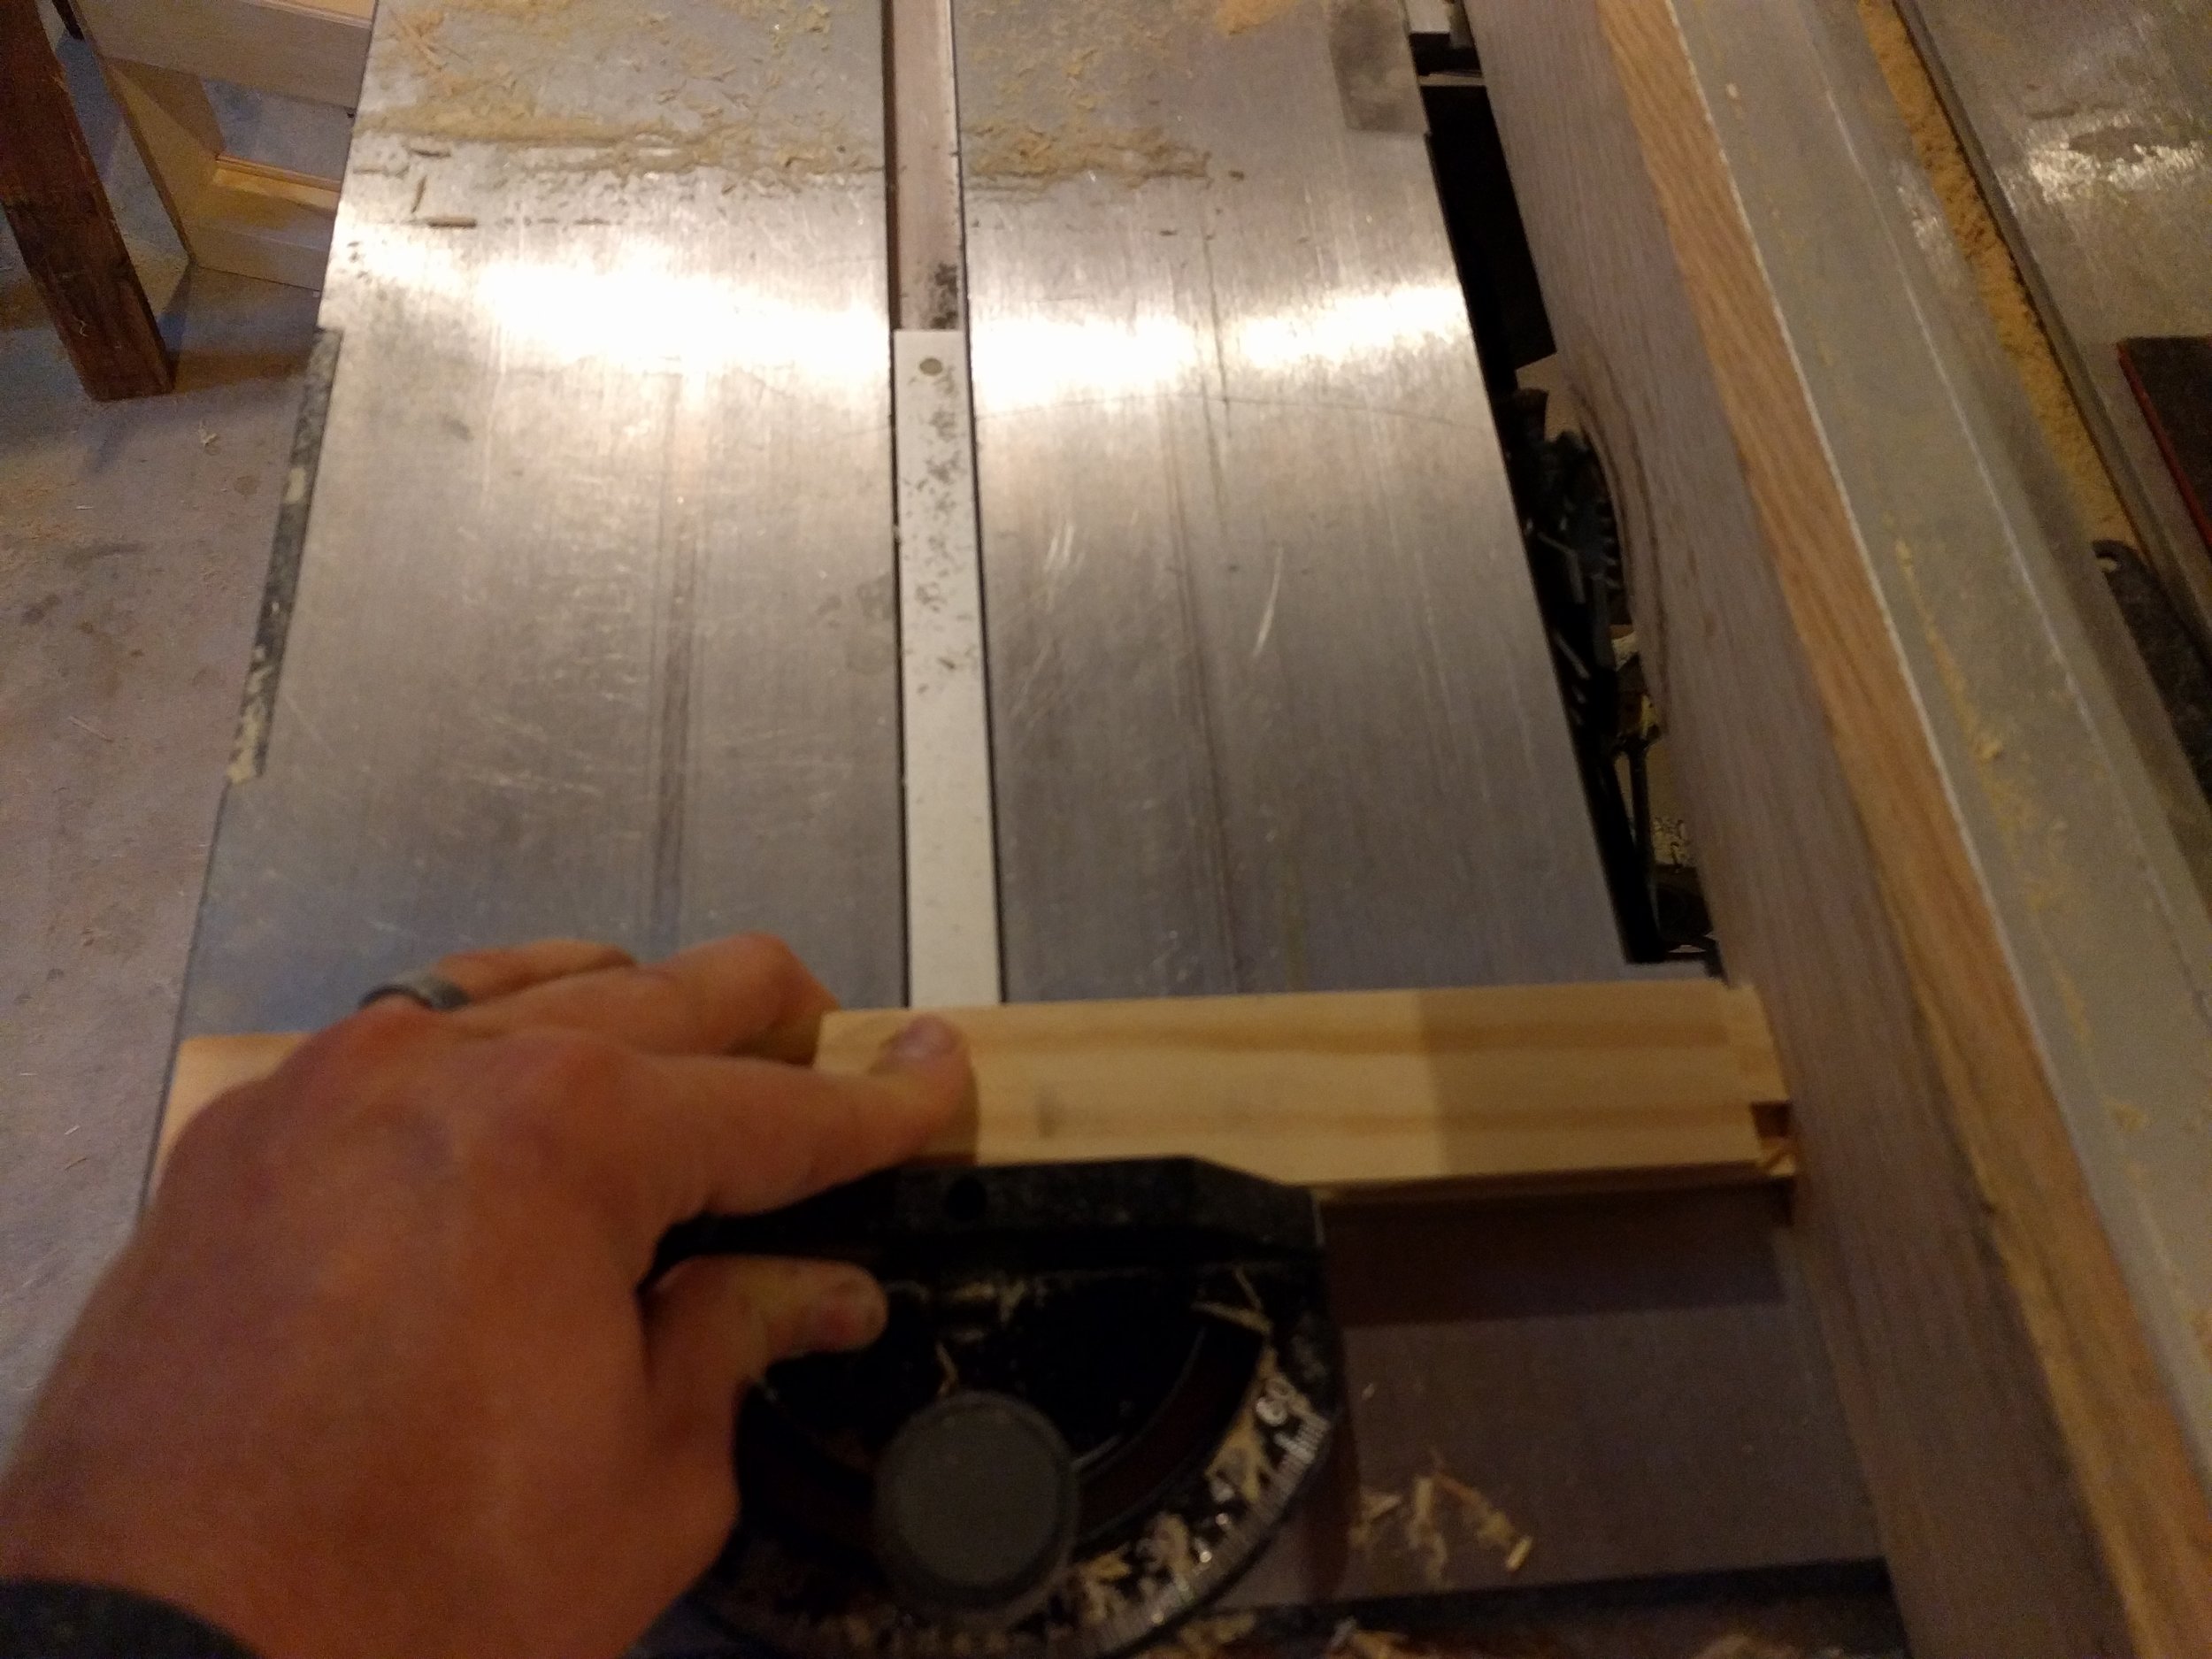
I found it easier to cut a dado in full lengths of 1x2 stock, then cut those pieces to the lengths I need. If I cut to length first, I end up with pieces that are too small to dado without putting my hand dangerously close to the blade. To get the groove dead center, I make one cut, then flip the board around and cut the other side. It takes a few tries on a scrap piece of wood to get the saw adjusted to the exact thickness of your plywood, but it's pretty easy-going after that. I want the groove to be exactly 1/2" deep.
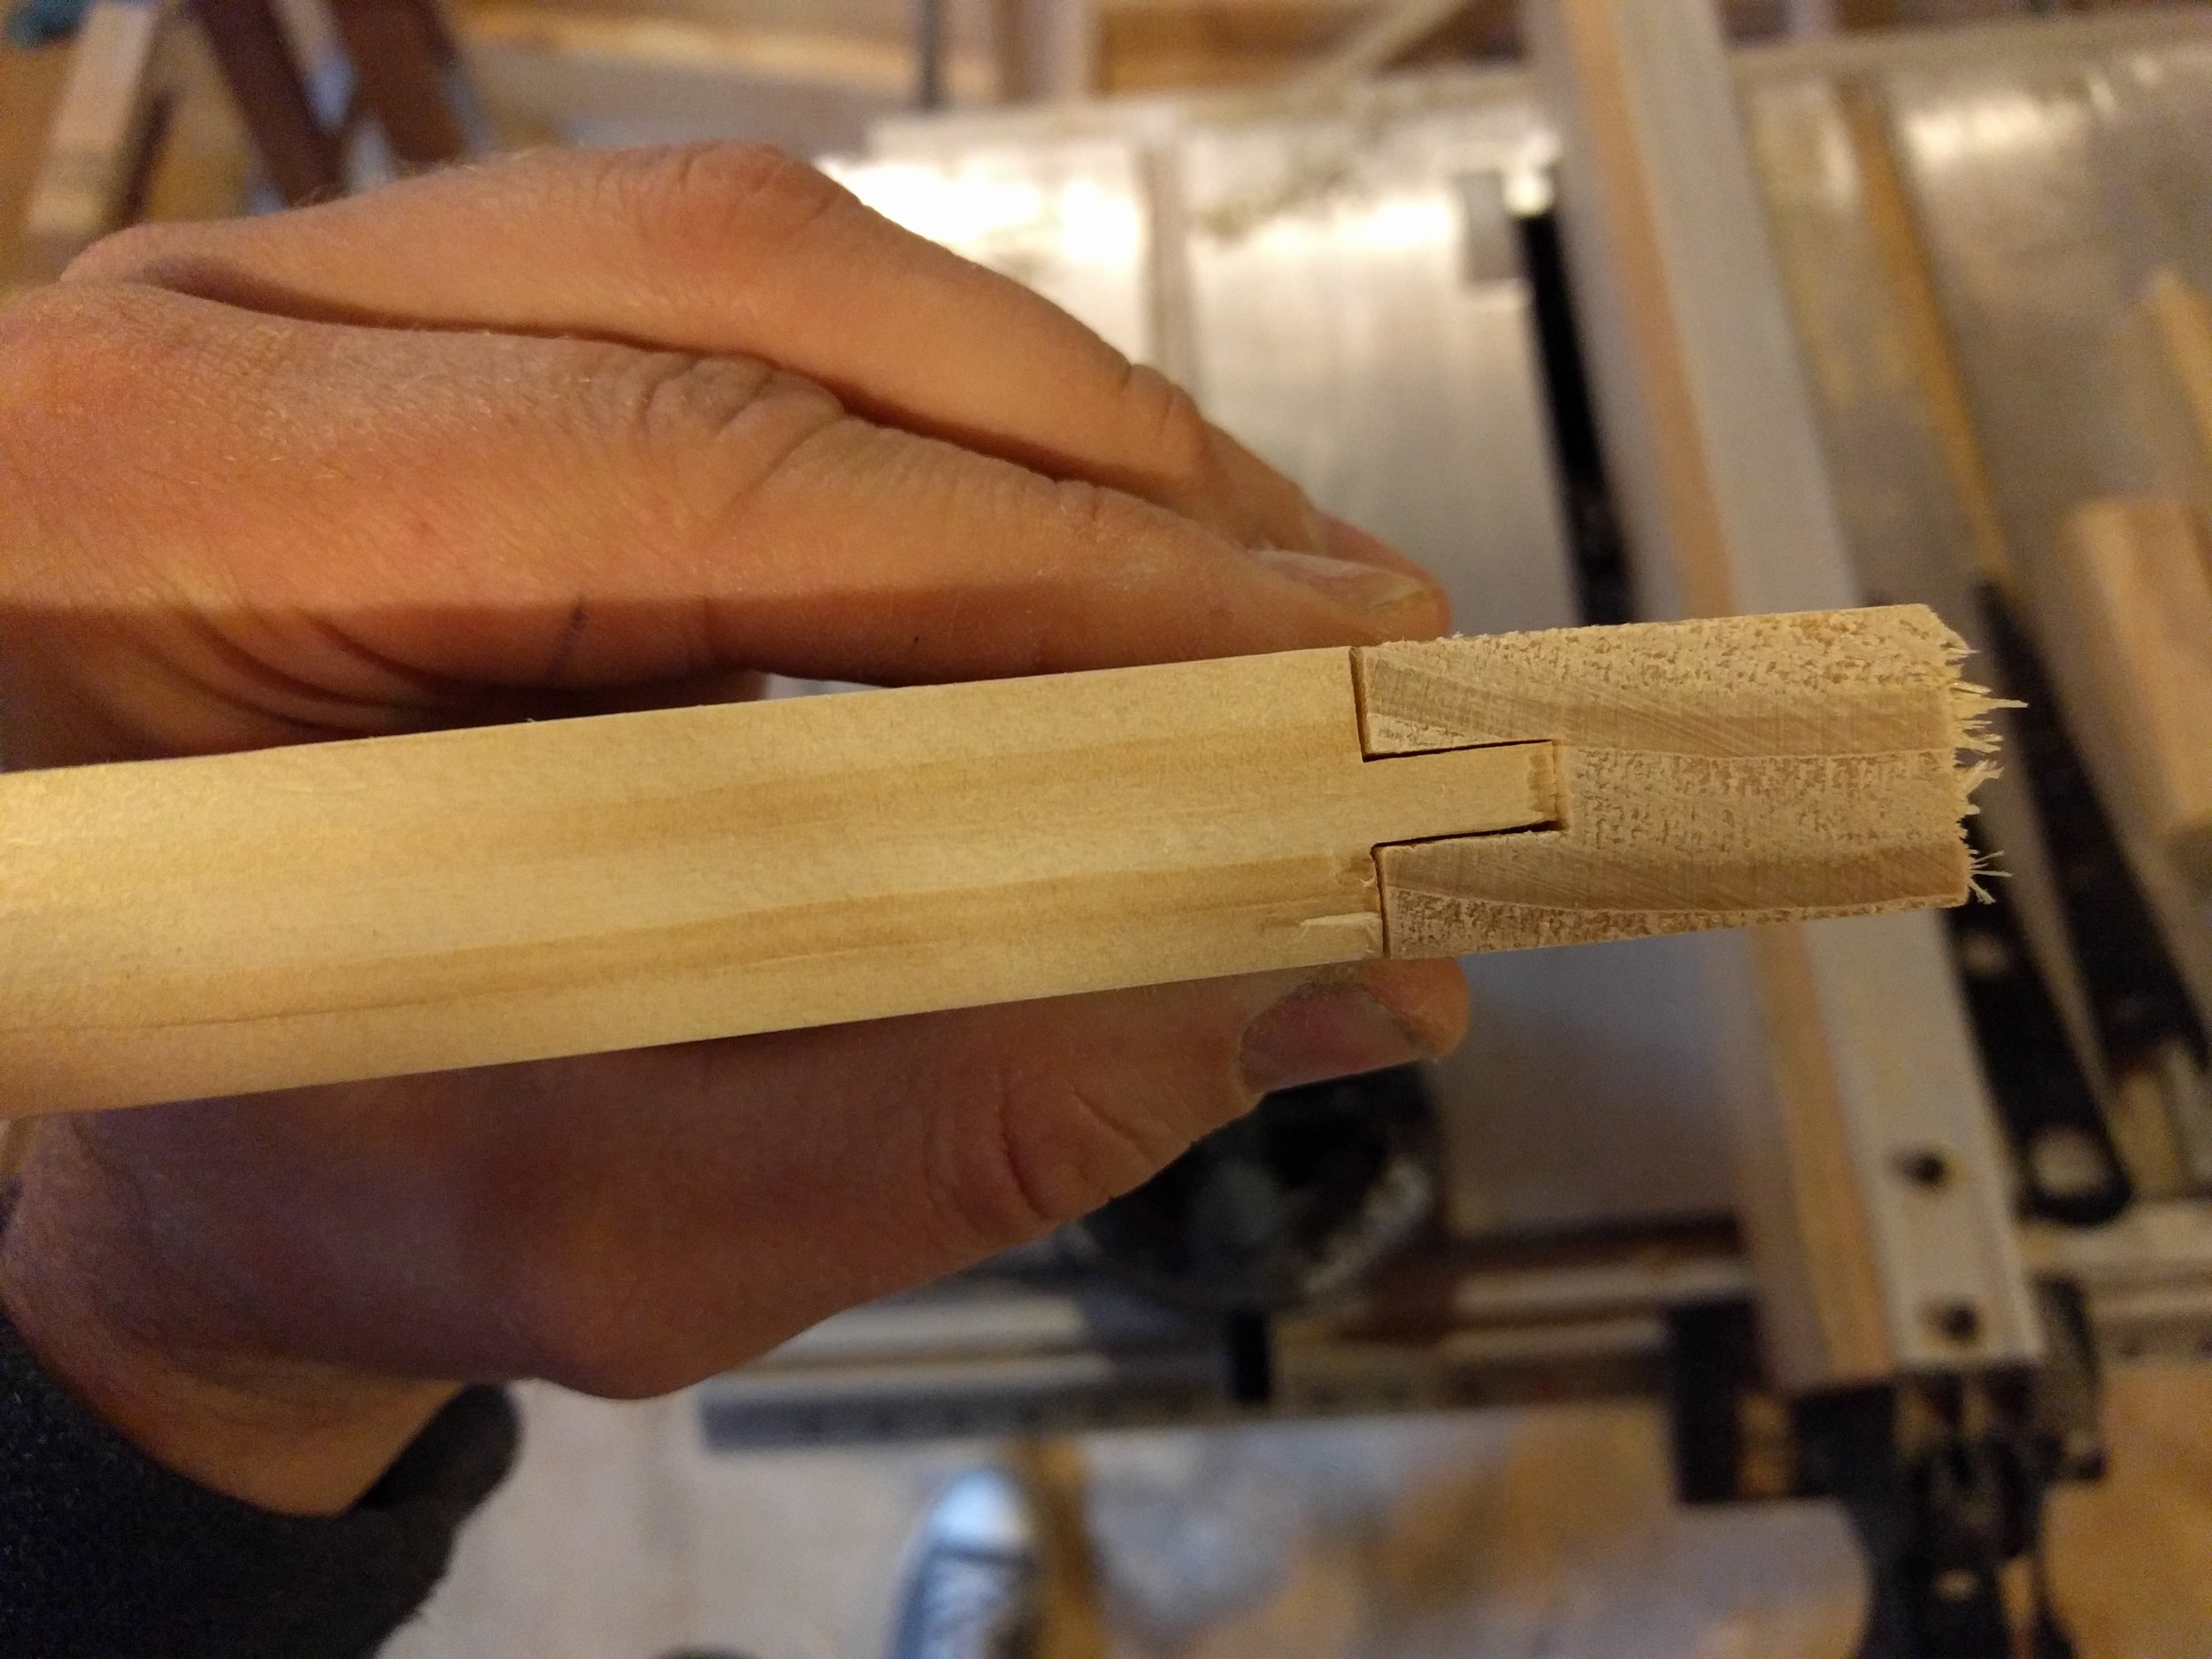
Next, I need to cut all my pieces to length. The left and right sides of each piece are exactly the same height as the finished piece because they go all the way to the edge. The top and bottom are two inches less than the width of the finished piece, because they only go as far as the end of the groove in the sides.
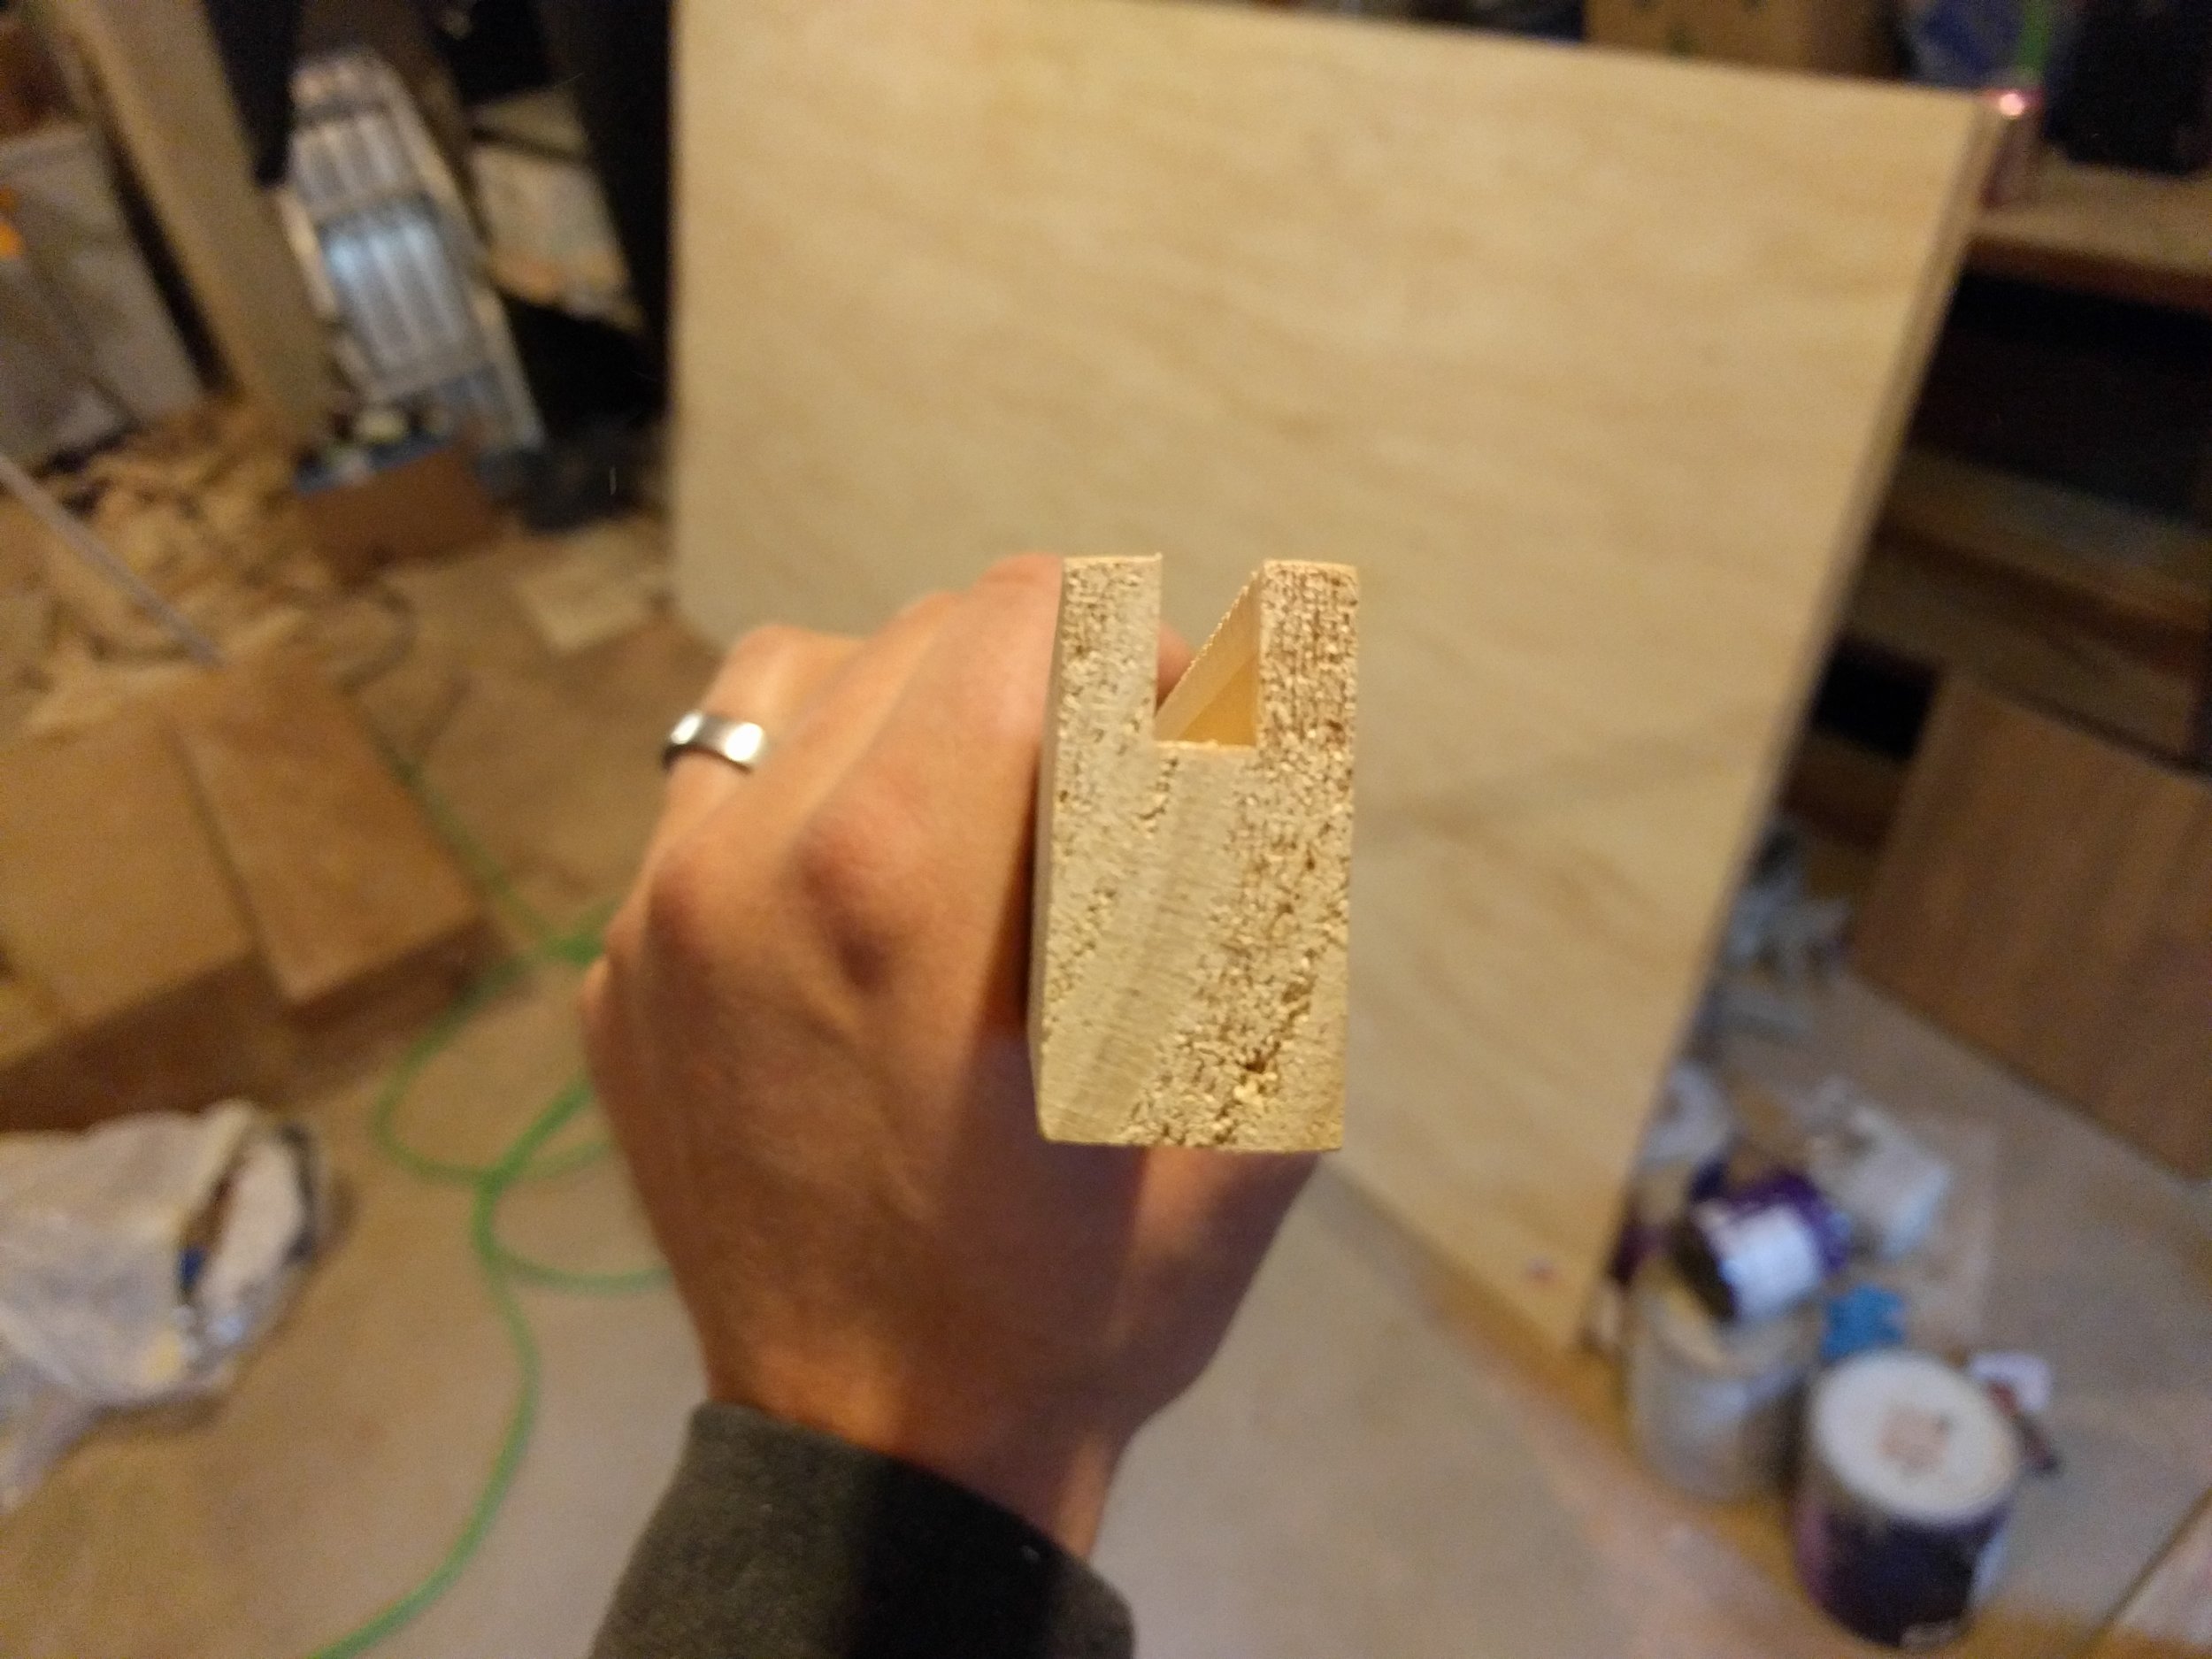
The sides are done, so now I need to cut the ends of the top and bottom. The shoulder of this cut needs to be exactly the same as the depth of the grooves we cut earlier, and the thickness of the wood that's left needs to be exactly the same thickness as your plywood. It may take a few tries to get the saw set up, but once it's done, you'll breeze through all your cuts pretty quickly.

The plywood panels for each of these doors should be two inches in either direction less than the finished dimension. In my experience, it helped to cut 1/8" or so smaller that that to make sure everything fit together nicely. After test-fitting all my doors and drawer fronts to make sure everything fits, it's time to glue. You don't need very much glue. If it's messy, you're using too much.
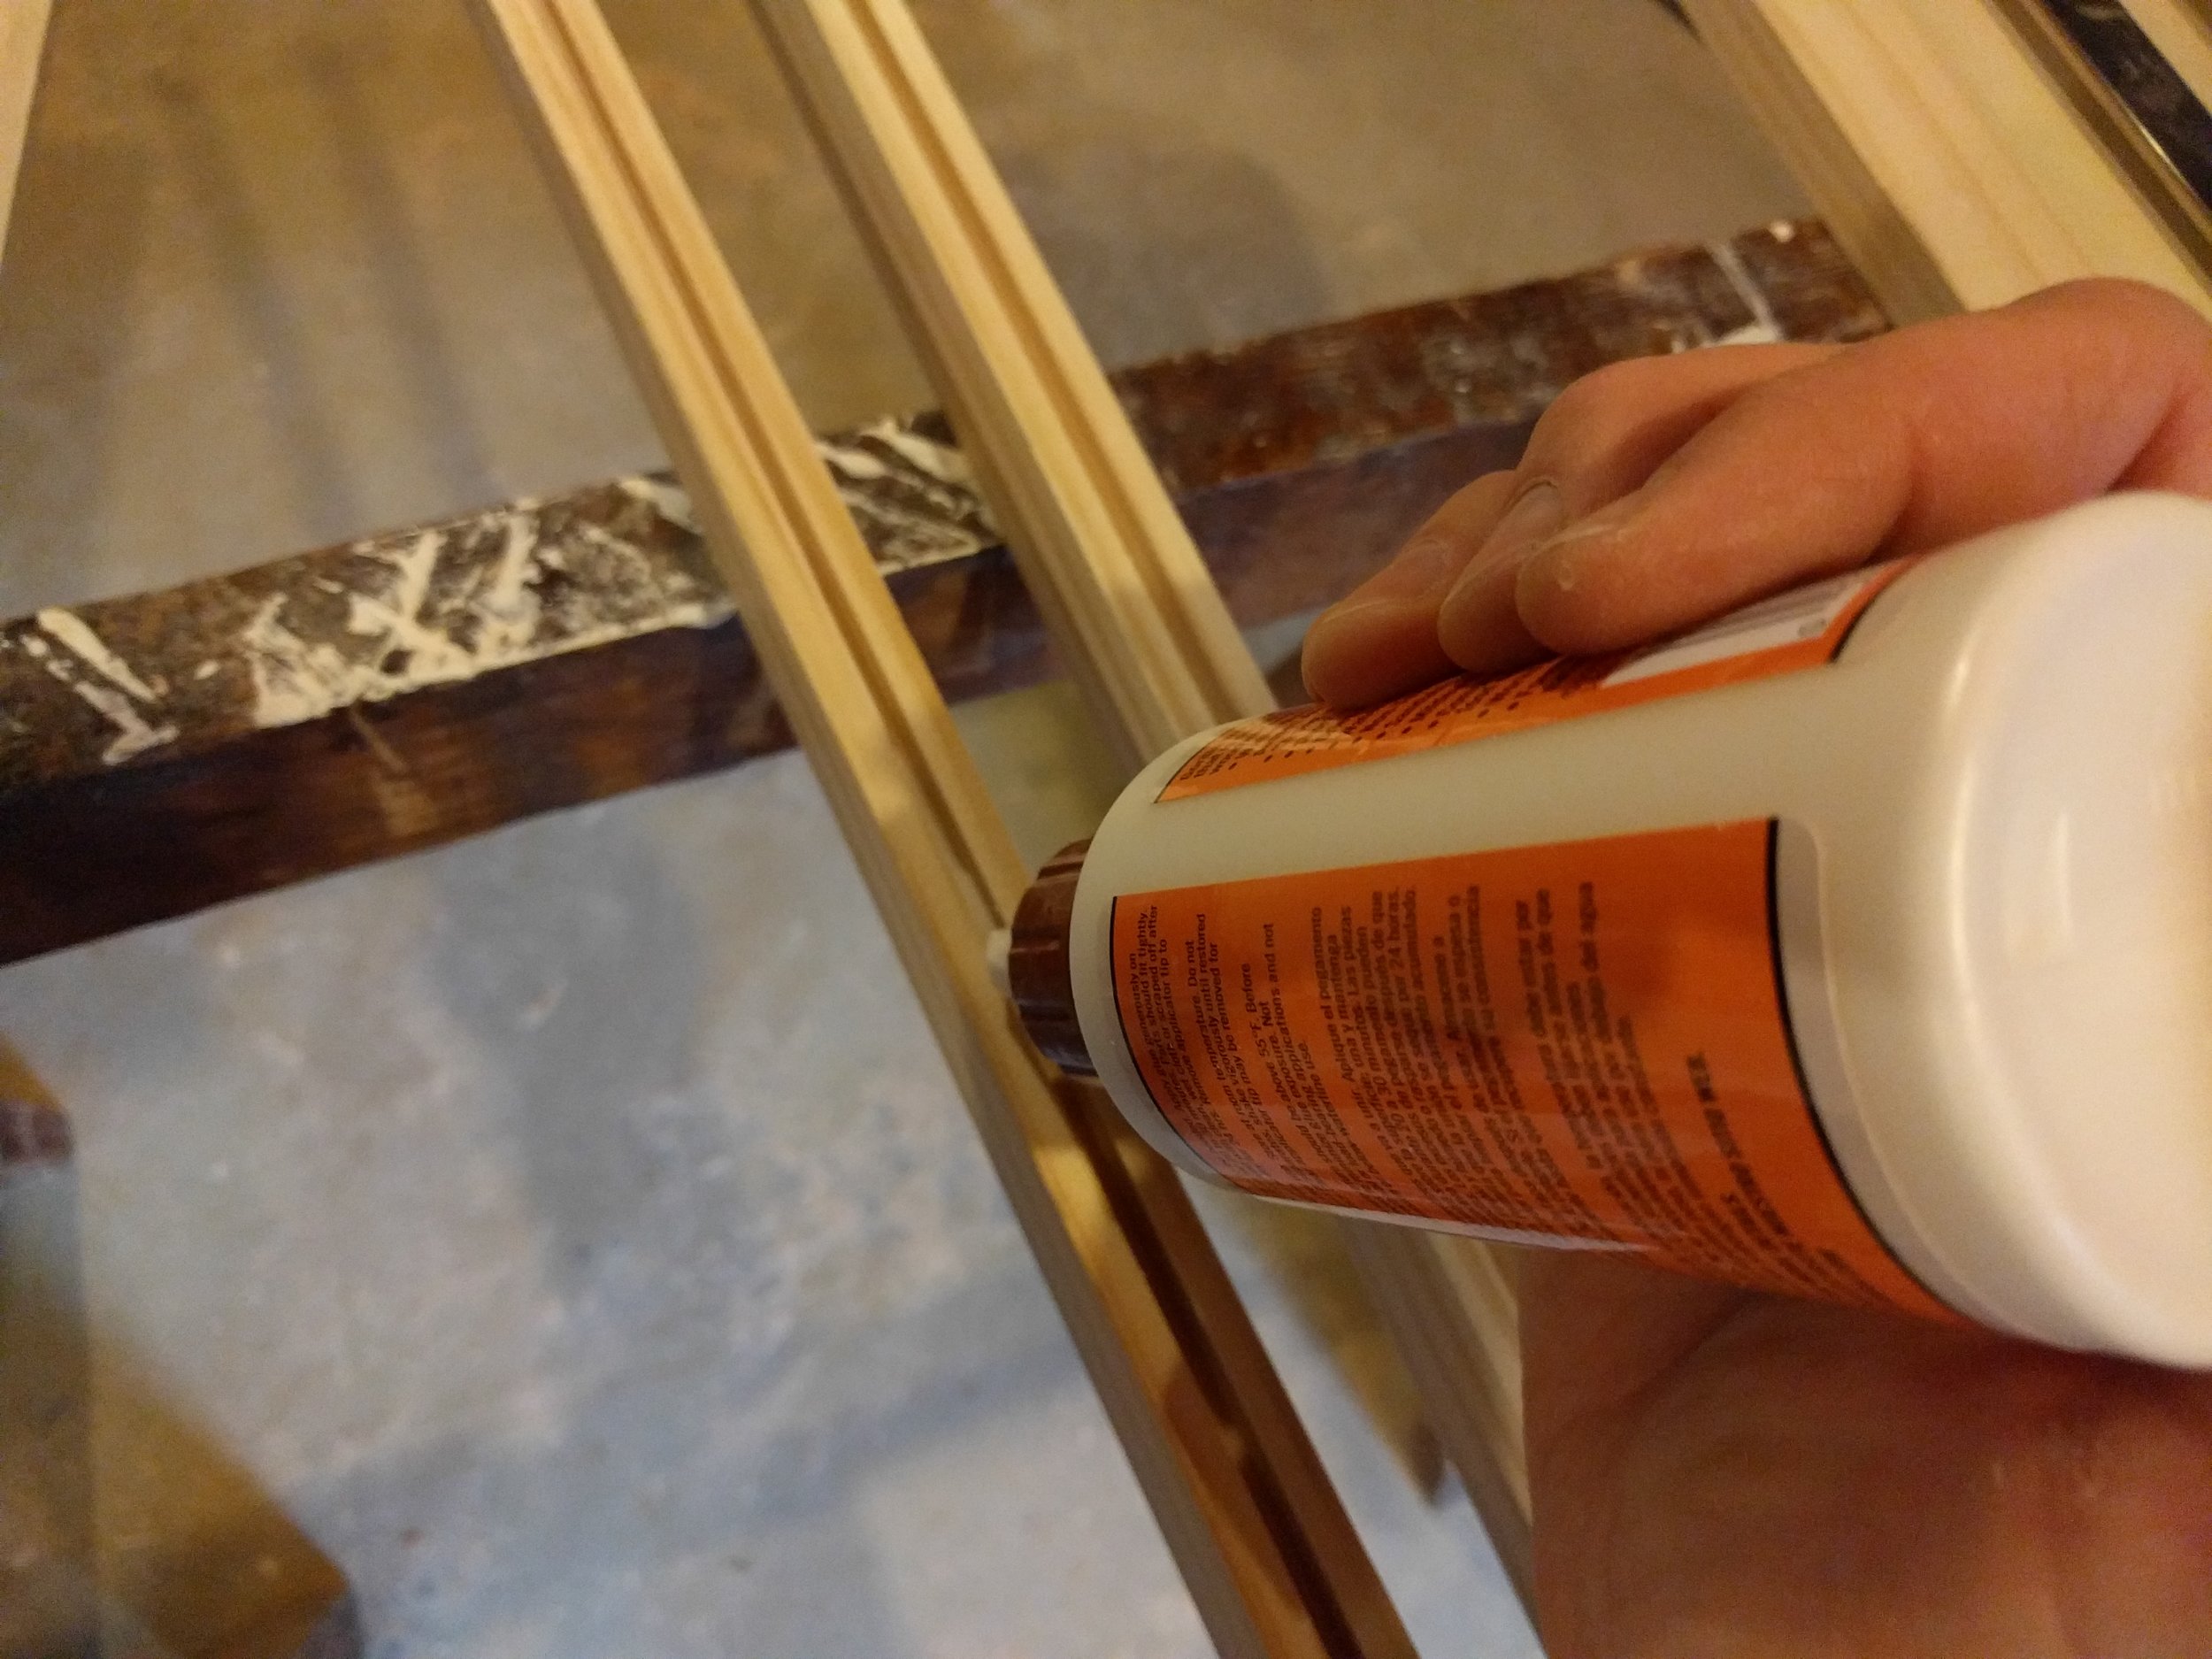
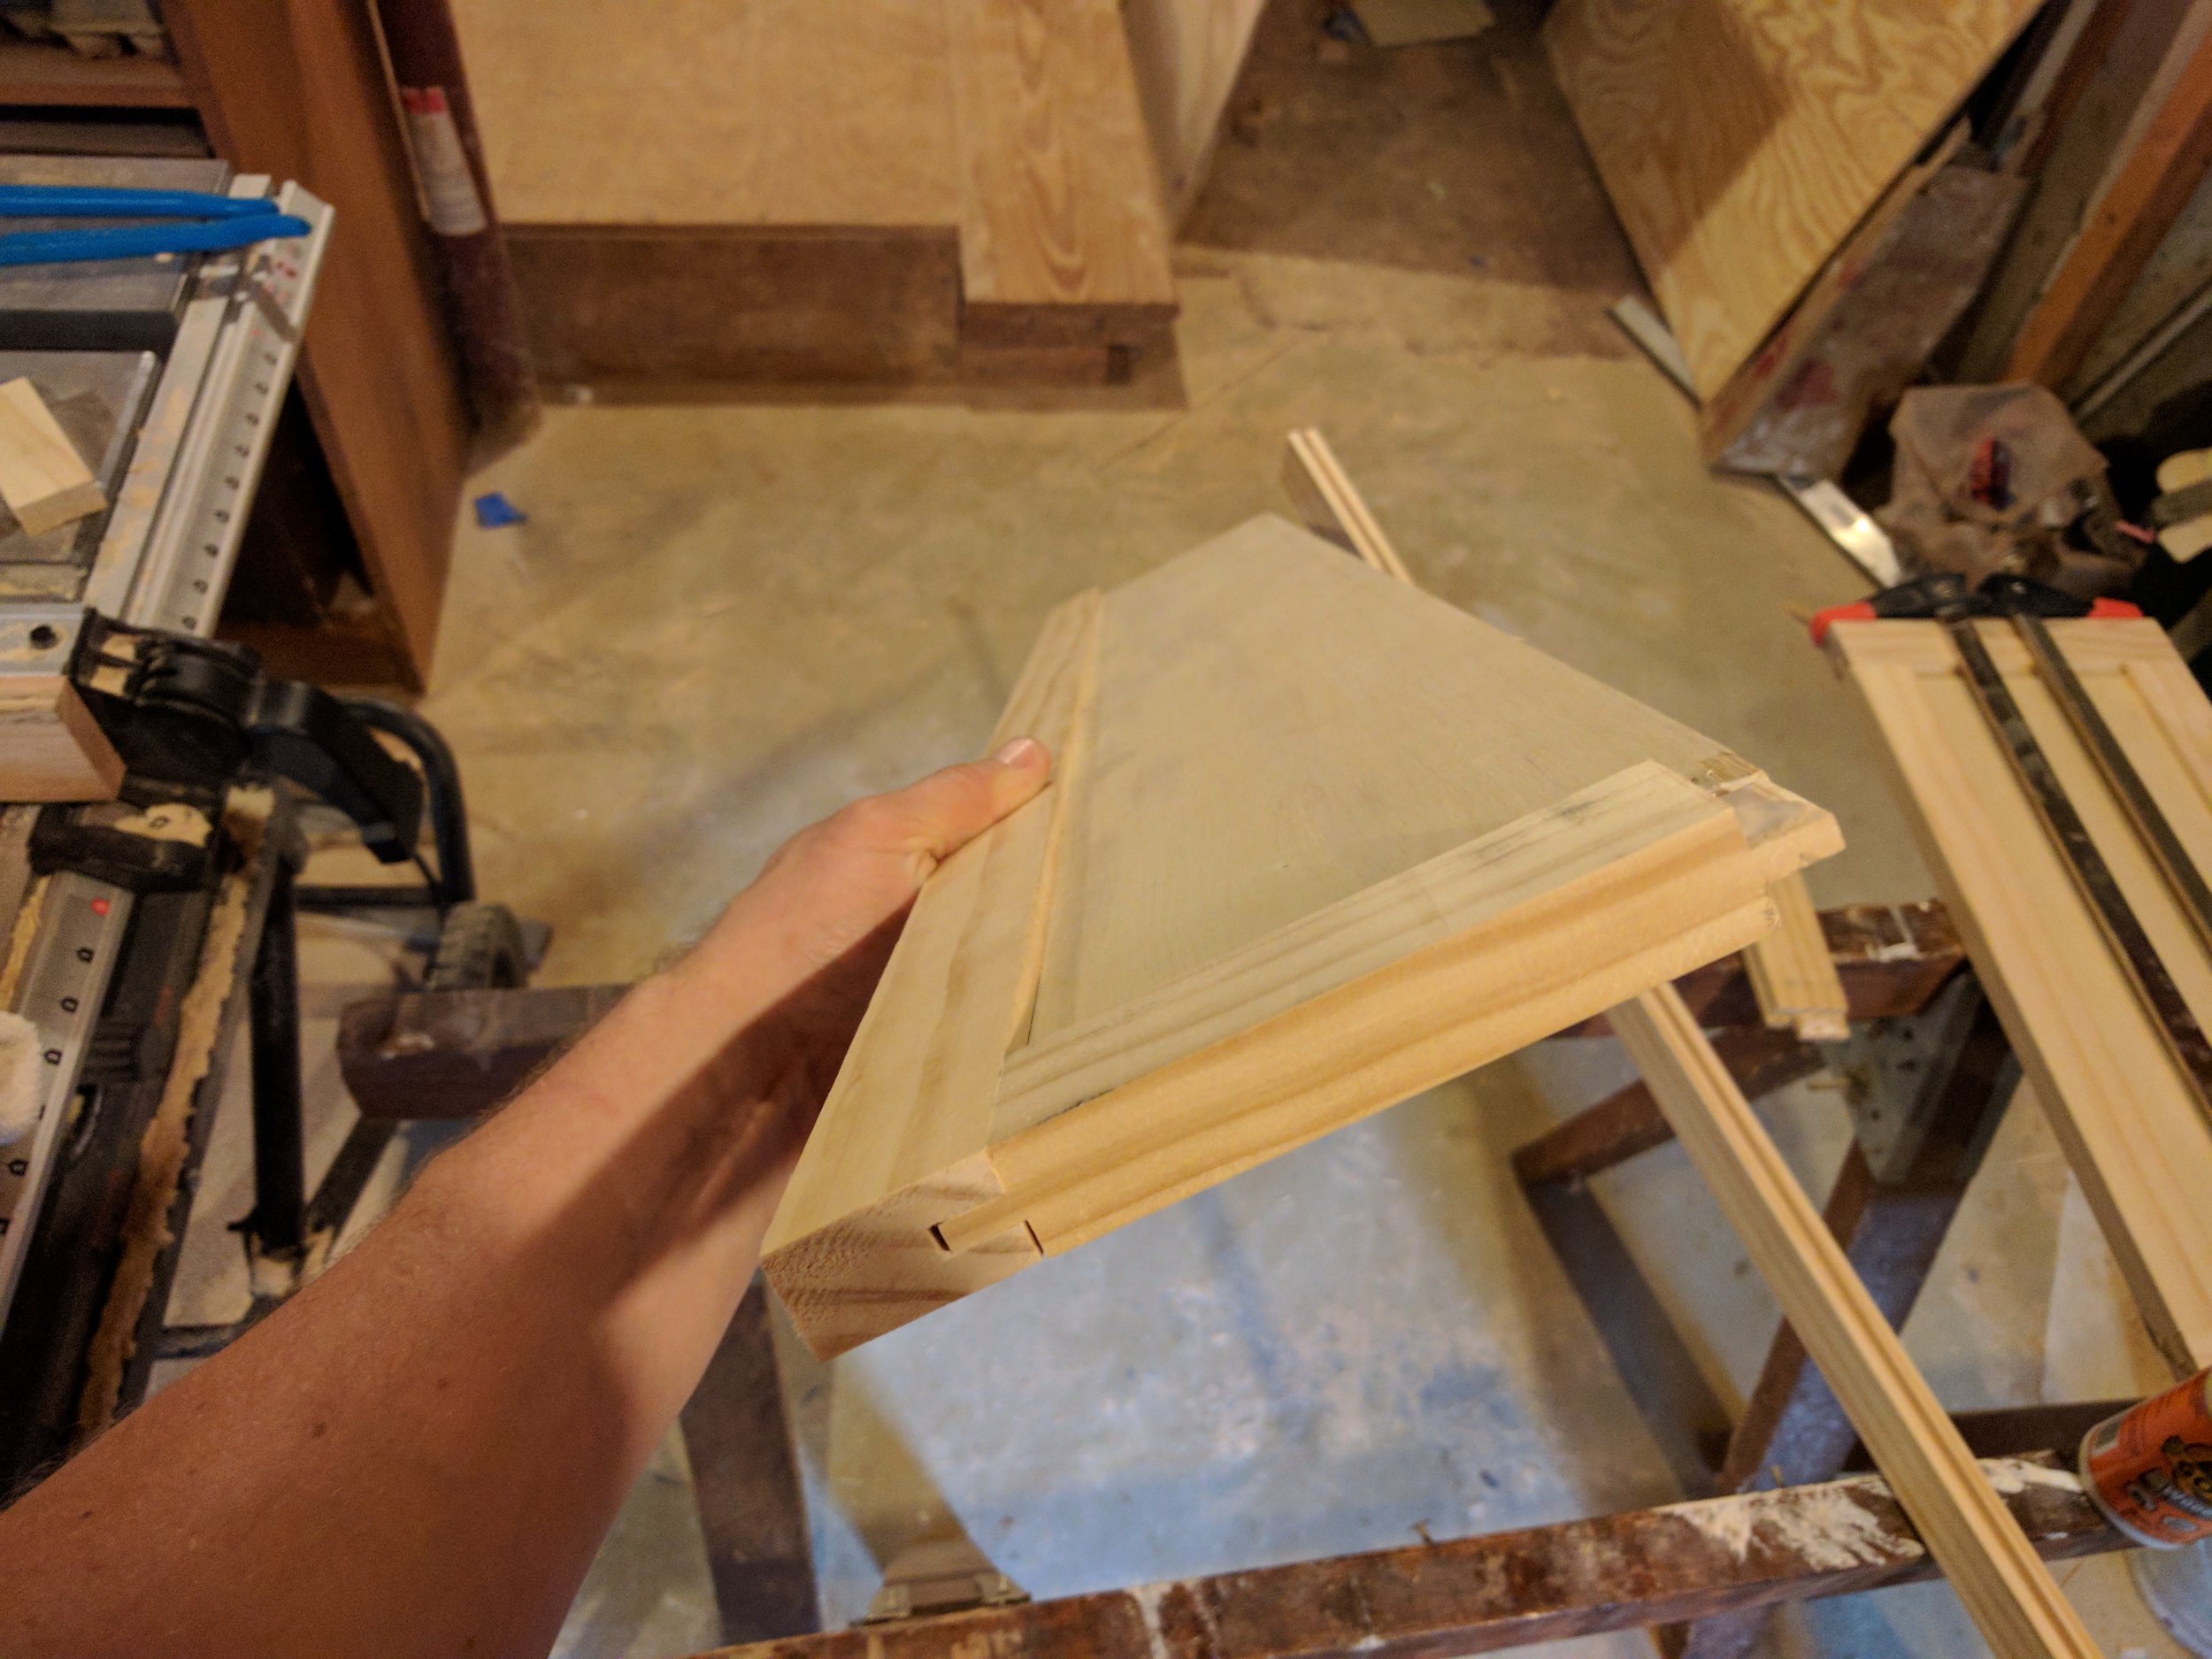
Once your piece is assembled, clamp it together. You really do need to clamp it, it'll be much stronger that way. Check your bottle of glue to see how long it needs to be clamped. If you have a limited number of clamps, this is where a fast-setting wood glue comes in handy.

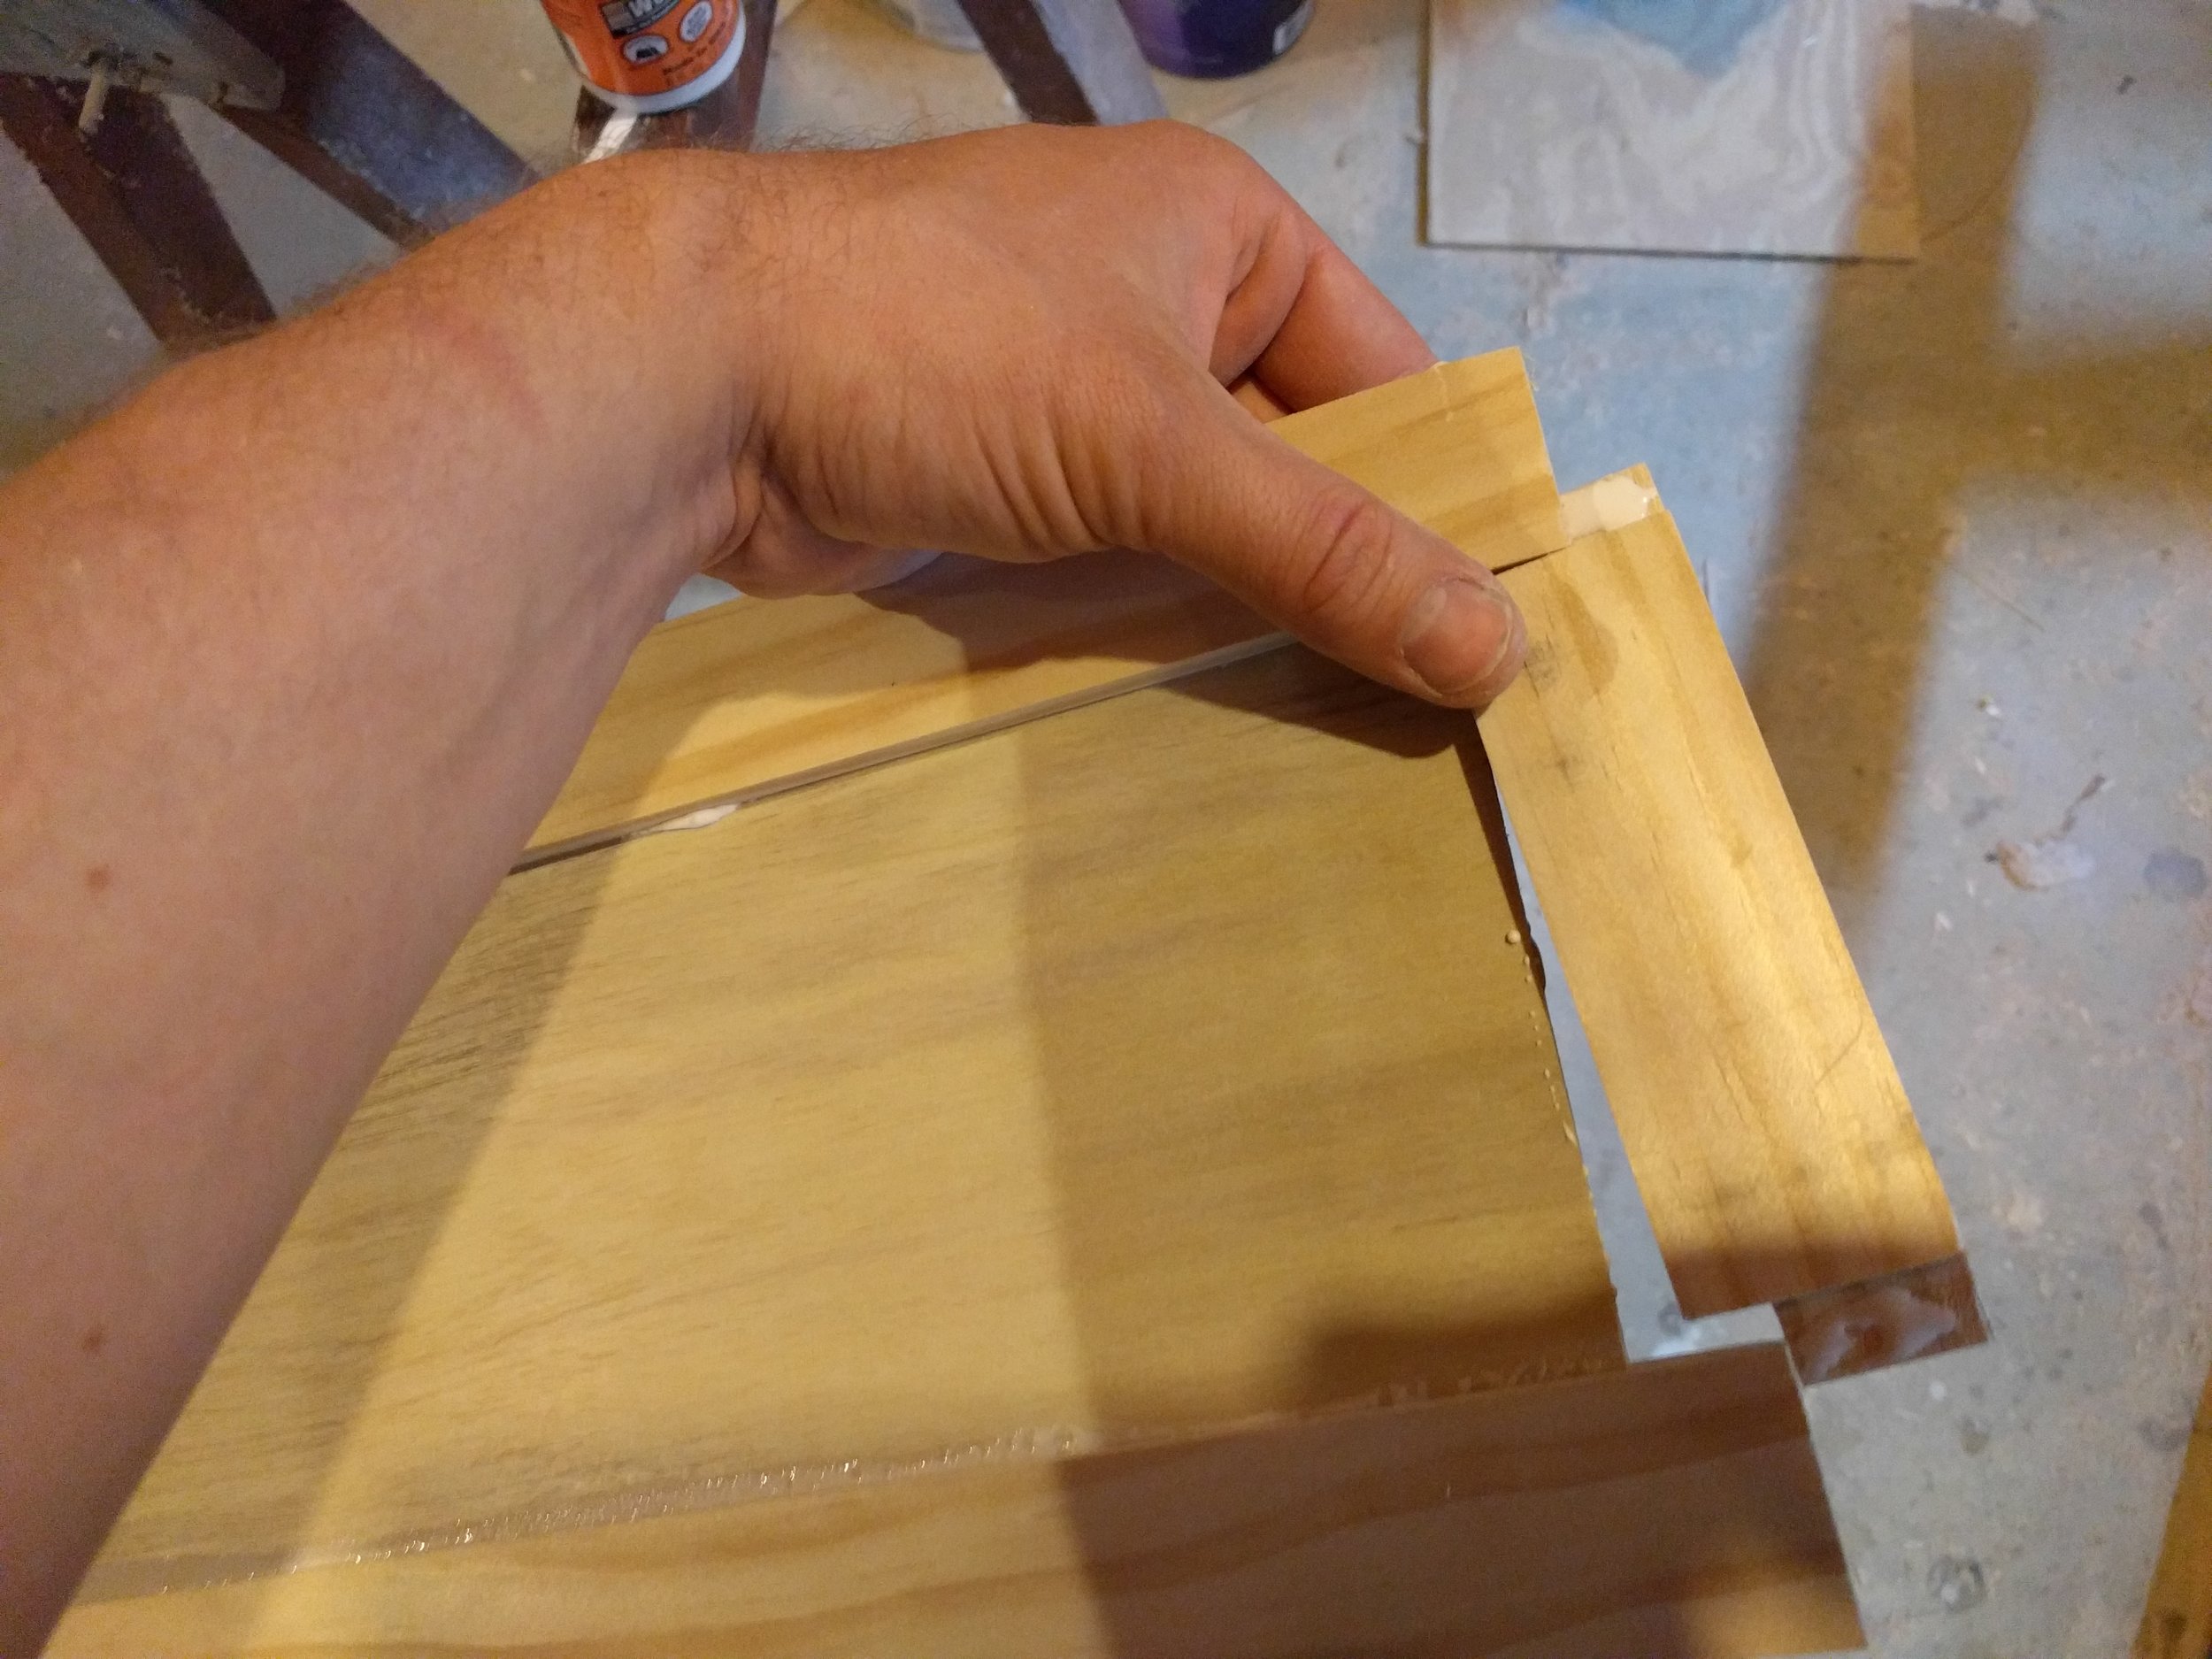
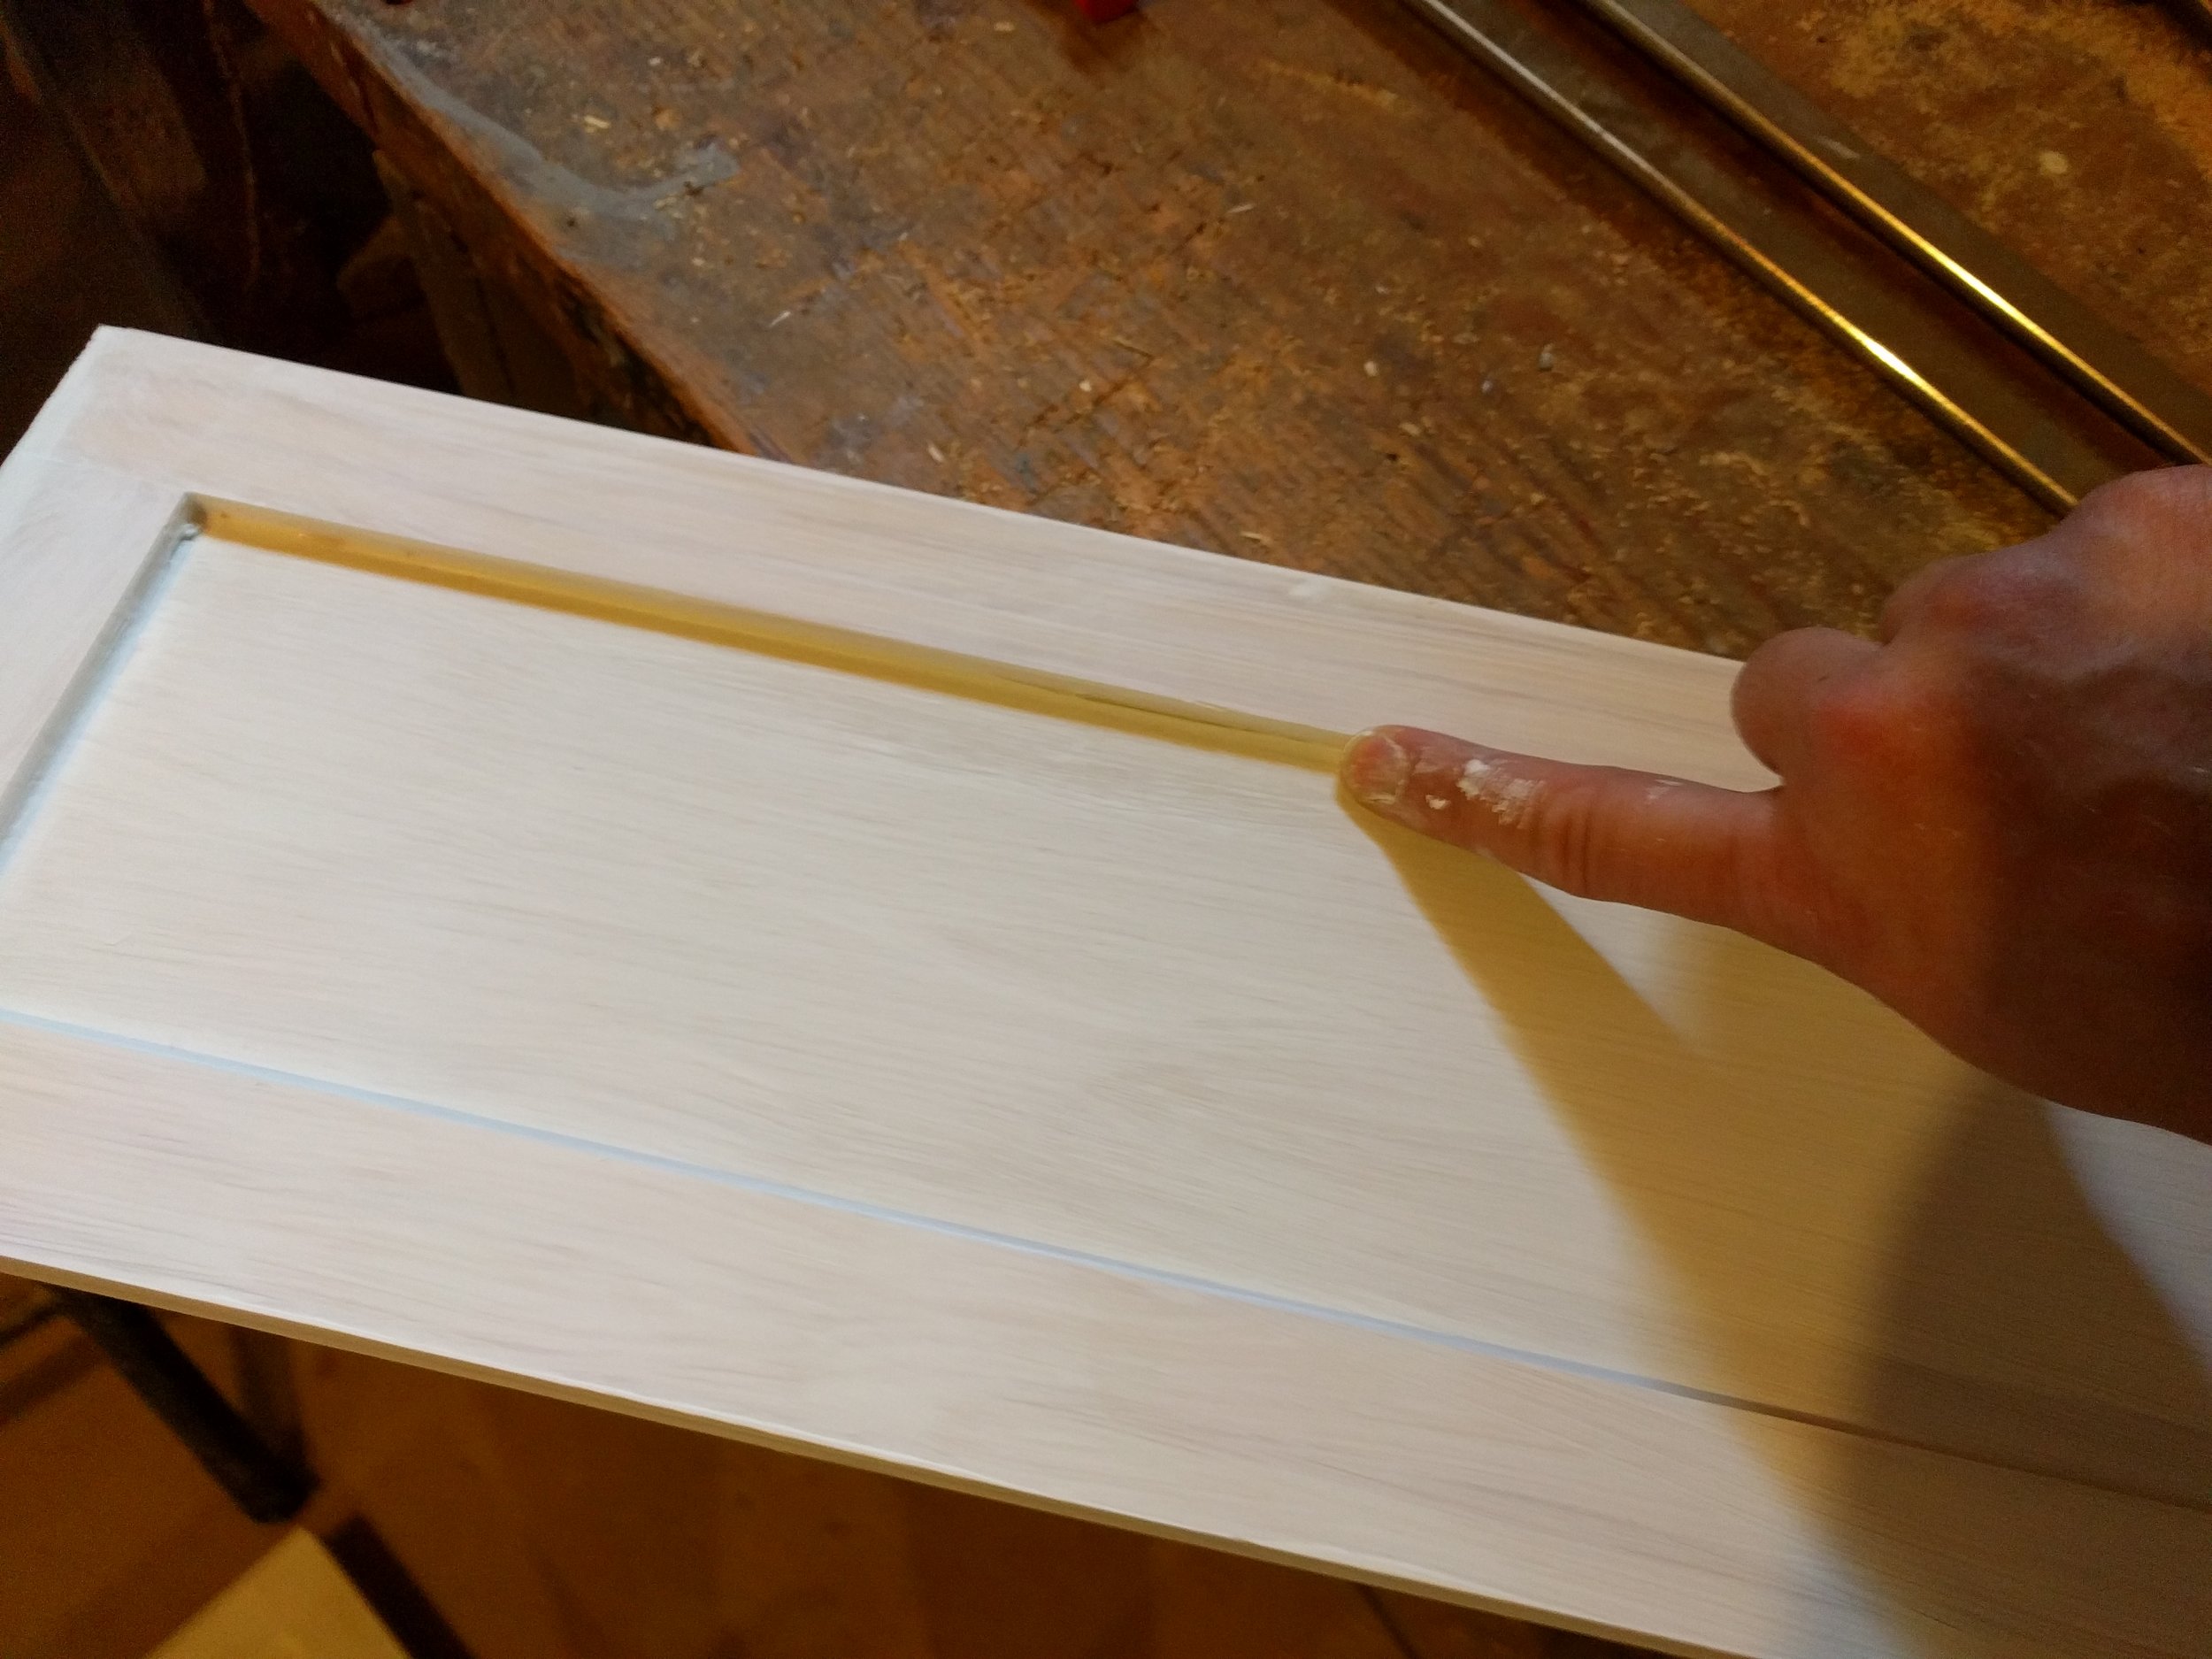
If you're going to paint your doors/drawer fronts, you need to caulk the seams between the plywood face and the frame. Use the cheap latex painters caulk for this. You don't need silicone or anything fancy. If it's the cheapest caulk in the store, you've probably found the right one -- just make sure it's paintable. Do not skip this step or there will be an unsightly crack in this area. You'll also want to sand the edges of your doors/drawer fronts to smooth everything out, especially at the seams in the corners.

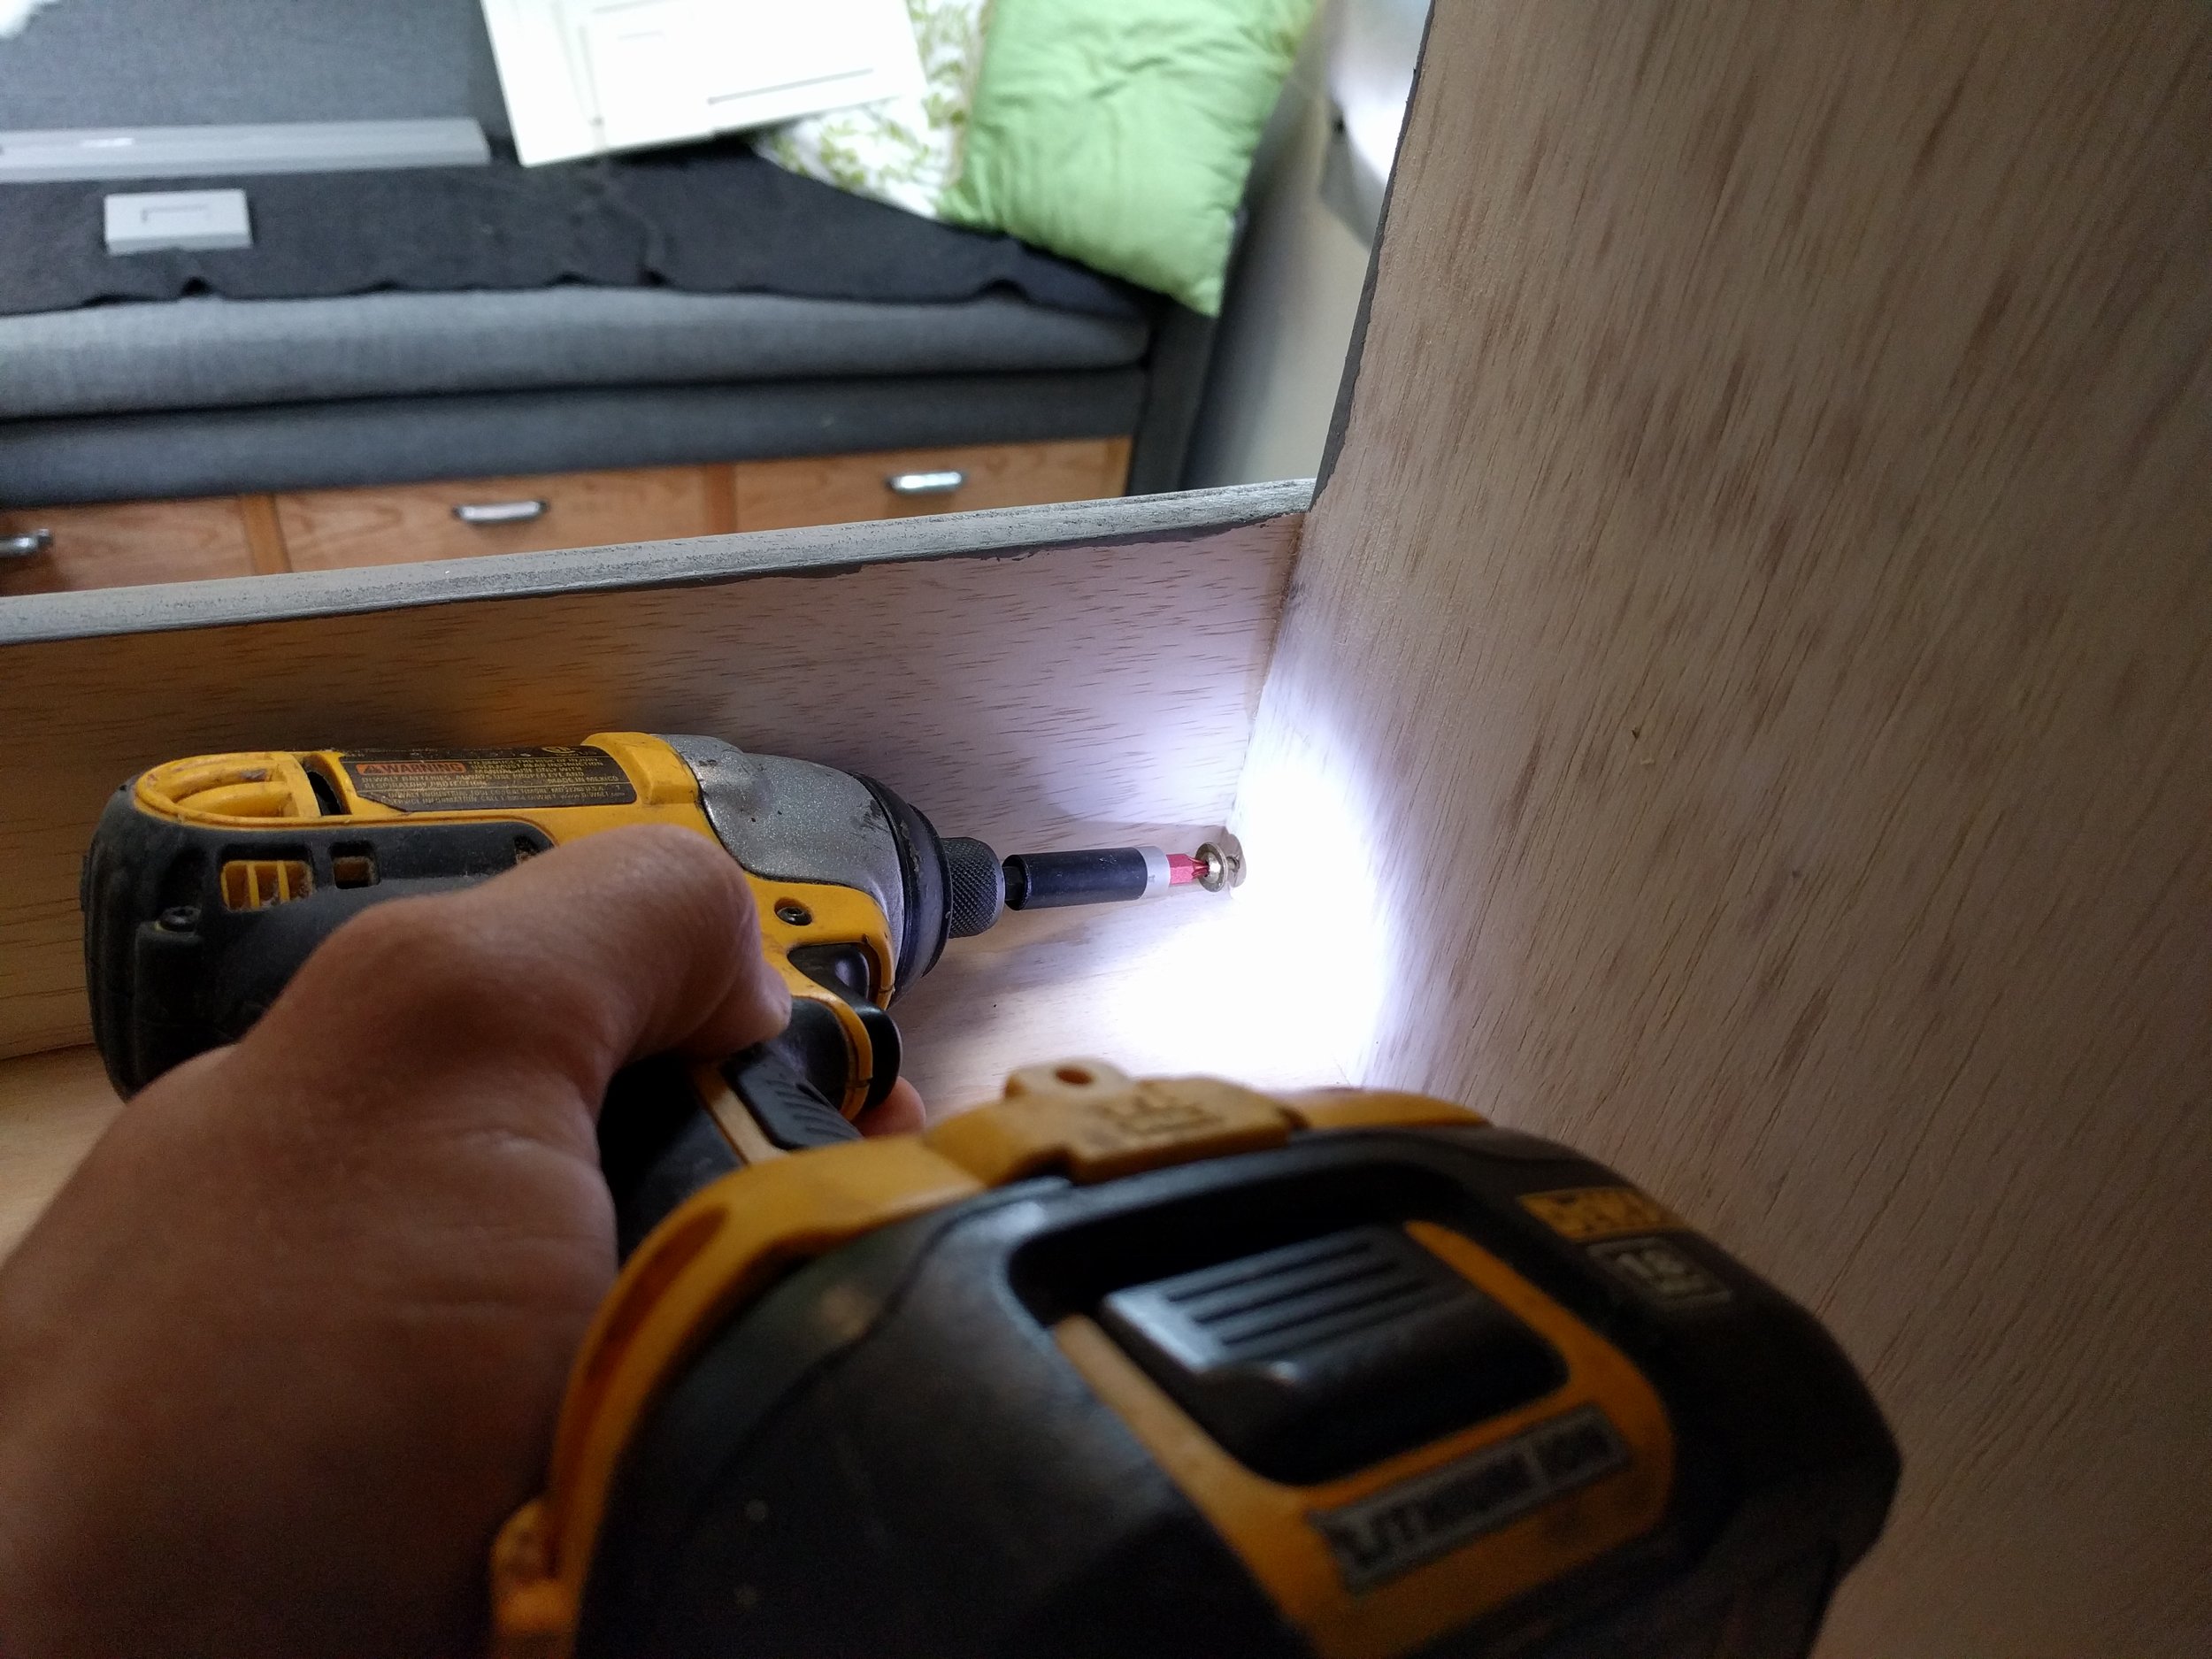
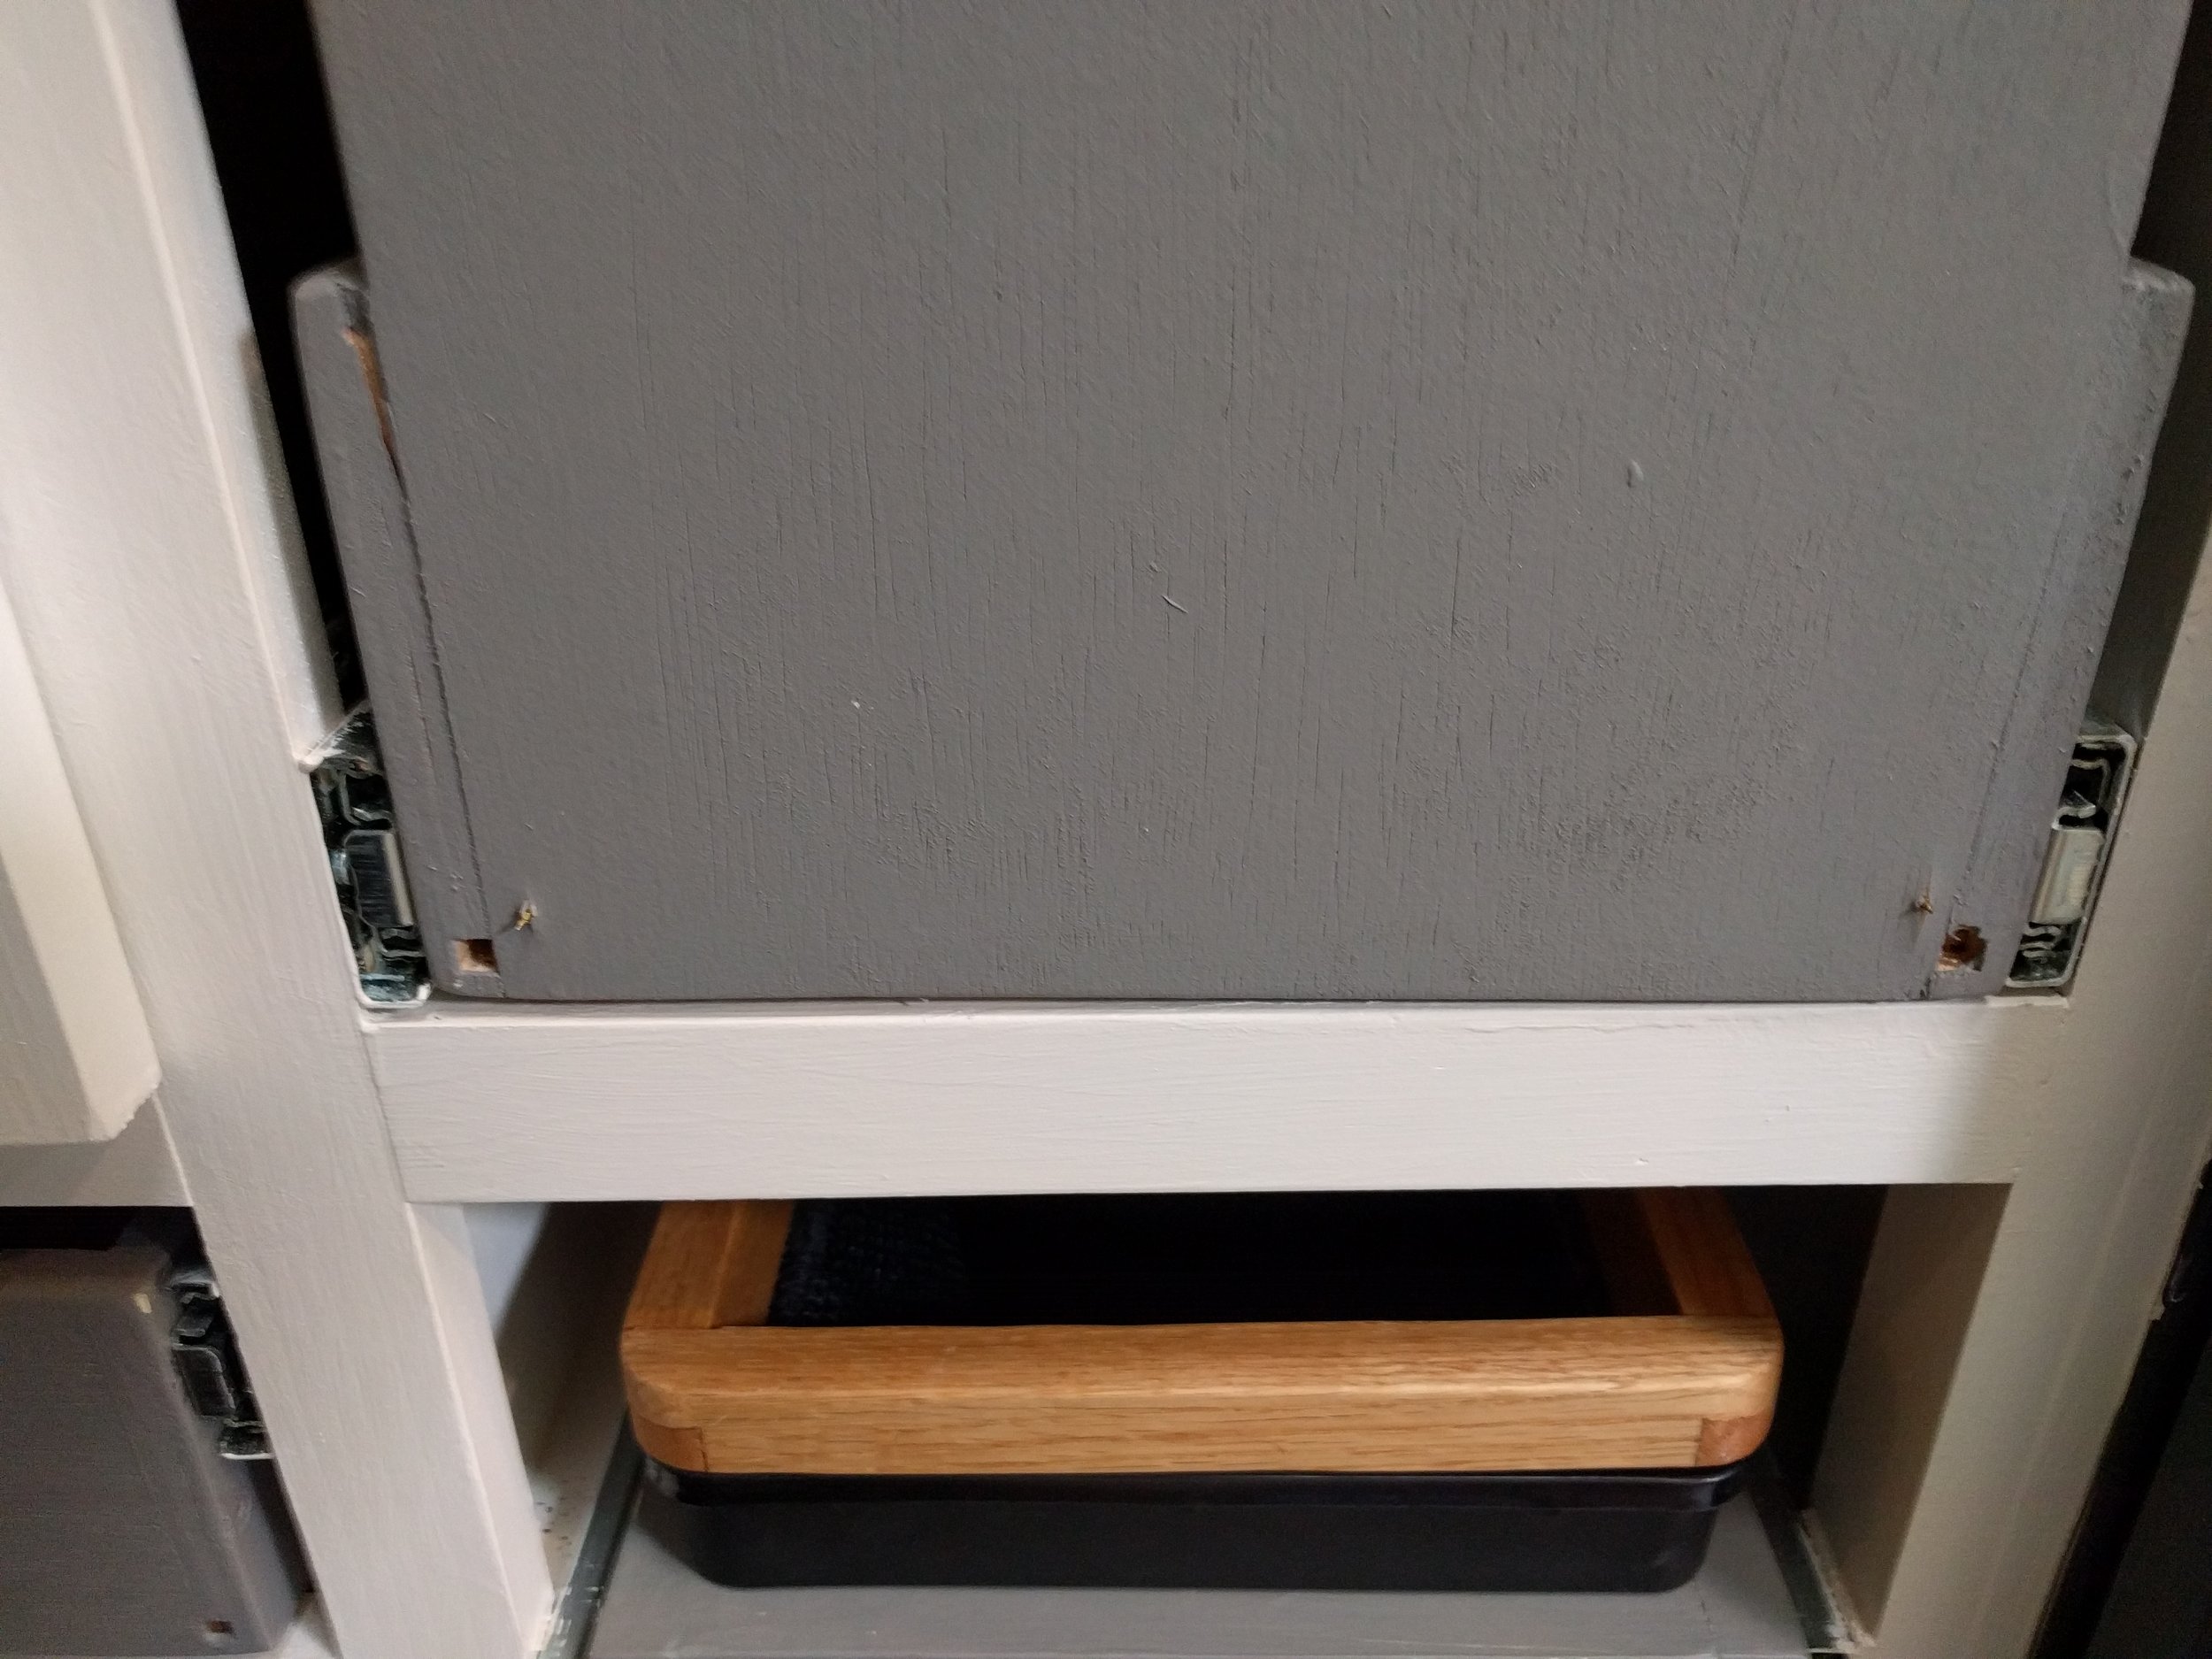
Installing these drawer fronts can be a little tricky. There isn't much overlap between the corner of the drawer and the "meat" of the door. You want the screw to hit the pine frame, not the plywood panel. Here's my method for mounting these drawer fronts. I put a screw in each corner of the drawer from the inside out, just far enough to poke out a bit. Then, I close the drawer and line up my drawer front. When I get it where I want it, I press the door into the screws that are poking out of the drawer box. Now, I can open up the drawer, line up the screws with the marks I made, and permanently attach the drawer front.
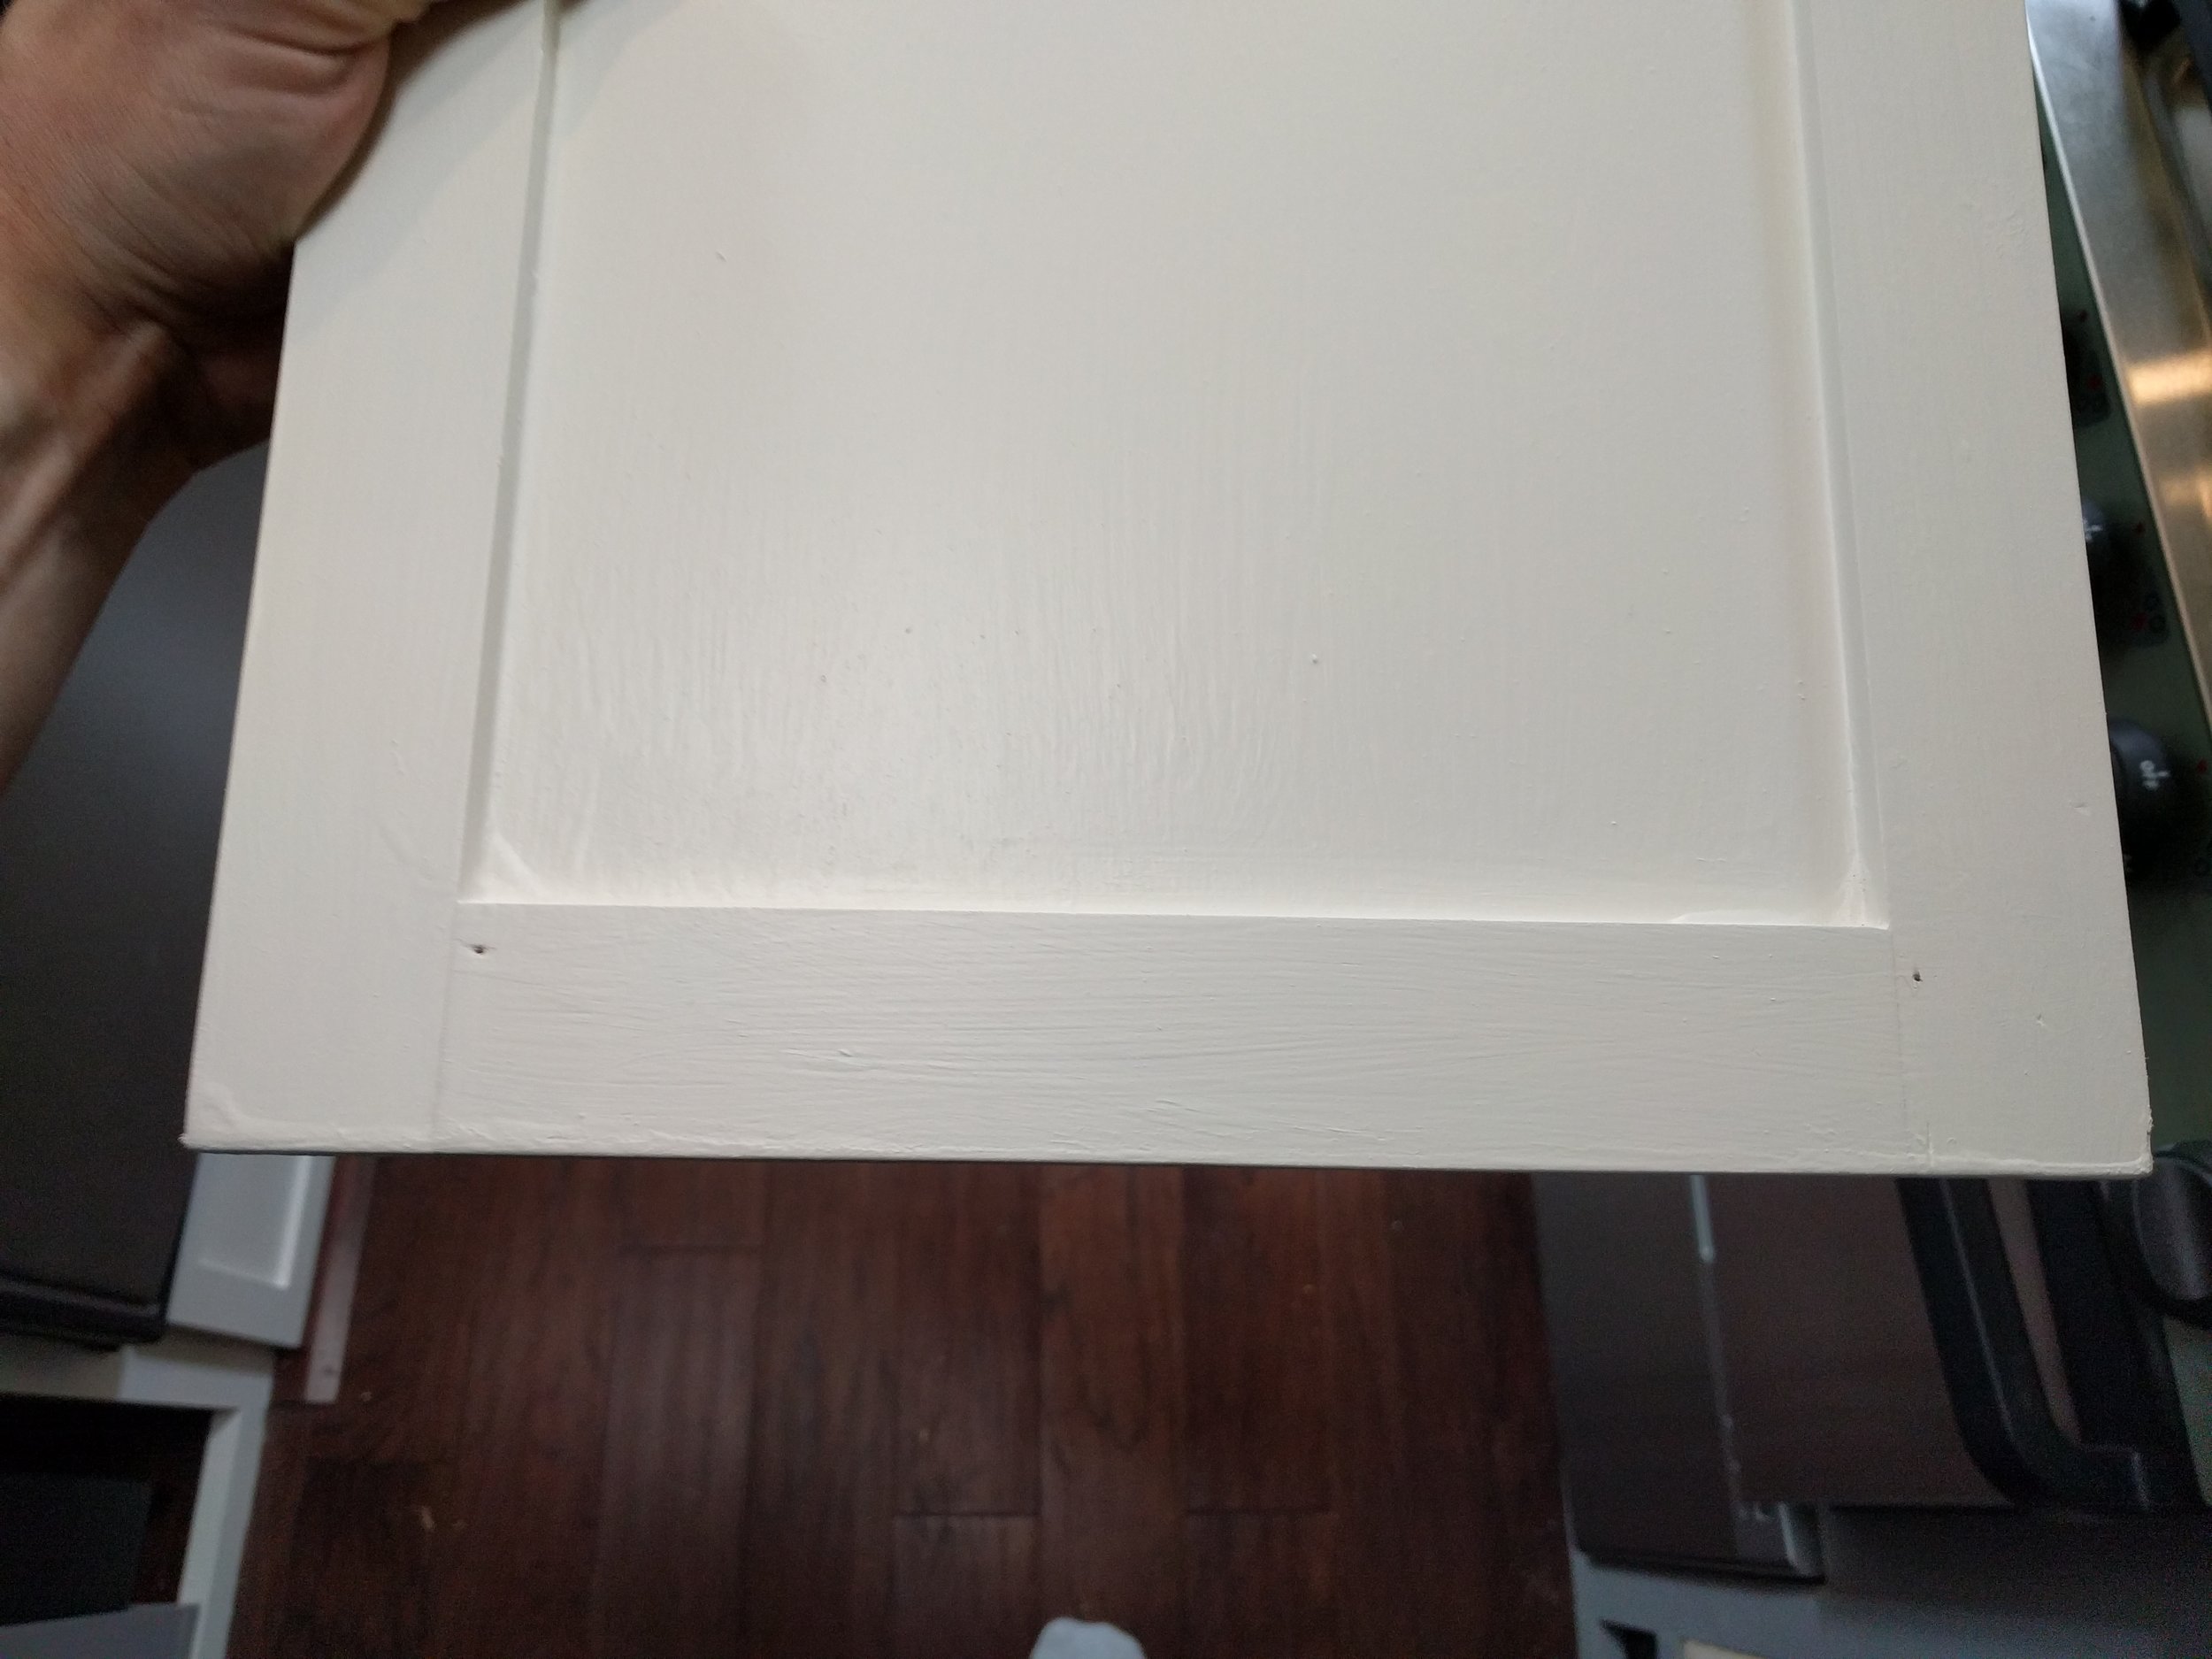
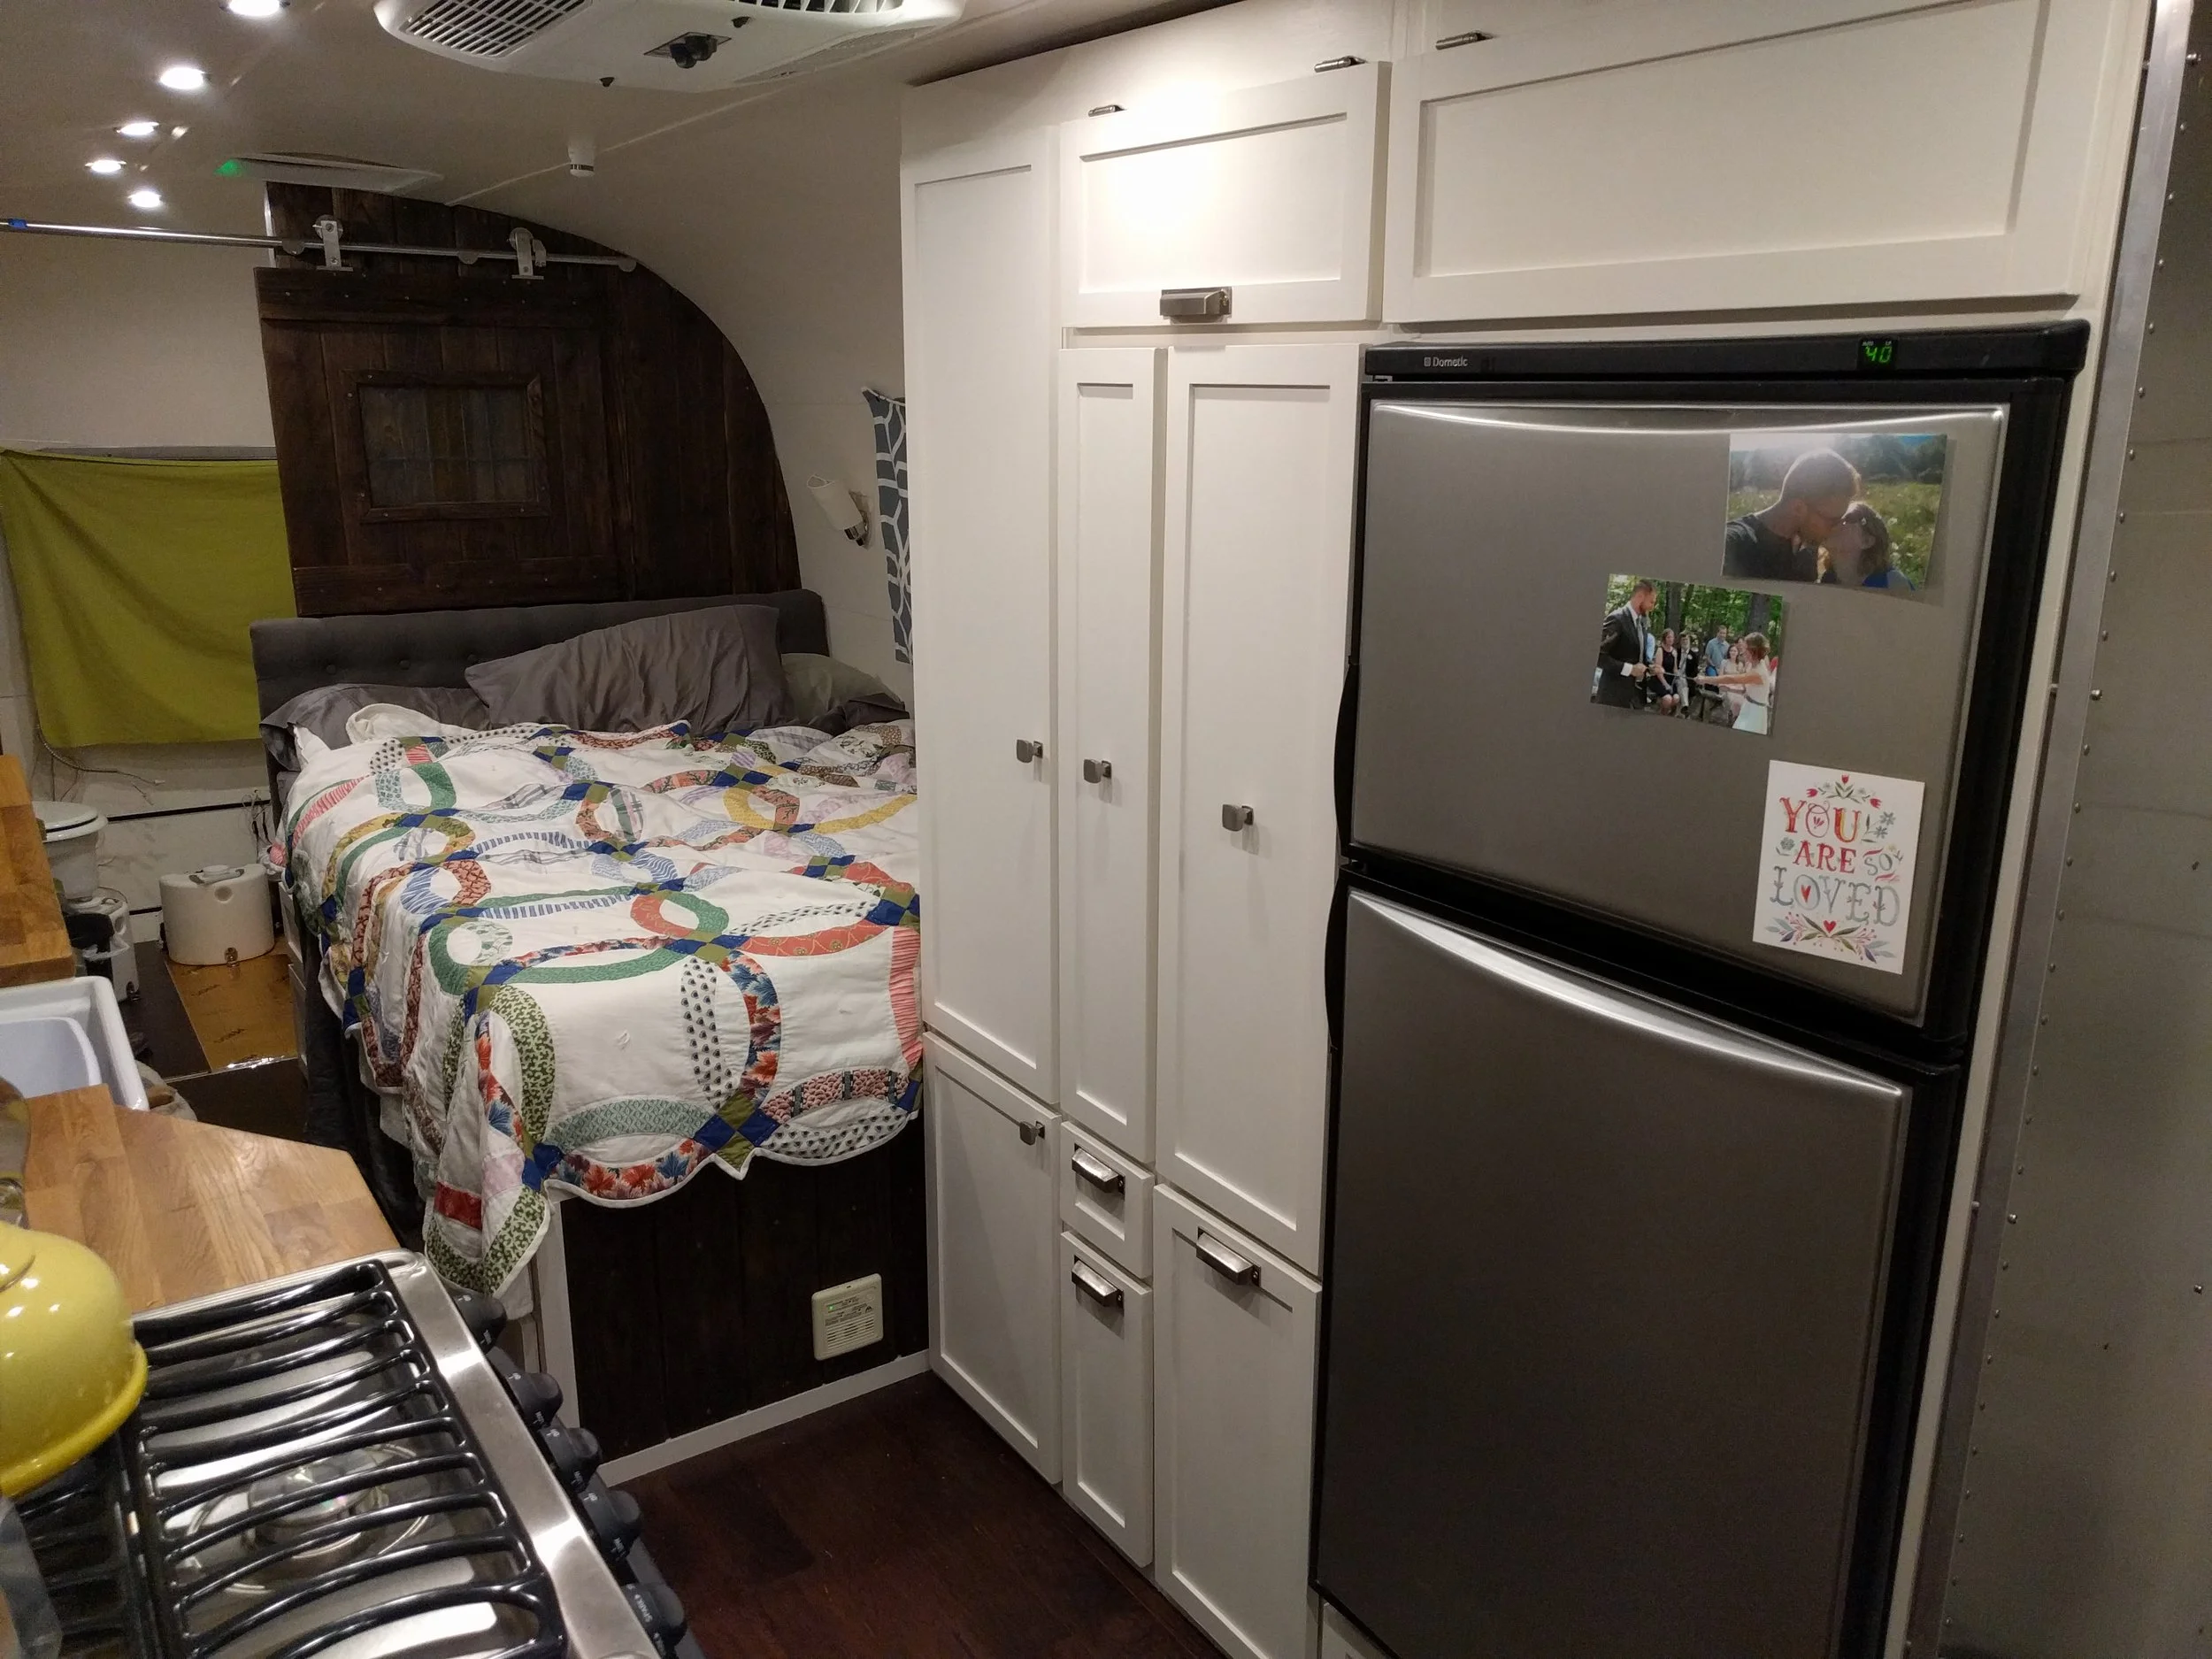
There we have it. Shaker style doors and drawer fronts.