Umbilical Replacement

Some of these links are "affiliate links."  If you decide to buy something based on our recommendation, it would be nice if you used the direct link from this page so that we can make a small commission for referring you (which doesn't cost you anything extra).

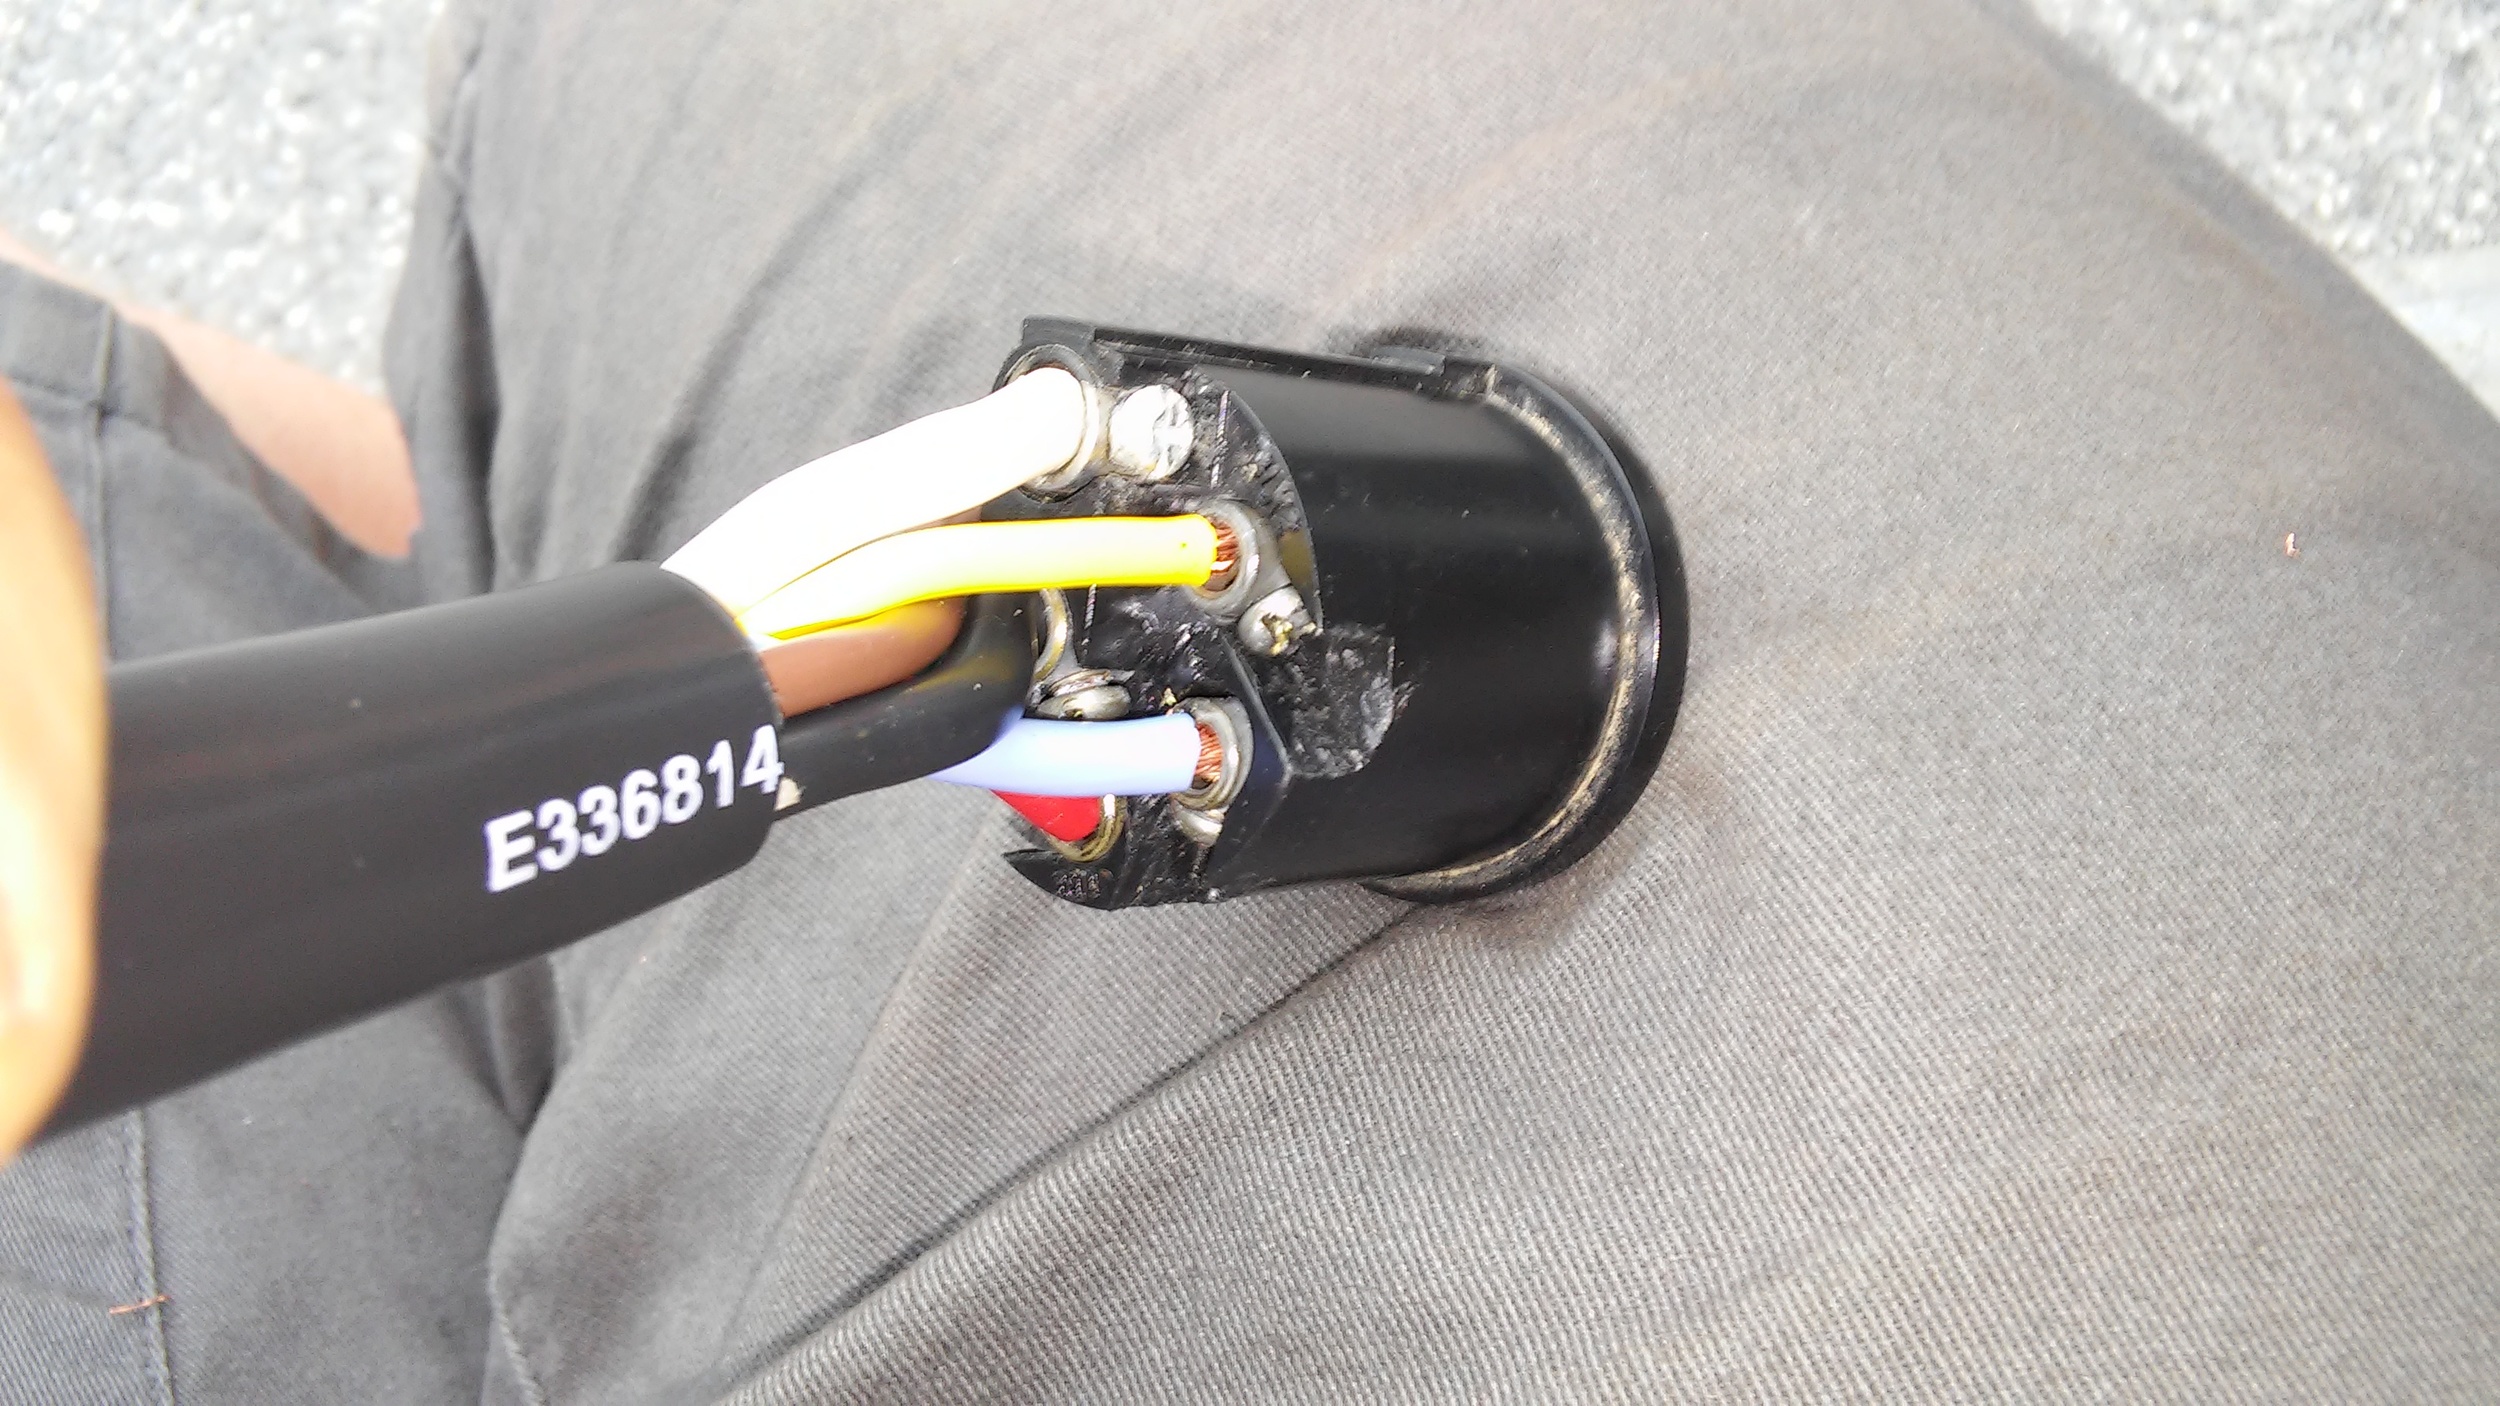
Something had to go wrong at the last minute, and here it is.  Plugged in to test drive and my running lights don't work.  Turns out the truck end of the umbilical is corroded and falling apart.  You can purchase a new umbilical locally, but it doesn't include the bit that plugs into the trailer.  I was able to reuse my old one, but if you need a new one, VTS has them here.

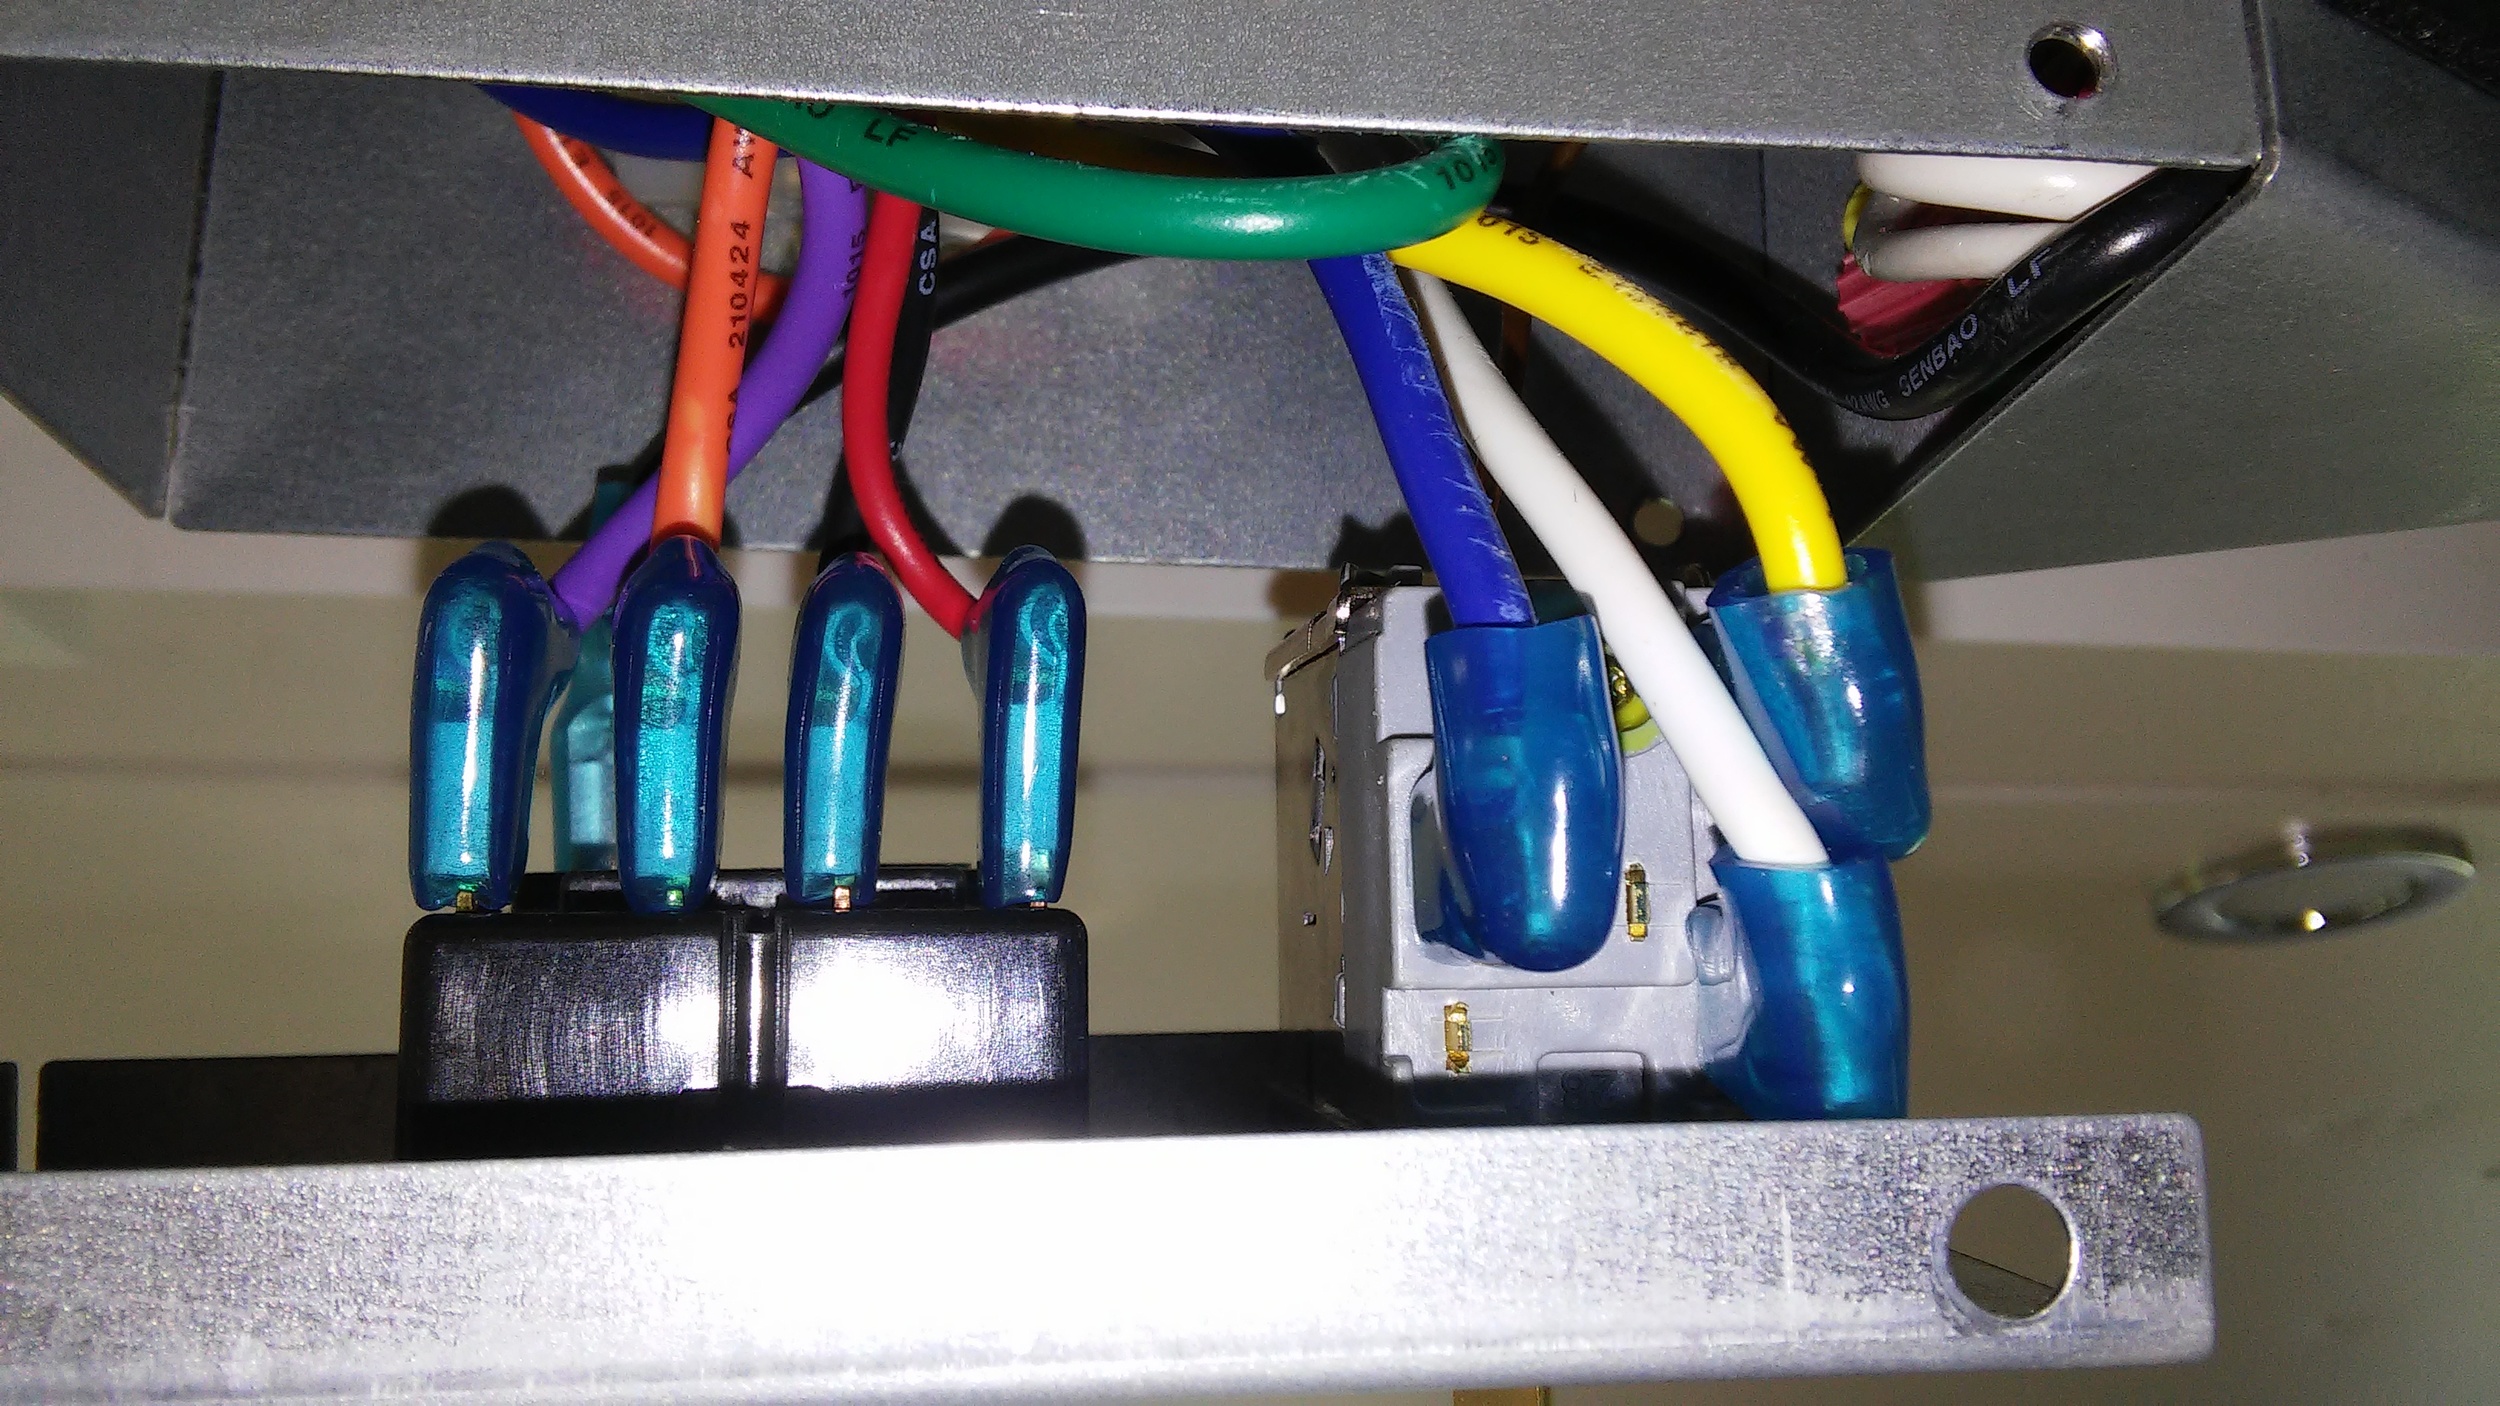
1974 Airstreams did not use the same wiring convention as current 7-way plugs, so you need to ignore the directions on the back of the plug, and wire like so:

The above picture uses a standard RV cord.  But not all cords use the same color conventions.  In fact, the standard 7-way cable and the extreme cold weather 7-way cable from VTS are both different from the one I used, and both different for each other.

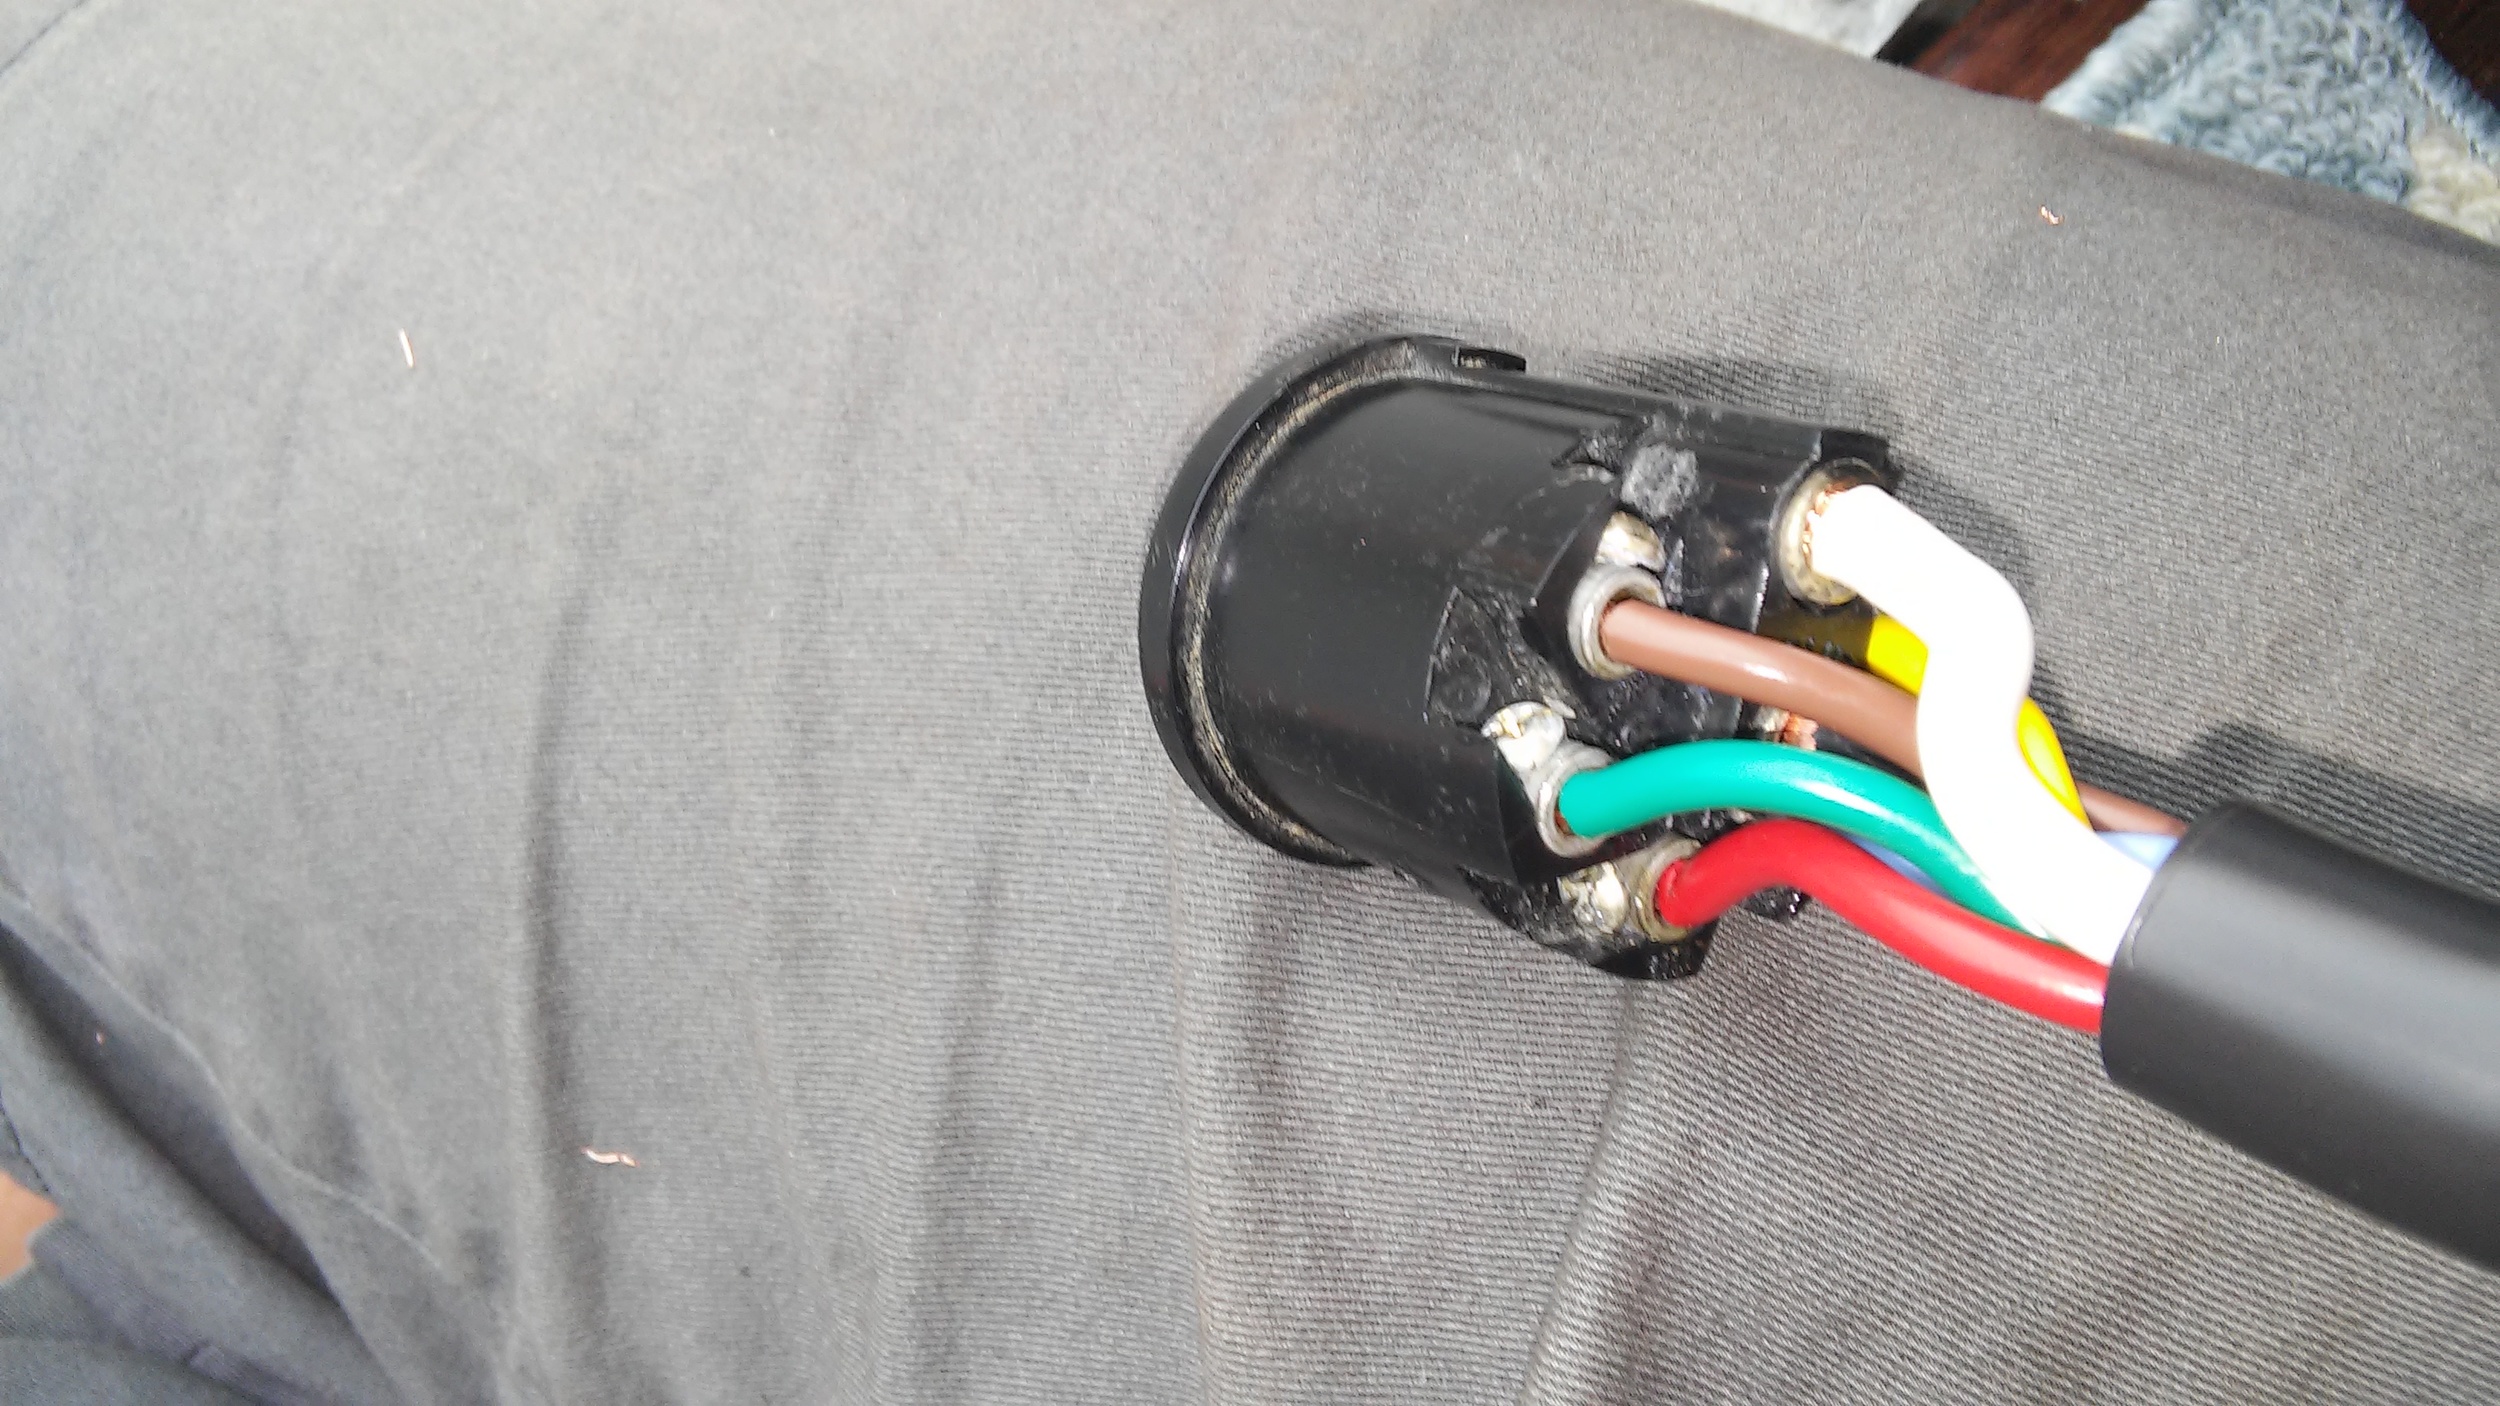
Looking at the back of the trailer side connector (as pictured above) with the notch facing up, here's where the wires go:

POSITION    FUNCTION    AIRSTREAM   MY CABLE   VTS STANDARD   VTS EXTREME

CENTER       (+) AUX           BLU                BLK               ORG                    RED

12 o'clock     (-) GND          WHT               WHT             WHT                     WHT

 2 o'clock     REVERSE        BLK                YEL               PUR                      BLU

 4 o'clock     BRAKE            YEL                 BLU               BLU                      BLK

 6 o'clock     L TURN           RED                RED               YEL                      YEL

 8 o'clock     RUN/TAIL       GRN                GRN               BRN                     BRN

10 o'clock     R TURN         BRN                BRN               GRN                      GRN

Where the rubber meets the road

Some of these links are "affiliate links."  If you decide to buy something based on our recommendation, it would be nice if you used the direct link from this page so that we can make a small commission for referring you (which doesn't cost you anything extra).

Jacked up the trailer by the frame to change tires.  We're getting this tire changing ramp to do this sort of thing in the future, but I've got to work with what I have now.

Centramatic goes on first.  Through some interesting physics, this device uses ball bearings to automatically balance your running gear while you're rolling.  Brand new 6-bolt rims from VTS and Maxxis radials ordered online and installed locally.  The lugs that came with my new axles are identical to the ones VTS requires for these rims.

Looking much better.

Belly Pan

I need the Airstream to be safe and legal to tow for the honeymoon, which means I need to get the bellypan on.  The brake wires penetrate the belly pan, so the belly pan should be in place before I hook up the brakes.  I've also got some tanks and plumbing to do.

I'm replacing the entire belly pan from the belt line down with new aluminum with the exception of the banana wraps which are unobtainable.  The old stuff is in pretty rough shape, has lots of extra holes, and I ripped a few pieces of belly pan in half when removing it.

First order of business is to use the old lower curved pieces as templates for new aluminum.

I started installation by lining up and riveting the lower surface of the curve to the frame.   Then I cut rockwool insulation to fill the void.  The width of a standard sheet of rockwool was a perfect fit for the width of the outriggers.  I used 1-1/3 sheet to get the proper thickness.

Used the insulation knife to trim the curve, then lift the middle of the panel and rivet into place.  A few more rivets to secure the panel, and we're good to go.

I applied a thick bead of TremPro in the gap prior to installing the belt trim.  I'll add another bead on the top of the belt trim afterward.  

Finally, set up a lawn chair to complete the 2/10 inspection.  It looked good 2 beers in and 10 feet away, so we passed inspection.

Next, we need to complete a few more items before finishing up the underside.

My, what a handsome job I've done so far.

Original gray tank gets a SeeLevel junior sender (the shorter version), a heat pad, a new dump valve, and a bunch of insulation.  

Fresh tank gets the same SeeLevel junior sender and heat pad, but not a lot of insulation since there isn't room.  I am using PEX with the stainless crimp rings for the fresh plumbing.  The lower white tubing will be my tank drain with valves accessible from inside the coach, as well as the low point drain for the hot and cold water fed from above.  I could also use this same plumbing to add hot water to the fresh tank in case I needed to heat the tank while boondocking. The top white tubing is the tank vent.  The blue tube is the fresh water suction to the water pump.

Finally, one of the auxiliary gray tanks gets the third SeeLevel junior sender.  I brought the auxiliary gray tank plumbing back to the bumper compartment.  I'll hook everything together inside the bumper compartment later -- I just need everything done inside the bellypan for now.  I didn't bother hooking up valves to my low point drains on the auxiliary gray tanks, since I can do that later from the outside.

The original belly pan was a couple of pieces of aluminum running front to back.  Pretty easy to install it that way if you have the frame upside-down and the axles off, like in the factory.  Since I'm doing this on my back and working around already installed axles, I'm using 4' wide aluminum sections running side to side.  Insulation in this area is also a standard sheet of rockwool with 1/3 of a sheet set on top of it to fill the void.

Rubber grommets around the brake wires, and shrink tube double crimp connectors to connect the electric for the brakes.  Brakes worked perfectly the first try, which is good, because I finished this Thursday morning for my Friday inspection prior to the Saturday wedding.

Replacing Mach 8 Cub Thermostat

Heat works, fan works, but compressor won't kick on -- no sound from the compressor at all.  I also noticed that the heat will get the coach really hot no matter what position it's in. Turns out, the thermostat is calling for heat regardless of the position of the temperature knob.  I verified that was the problem and got myself some temporary cooling by "hotwiring it" as you can see in the second picture below -- the yellow "cool" wire is attached to the left "heat" terminal.  Alternatively, you could jumper the white and yellow wires together to test what happens during "call for cooling" condition, or jumper the white and blue wires together to "call for heat."

Step one, email Airxcel a bunch of times and get ignored.  Step two, get fed up and call the tech service line on your lunch break, speak with a tech who happily sends you a replacement part at no charge.  Step three, remove old thermostat.

That pesky bare ground wire coming out of the ceiling assembly is from thermostat.  Need to disconnect it from the chassis to remove the old thermostat.  Remember to grab that little rubber grommet, since there isn't a new one in bag with the replacement thermostat.

Fish the new ground wire through and attach to chassis.  Don't forget to put the rubber grommet on it first.  Attach the bolt to hold the thermostat in place.

Attach the three wires.  Note the markings on the thermostat correspond to the handy sticker right in front of your face.

Three screws to get the switch cover back on, then install the interior trim and dials, and we're back in business.

The Greatleys' Build-a-Bed Workshop

The bed frame is 20" high to give us as much storage as possible underneath.  The structure is essentially two halves.  The street side has doors hidden under the mattress that access the area below for longer term and less accessible storage. The curb side has a face frame that will accommodate six drawers, three deep 9" drawers on the bottom and three shallower 6" drawers on the top.  This entire structure is freestanding on top of the floating floor and a ledger board.  It will be attached to the wall, but not to the floor, which will allow the floating floor to expand and contract underneath it.

The drawers themselves will have to wait for after the honeymoon.  Priorities.

The mattress is from Tuft & Needle.  Customer service is good, but I don't think I'm a fan of the product itself.  I think it's too firm for me.  I'm a side-sleeper, and I seem to be doing lots of waking up with limp arms.  I'll give it a little while longer, but I'm thinking we might need to cash in that 100 night guarantee and get something else.